
App Management
Please see that you might not be able to see all the options described below due to restriction on your access rights
This section allows you to define and manage app settings and users. The components are:
App users
Public app: This section contains the list of all the app users who have downloaded and logged into your app. You can see the list along with the profile information that they have filled in. You can email yourself the list containing all the user details by clicking on 'Email list as' on the top right.
Internal app: This section contains the list of numbers that have been added to the app user list from the CMS. It also indicates whether the added users have logged in to the app or not.
There are two methods to define app users in an internal app:
Method 1: Manually type in the Name and mobile number of each user you want to give access to. You can also fill the profile fields for the added user.
OR
Method 2: Create a .csv file with the names and mobile numbers of the Users and upload it at one go.
The instructions for upload are:
1. Create blank Excel file and make two columns, name first as "Name" and second column as "Mobile Number". Mobile number along with country code is mandatory. eg: +919004319022
2. Fill the info and click on export as CSV (from top menu, under ‘File’ option)
3. Choose the exported file and upload it
App User Fields
These define the information that any app user has to enter when they log in to the app. Name and Mobile are present by default. You can add as many profile fields as you like. All this information appears in the submissions made by the user, e.g. along with the form data submitted.
Adding a new field
Step 1: Go to App Management (at the top panel of the CMS).
Step 2: Select App User Fields from the drop-down.
Step 3: Fill in the field name and field type (Input or select).
Input field : the app user has to enter the response to the field himself, there are no restrictions.
Select field : the app user will have to choose from a list of pre defined options that you have to add as part of adding the field
There are also two check boxes for each of the fields:
Mandatory: If you check this box, then this would mean that the app users won't be able to continue using the app until they have filled in this field. If you later change a field to mandatory, then the logged in members will also be forced to fill in the field before they can proceed to using the app
Editable: If you check this, then the app user will be allowed to edit that particular field. If you want some particular information to not be editable by the app users, then uncheck this.
Step 4: then click on save. Your new user field will be created.
You can also edit any of the existing user fields by changing the name and the properties of mandatory and editable. You can add new choices for a select field.
You won't be able to change the field type once it is saved, neither can you edit/delete the existing select options. Deleting an existing app user field is also not allowed.
App Audiences:
This functionality enables you to divide app users into different groups so that you can align app features to suit diverse user segments. Based on this segregation, you can send targeted communication and control visibility of resources.
To add a new audience:
Step 1: Go to App Management (at top panel of the CMS) and select App Audiences from the drop-down.
Step 2: In the App Audiences tab, click on ‘Add Audience’.
Step 3: Enter the name of the audience category that you want to app in different languages.
Step 4: Then click on ‘Create’. Your new app audience will be created.
You can also edit an existing audience name.
Build App Again:
In case you want to make a very basic change in the app properties, for example, change in languages supported, name, logo, features present or colour theme, then you need to build the app again using this link. You can see more about the app building process here.
Home Page Customisation:
This is one of the privileges that you get as a forBinary user and makes us stand out from the rest. It is an in-house designing tool that enables app-owners to have complete control over how they want their app homepage to look. You can see the changes being reflected real time in your app. The process and the different components are explained below:
Step 1: Go to App Management (Top panel of the CMS) and then select ‘Home Page Customisation’
Step 2: App customisation consists of three parts - Towards the left you can see the elements that can be added to the home-page; Right next to it - you can edit, delete or change the sequence of elements; At the farther end, you can view the real time preview of the mobile screen.
Change the order of elements in the app preview by simply dragging and dropping the elements from the added list
Step 3: Add the different elements you want on your homepage, style and order them as your liking.
Step 4: When done, click 'Save' at the top right and see the changes reflect real time on your app.
The different customisation options and types of elements are:
HOMEPAGE BACKGROUND
It is the backdrop against which other elements of the home-page is displayed. It can be a plain colour or you can upload a background image of your choice
Step 1: Select ‘Background’ from the elements
Step 2: Add background colour or upload an image (you can change the opacity of the selected image)
Step 3: Click ‘Save’
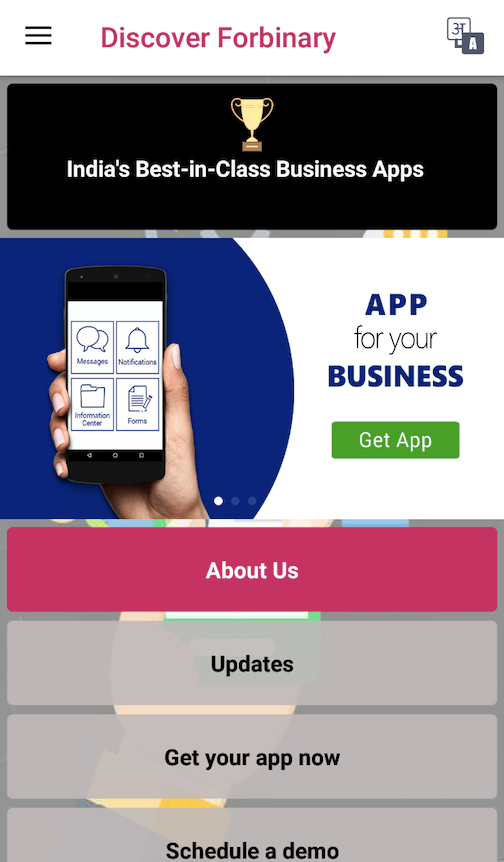
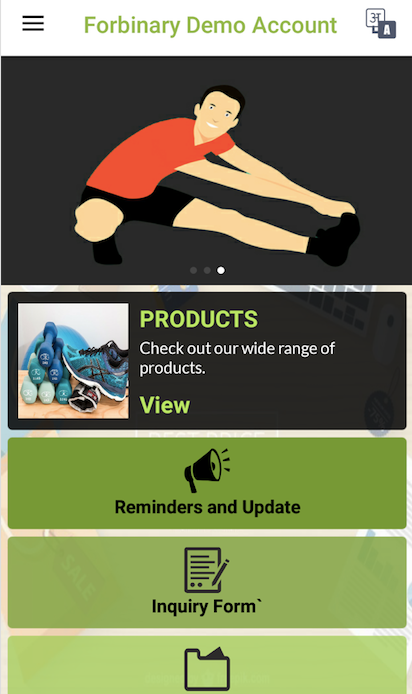
HOMEPAGE BANNER
Homepage Banner is generally present at the top slot of the App. One can upload upto 5 images that will appear at the beginning of the page. The images will keep rotating through horizontal auto-scroll.
Step 1: Select ‘Home Page Banner’ from the elements
Step 2: Upload Images (recommended 320 x 200 px ; max1 MB Each ; Maximum 5 Images)
Step 3: Click ‘Save’.
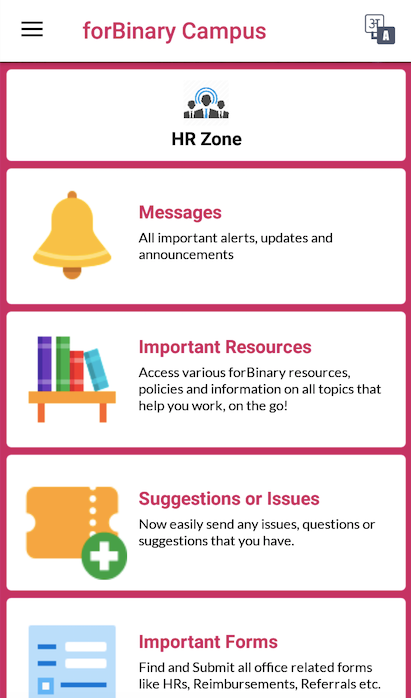
The features opted during app creation can be showcased on the homepage through custom icon and styling
Step 1: Select the feature that you want to add to the homepage from the list of elements.
Step 2: Under Styling Tab, select a button or card style as per your liking
Step 3:
Go to the Edit tab and upload an icon (recommended for button: 200 x 200px, 200kB max ; cards 320*320px, max 1MB) or choose one from the default options available.
Select icon colour
Enter the title and description (if present) and format the text.
Step 4: Click on ‘Save’
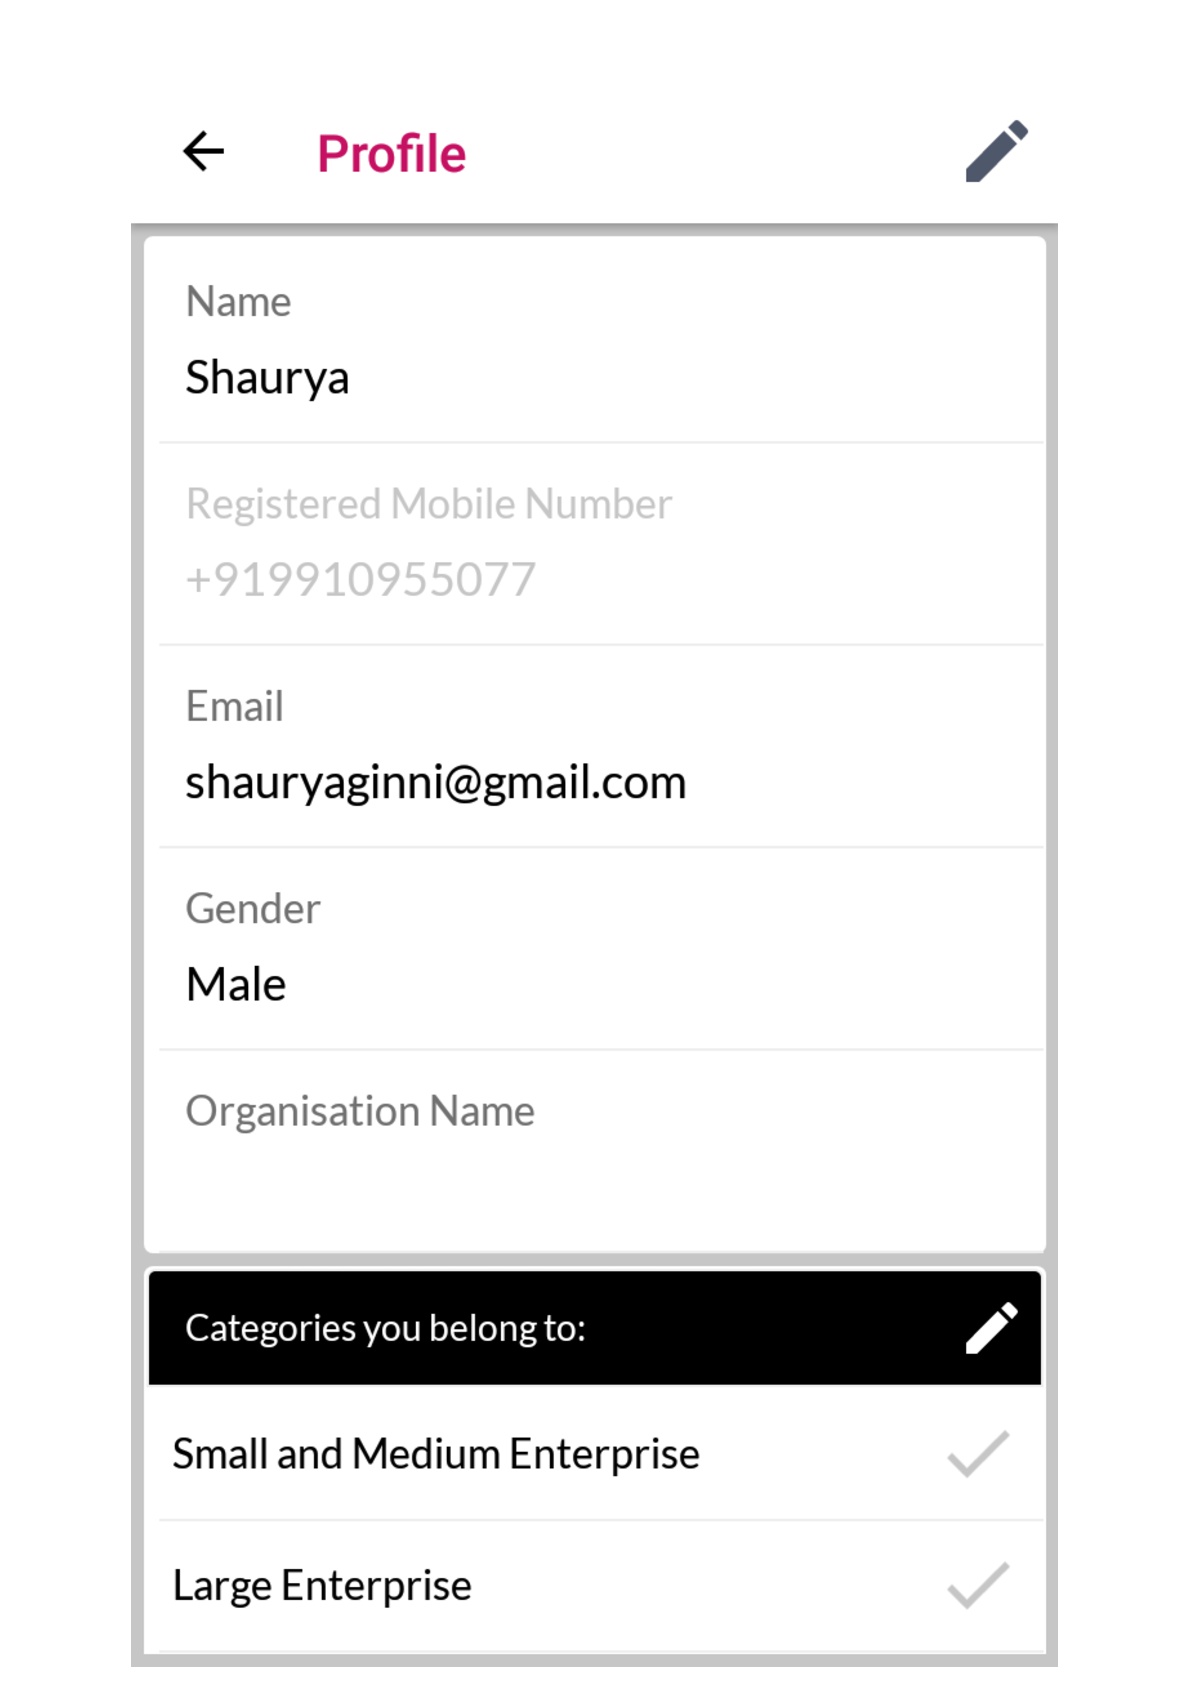
PROFILE
You can display and customise the profile option on the app homepage to give easy access to the app users. The profile section in the app is where the app user can see his/her profile details.
Step 1: Select ‘Profile’ from the list of elements.
Step 2: Under Styling Tab, select a button or card style as per your liking
Step 3:
Go to the Edit Tab and upload an icon (recommended for button: 200 x 200px, 200kB max ; cards 320*320px, max 1MB) or choose one from the default options available.
Select icon colour
Enter the title and description (if present) and format the text.
Step 4: Click on ‘Save’.
OTHER APP ELEMENTS
These are the elements which are present inside the features that you have selected. Resources like forms/folders & payment links can be exhibited on the home-page. Users are directly taken to the specific elements. This is used for providing easy access to these resources eg. an important form can be brought to the home page.
Step 1: Select ‘Other App Elements’ from the list of elements.
Step 3: Choose the feature which contains the resource you want to bring to the home page. Once inside the feature, choose the required resource that you want to place on the Home Screen.
Step 3: Under Styling Tab, select a button or card style as per your liking
Step 4:
Go to the Edit Tab and upload an icon (recommended for button: 200 x 200px, 200kB max ; cards 320*320px, max 1MB) or choose one from the default options available.
Select Icon Colour
Enter the title and description (if present) and format the text.
Step 4: Click on ‘Save’.
URL
You can add an external URL to the homepage.
Step 1: Select ‘URL’ from the list of elements.
Step 2: Under Styling Tab, select a button or card style as per your liking
Step 3:
Go to the Edit Tab and upload an icon (recommended for button: 200 x 200px, 200kB max ; cards 320*320px, max 1MB) or choose one from the default options available.
Add the URL that you want the user to be redirected to.
Select Icon Colour
Enter the title and description (if present) and format the text.
Step 4: Click on ‘Save’.
PLAIN TEXT
Additional Text can also be displayed on the app homepage. This won't be linked to anywhere and only appears as static text
Step 1: Select ‘Plain Text’ from elements
Step 2: Choose preferred layout
Step 3: Enter the text and format it
Step 4: Click ‘Save’
SOCIAL MEDIA
Social Media Handles can be shown as part of the Homepage.
Step 1: Select ‘Social Media’ from elements
Step 2: Choose the platforms that you want to link. Options are Facebook, Twitter, YouTube, LinkedIn and any other website
Step 3: Insert Social Media URLs
Step 4: Select Shape and colour of the icon
Step 5: Click ‘Save’
PLAIN IMAGE
You can show plain images on your homepage
Step 1: Select ‘Plain Image’ from elements
Step 2: Upload the requisite Image (recommended 320 x 180 px ; max 1 MB)
Step 3: Click ‘Save’
YOUTUBE VIDEO
You can also embed a Youtube Video to your app Homepage
Step 1: Select ‘Youtube Video’ from elements
Step 2: Add the URL
Step 3: Click ‘Save’.
PHONE:
Add Contact Information to the Homepage to let app users call from the app
Step 1: Select ‘Phone’ from the list of elements.
Step 2: Under Styling Tab, select a button or card style as per your liking
Step 3:
Go to the Edit Tab and upload an icon (recommended for button: 200 x 200px, 200kB max ; cards 320*320px, max 1MB) or choose one from the default options available. Add the phone number that you want to be called on the click
Select Icon Colour
Enter the title and description (if present) and format the text.
Step 4: Click on ‘Save’.
Once you are done making all the changes, don't forget to click 'Save' at the top right. Your changes will then start reflecting in the app