
Task Allocation
(only for Internal Apps)
What's this?
Task Allocation is a powerful tool designed for organisations who are looking for an effective way to give tasks to their workforce and manage them. The Tasks are organised under Projects and each task is assigned to one employee at a time.
When to use?
For assigning any kind of work which is expected of an employee. The employee is able to see the details of the task in his app and is able to update the status and submit additional information. Some of the use cases where task allocation can be used :
Site visit updates
Project Reporting
Real time updates by Service Agents
Daily data collection
Lead management and updates
Managing workflows and life cycle of a process
Statuses
Each organisation has a different workflow and therefore different possible states of a task. This options allows owners to add different possible statuses for a task. This can be accessed by clicking on the 'Manage Statuses' link at the top right of any screen within Task Allocation.
The status 'Completed' is added by default to all accounts. This cannot be edited by the owner.
You must added at least one more status other than Completed before you can start adding tasks
Projects
All the tasks in an organisation are grouped under Projects. Similar tasks can be grouped under the same project. Each project also has an assigned department. CMS Admins and Users belonging to a particular department can only projects belonging to their own department. Only selecting a project from the project list, the tasks contained within that project are shown.
The list of projects also shows the total number of tasks within that projects along with the completed task number. You can take the following actions on a project level basis: you can make all the tasks contained in the project offline, or you can notify all the assignees of the tasks inside the project (they are sent a push notification)
Creating a new Project:
Click 'Add New Project' at the top left of the screen
Enter the name of the project in different languages and select the Department.
Click Add button. The Project is created.
Assignees
While creating a task, it is mandatory to assign an employee responsible for updating the task. It can be assigned to any one of the app users who have been granted access to the application. Only the concerned user will be able to see the task in their task list.
To add a new employee, you can add app users to your account. Read more about it here
Tasks
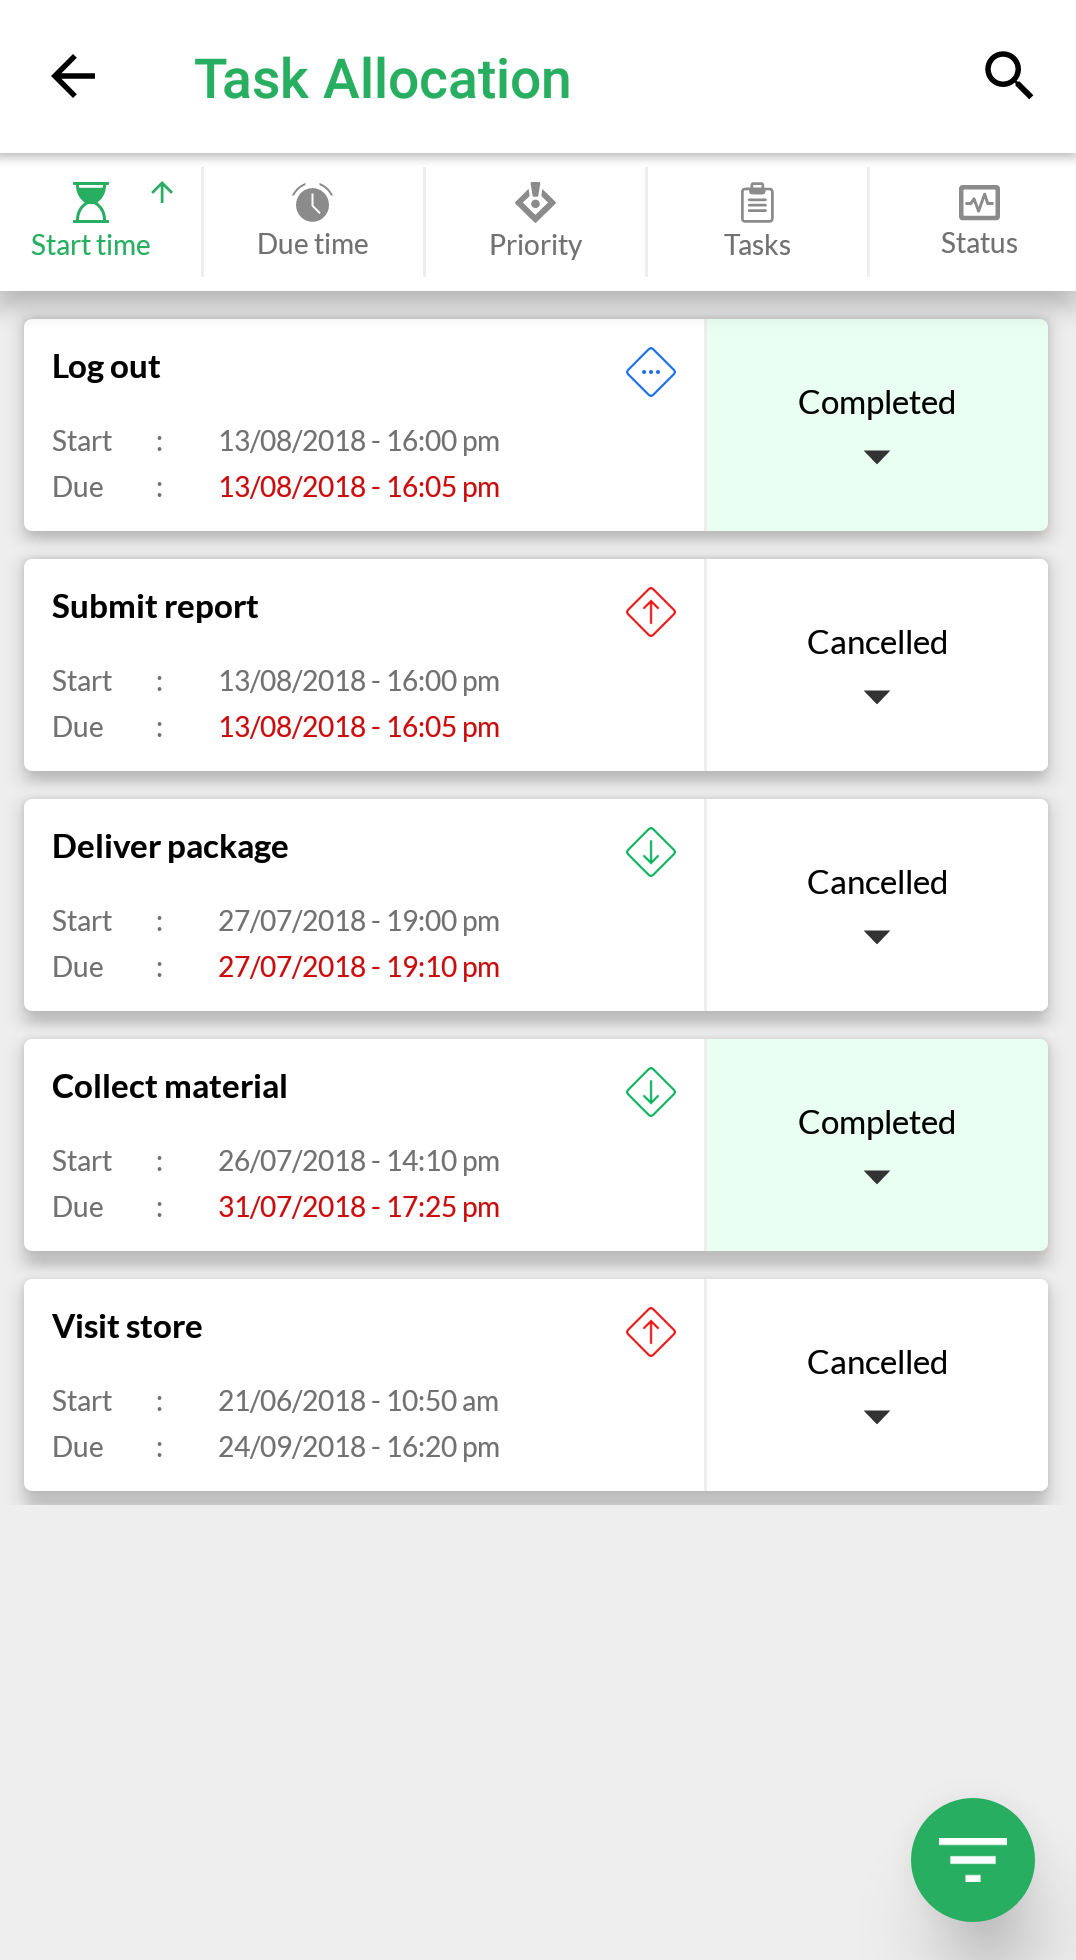
You can either see all the projects inside a project or all the tasks assigned to a particular employee. A task contains the following elements:
Task title
Task description
Project to which it belongs (cannot be changed once created)
Task Assignee
Start and Due Time
Reminders for Start and Due Time (Reminders are sent as notifications to the assignee)
Priority (High, Medium, Low)
Status
Images/PDFs/PPTs/Docs/XLS Attachments
Interlinking of Information Center
Interlinking of Forms
Activity History showing log of changes
Comments done from CMS and by the app user
You can edit these details from the task list itself or in the detail window which opens on the right when a task is selected. You can also copy a task or send a reminder to the ask assignee from the options that open up when the 3 dot menu is clicked. If you want an assignee to not see any task, you can turn its visibility off.
You can choose if you want to allow the app users to change the priority of a task.
Whenever a change is made to the Assignee, Start Time/Due Time, Priority or Status of the task, a push notification is sent to the Assignee of the task. Notifications are also sent for Reminders set and comments made.
For easy accessibility to all tasks, you can either search tasks by titles or apply filters on the basis of the Priority, Start Date, Due Date and Status.
Overdue Tasks: These are the tasks who due time has passed but still have not been marked Completed by the concerned Assignee. This also is a special filter which can be applied to the list of tasks.
Please note that if the Overdue filter is applied then the Due Date and Status filters are removed and disabled.
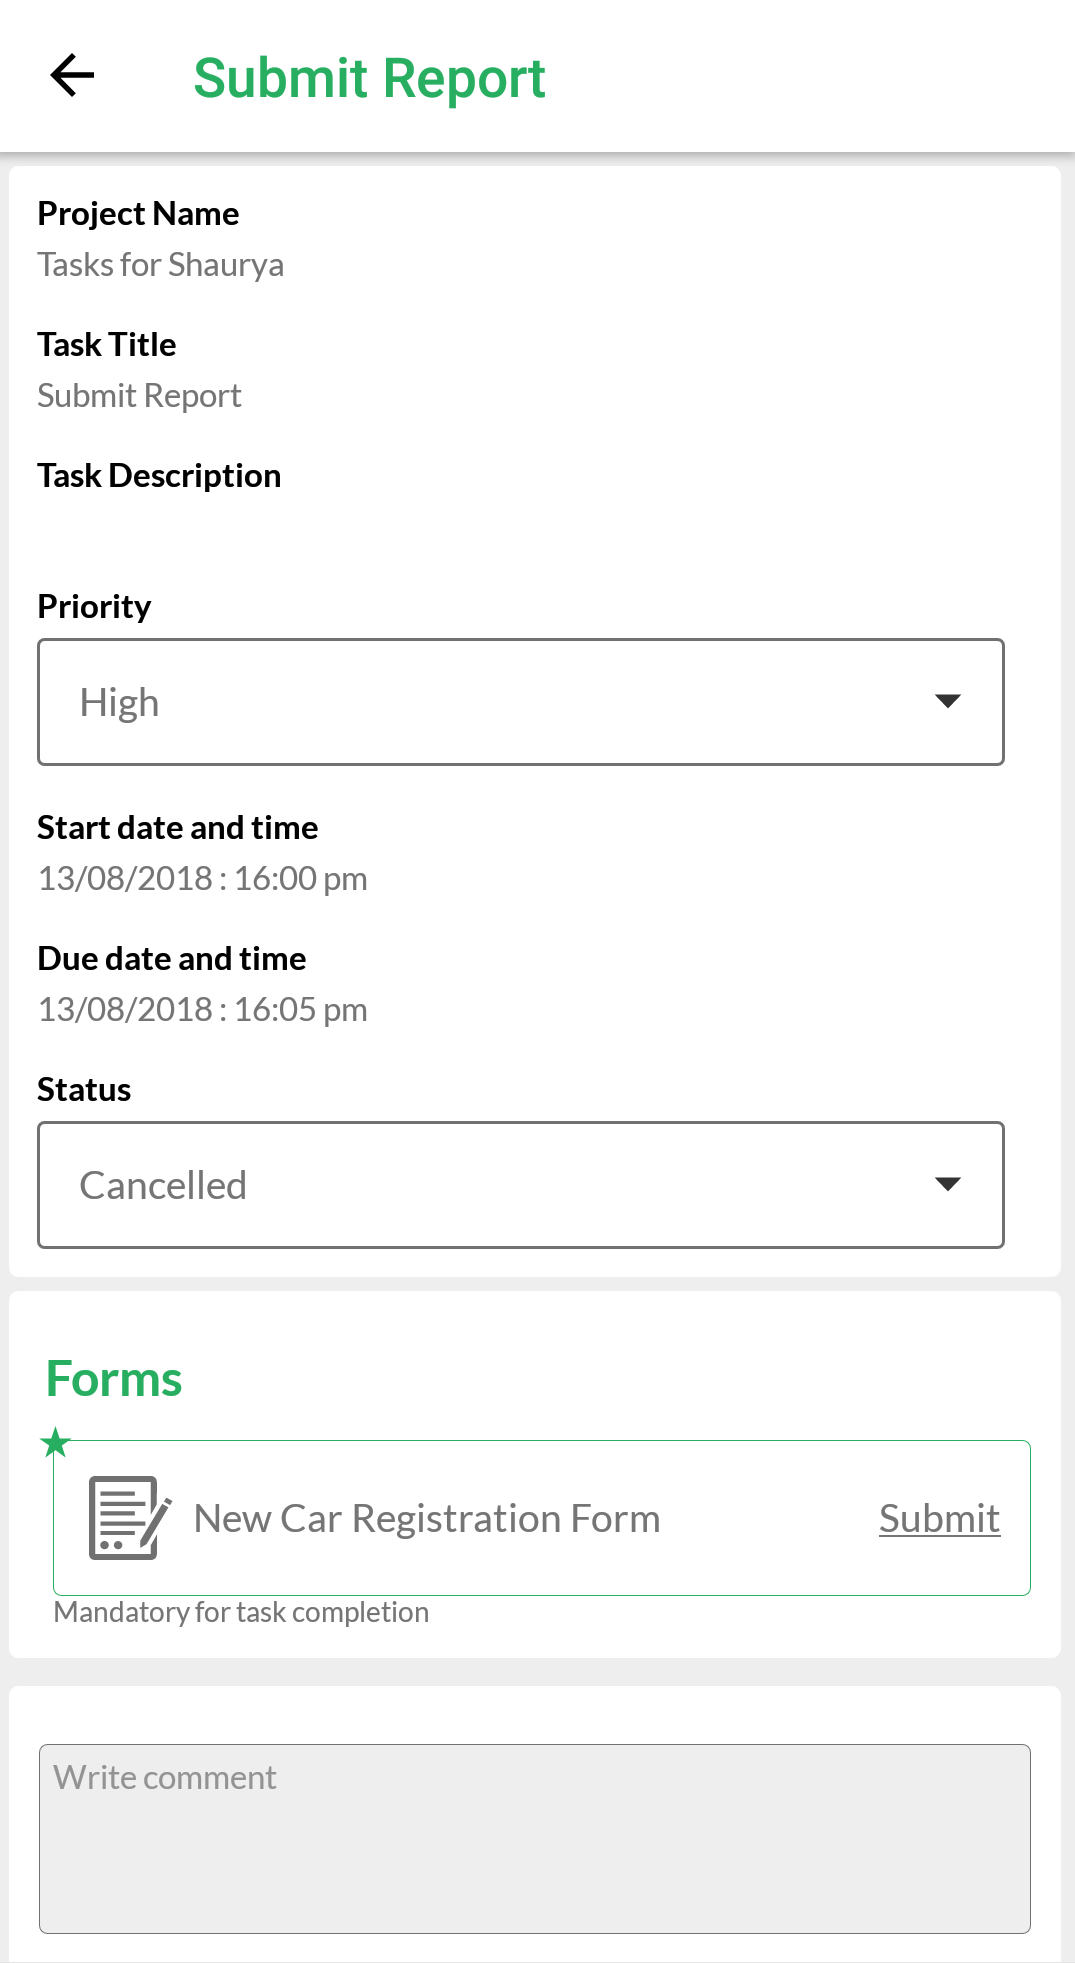
About interlinked forms: You can interlink forms to any task. The data submitted by the user corresponding to the form will be visible in the task detail itself. You also have the option to make form submission mandatory for a task. If you choose this option, then the status of the task cannot be changed to Completed unless the form is submitted atleast once.
Creation of Tasks
You can create a task by clicking on the 'New Task' button at the top left of the window inside any project or on the assignee page.
The app users will be able to see the tasks in their app. They can also search sort and filter through the tasks.
Clicking on any task opens up its details where the task details can be updated by the app users.
You can also create multiple tasks in a single action through the CMS. You can :
Create tasks for multiple employees at once. Separate Tasks with the same details are created for each of the selected assignees. Select the checkbox in front of the assignee selection with the label 'Create tasks for multiple employees at once' and select all the assignees for whom you want separate tasks.
Create tasks which are repeated over multiple days. The number of tasks created is the same as number of days selected with separate tasks with different start and end times are created for each of the selected days. Once you have set the start time and end time for the starting tasks, select the checkbox 'Repeat Task on different days?' and then select the days from the calendar on which you want the task to be repeated. The number of tasks created is 1 + number of days selected from the calendar.
You can select assignees for a task and then repeat it over multiple days.