
Lead Manager
What's this?
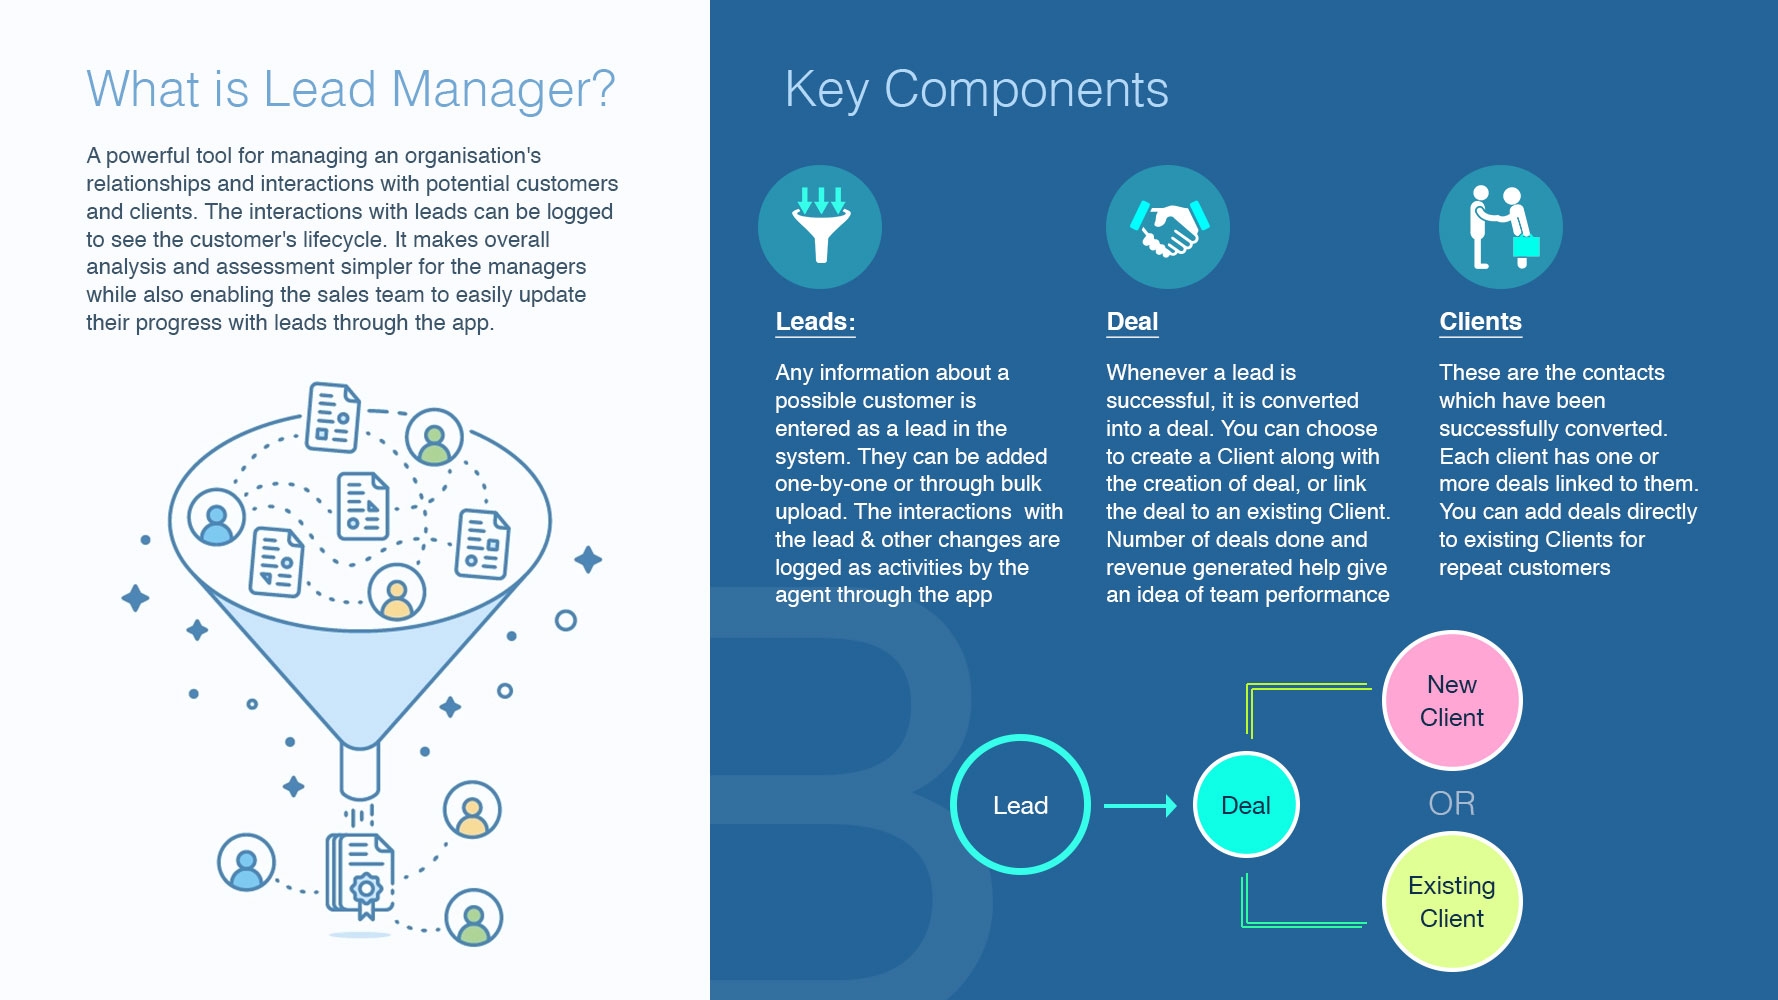
The lead manager is a powerful tool for managing an organisation's relationships and interactions with customers and potential customers. The leads can be fed into this system and the interactions can be logged to see the customer's lifecycle. It makes overall analysis and assessment simpler for the managers while also enabling the sales team to easily update their progress with leads through the app. The managers have access to the CMS where they can track the progress of leads, see performance of team members and also make changes to the data themselves.
When to use?
The Lead Manager is useful whenever you are dealing with a large number of leads and clients and have an on ground sales team.
Effectively manage the leads
Track the work done and performance of employees
Create teams and restrict access hierarchy wise
Manage relationships and interactions with existing clients
Summary
The general flow is going to be:
Add a lead in the system
Set follow ups, log the interactions, edit info
Once a lead is successful, convert it into a deal
When converted into a deal, a Client is created with the same info as that of the lead and the deal is linked to the created client.
You can continue to add interactions with created client. You can also further add deals for this client directly.
Settings and Setup through CMS
Lead Profile Fields
This is all the information you can collect about the leads/clients in the form of profile fields. There are some pre defined fields and you can also customised fields of your own. A field can be either of select type or input type.
The labels of the fields added by default cannot be edited
You can make any field mandatory for the creation of a lead. Only Name field is mandatory by default and that cannot be changed
The fields present by default:
Name : Name of the lead
Stage : The Stage of lead as it progresses through the process with the sales team. The states added by default are : New, Open, Interested, Negotiation and Dropped are added by default, you can edit, delete and your own Stages as per your business flow
Priority: Priority of a lead can be set to High, Medium or Low, these cannot be edited.
Phone number: Phone number of leads. This needs to be added with the country code in the correct format
Alternate Phone Number
Email ID
Alternate Email ID
Source: Possible sources of the leads, you can add the options in the dropdown list
Expected Amount: Expected Amount of deal which may be done when the lead is converted. Should be in number format
Interest Info: Information about what the lead is interested (which product/services etc)
Company: Organisation to which the lead belongs
Website
Designation
Address
City
State
Pincode
You can only delete any option for a Select Type field if that option is not currently selected for any lead. You can first change the lead info and then delete the option
You can add your own customised fields of input or select types and choose to make them mandatory if you wish. Mandatory fields are marked with an asterisk and customised fields added by you have ‘(custom)’ after the name
You can reorder the fields as per your requirements. The information will appear in the same order in the CMS elsewhere and in the app
You can archive or restore any of the custom fields added by you, not the default profile fields
Deals Fields
This is the information taken as input at the time of creation of a deal, either by converting a lead or by adding a deal to an existing client.
Deal Name
Deal Amount
Closing Date: Date of the deal
Payment Mode: You can customise the options for this. By default, the following options are added: Cash, Cheque, Payment Gateway, NEFT, IMPS, RTGS, UPI, Wallet Transfer, Demand Draft
Deal Note : Additional info about the deal
Deal Attachments: Image/PDF related to the deal (maximum 2 per deal)
You cannot add customised fields for deals.
Deal name, Deal Amount and Closing Date are mandatory by default. You can make other fields mandatory if needed
Activities on Leads/Clients
These are the possible types of interactions or actions you can take with a client. This helps in knowing the history of the lead/client.
You can add your own activity/actions. You can also make offline those actions which are not relevant any longer. They will not appear as options while adding an activity.
The following actions are added by default:
Made Outgoing Call
Received a Call
Had a meeting
Sent an email
Sent an SMS
Sent Whatsapp Text
Comment
Attachment
Lead Lists
These are used to group lists so that notifications about their conversion to a deal can be sent to linked email IDs. You can create lists and link multiple email IDs to each list. Each email ID will receive a notification when a lead belonging to the corresponding Lead list is converted to a deal
Assignee Settings
This is where you add members to different departments and define their access privileges. Each app user can belong to one or more departments
For any app user to have access the Lead Manager feature, they need to be added to atleast one department
Once the department(s) are assigned to an app user, you can do the following settings:
Define access: There are four options for this:
Own - Access to only leads/deals assigned to seld
All Department + Unassigned Leads: Access to the leads/deals assigned to all members belonging to own departments + All Unassigned Leads too (highest level of access)
All Department Members : Same as above, but can't access Unassigned Leads
Department members excluding Specific : Same as all Department Members, but you can exclude specific members from the list - this is used when you want to restrict the access of members to leads/deals of senior teammates.
You can define whether the app user can add new leads/deals
You can define whether the app user can reassign leads/deals to which they have access
By default when an app user is added to a department(s), the default setting is that they can access their own leads/deals, can add a new lead/deal, cannot reassign leads/deals/clients
Please see that the list of clients and their info is accessible to all members. Information related to their deals is however restricted as per the settings made.
Leads - CMS
The Leads list contains the list of all the leads in the system. There are two tabs containing the assigned and unassigned leads.
The access to the leads is restricted if the CMS user profile is Admin or User. They can only see leads assigned to App users (assignees) belonging to their own department (s). The unassigned leads can however be accessed by all users.
You can search on the list of the leads by the name or contact info. There are multiple filters to narrow down the list. You can edit, copy or archive any of the leads. Archived leads are accessed from the 'Archived Leads' section at the top right.
You can make changes to multiple leads at once by selecting them and then choosing an action. You can also download the selected items as CSV or XLS file
You can create a new Lead by clicking the button at the top left.
Selecting any lead takes to the lead detail page. The page contains the lead information on the left and the lead history on the right. The lead history contains all the edit history, previous follow ups, activity history, conversion into deal and archive/restore history.
You can do the following actions on a lead:
Add a follow up date - A push notification in app is sent to the concerned assignee at the time of follow up and an alarm plays with details of the follow up.
Edit Lead info: Change information about the lead, every change in recorded in log
Log an activity/action: Add the interaction with lead by choosing an action from the list (defined in Settings section - Activities on Leads/Clients). You can add a note and add attachments of images/PDF. Maximum 2 attachments allowed. The note can be used as a means to communicate with the app user (assignee) and give instructions or get updated.
Convert into a Deal: Once a lead is successful, you can convert it into a deal. When the lead is converted, you are asked information about the deal:
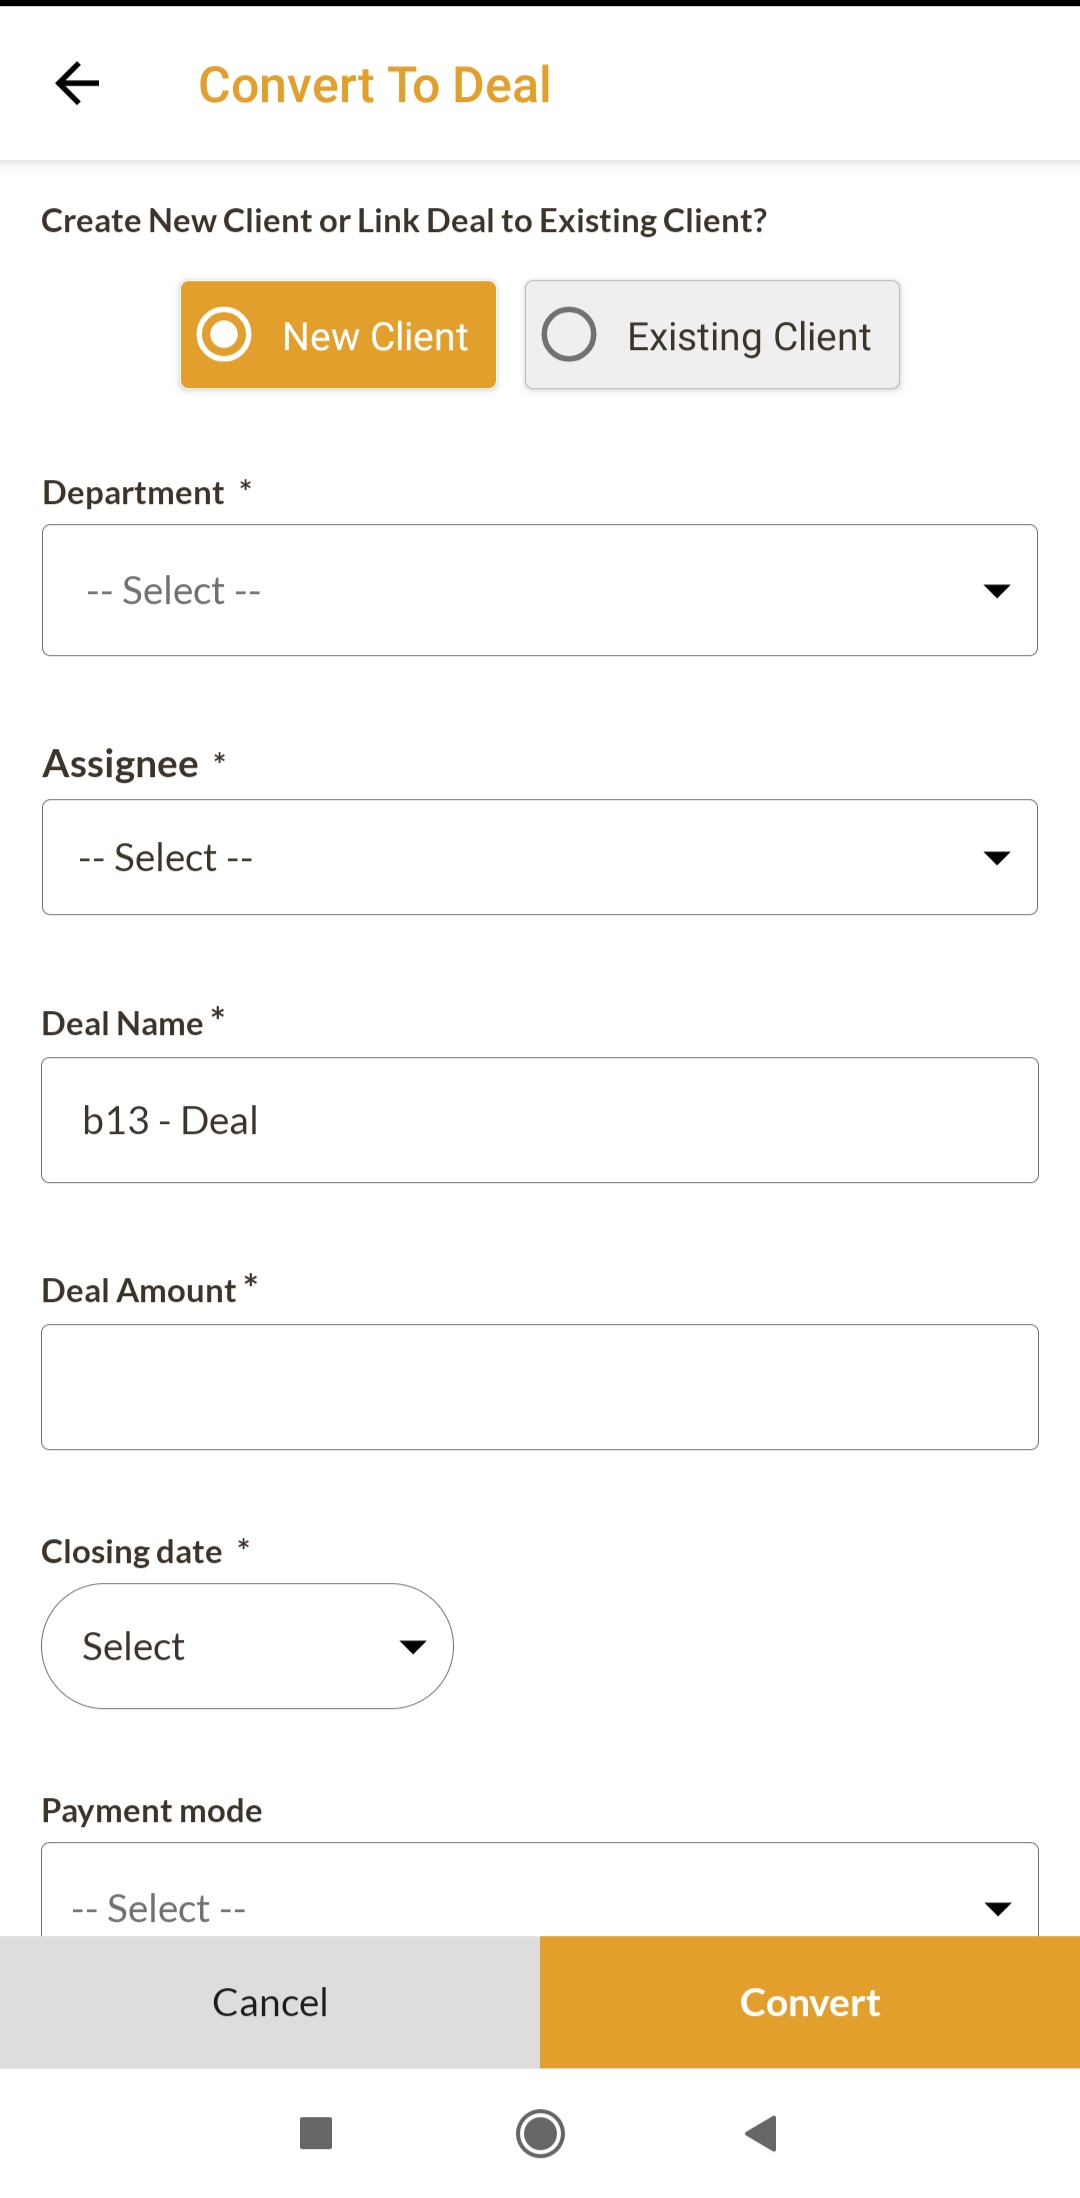
New Client or Existing Clients: When you convert a lead into a deal, you can either choose to create a new client corresponding to the lead or link the deal being created to an existing client. When a new Client is chosen, the data of the lead is used to create a new Client. All the data of the lead is transferred to the created Client. The stage and priority does not exist for the client. If you choose to link the deal being created to an existing Client, then you can select a Client from the existing list of clients.
The lead info is lost in the case when an existing Client is chosen as this information already exists for the selected client and the deal being created is linked to the selected Client.
Department: Every deal is attributed to a Department
Assignee: You can choose one of assignees from the list of members belonging to the department selected above
Deal Name: Pre-filled as " Lead_Name - Deal ", can be edited
Deal Amount: Pre-filled by Expected Amount from Lead info
Closing Date
Payment Mode
Deal Note
Attachments
Once converted into a deal, the lead is removed from the list of leads
Bulk upload of leads
To add leads into the system, you can either add the leads one by one by filling the new lead form, or you can also choose to upload multiple leads at once by uploading a csv file containing the lead data. The information of each should be entered into a separate row.
The guidelines to follow while making the file:
The first row of the uploaded file should contain the column headers used to identify and map the data of the columns
You can download the Sample CSV file, add the lead data and upload it
You can also upload your own CSV file containing lead data and map the columns to lead profile fields
Please make sure that all mandatory fields have data for every lead
The values of select fields should exactly match any one of the options already added for that field
Assignee column should have the mobile number of the Assignee
Any row with an error will not be added as a leads
You can download the Sample CSV file, add the lead data and upload it
You can also upload your own CSV file containing lead data and map the columns to lead profile fields
Please make sure that all mandatory fields have data for every lead
The values of select fields should exactly match any one of the options already added for that field
Assignee column should have the mobile number of the Assignee
The phone numbers should be added along with their country codes, without the + at the start. e.g. Indian numbers should be added as 919898989898 (Only for Indian mobile numbers, you can add just the 10 digit numbers starting with 9,8,7,6)
Any row with an error will not be added as a lead.
There are two tabs in the Bulk upload section: Import Leads: used to Upload a file with leads, Import History contains the details of the previous upload
You can use the Sample file available for download to fill in the leads data. It helps in quick upload as the column headers are pre filled with the lead profile fields of the account. You have to insert the relevant data in the right columns of the sheet and then process the import of leads in the system
Click on the Upload File and choose the CSV from your computer and then click on Preview. The next screen allows you to map the column headers of the file that you have uploaded to the Lead Profile Fields in your account. (The matching headers are mapped automatically for ease of use). You are also shown the sample data from the first two rows for each of the columns to give an idea of the data contained in the columns
Make sure that you map all the mandatory fields in the system. Also, the same field should not be selected for more than one header in the file.
Once you have completed the mapping, click on Finish. You import will initiate. Once the import is finished, you will receive an email containing the results of the upload - number of failed attempts and the number of leads successfully added.
You can also see the results of your upload in the Import History where all the upload attempts are shown. You can see the number of failures and successful additions. You can also download the error file containing the reasons for the failure of each of the rows which were not added as leads. You can correct the data in this error file only and try to upload the same file only to complete the addition of failed leads.
Clients - CMS
The Clients tab contains the list of all the Clients in the system. The list contains the info about the number of deals done against clients and the total revenue (sum total of all deals). You can search by the client name and contact information and apply filters to narrow results. It is not possible to create a Client directly, you can first create a lead and then convert it into a deal
Selecting any Client takes to the detail page of Client. It is similar to the lead with some differences. The page also has the list of deals which have been linked to the Client. The Stage and Priority are not present for the Client as compared to a lead. The deals of the client can be copied to create a new deal, or archived.
Admins and users can only see clients for which atleast one deal belongs to their department.
Deals - CMS
The Deals tab contains the list of all Deals done. You can search for deals or filter the results. The archived deals can be accessed at the top right.
Once archived, a deal is not incorporated while counting the number of deals done by assignees or while calculating the total revenu
You can add a deal directly by clicking the button at the top left and then selecting the Client to which the deal needs to be linked.
Clicking on any deal takes you to the corresponding Client page (there is no separate page for deals)
Overview - CMS
This section contains the important data and numbers.
At the top, the number of assigned and unassigned leads are shown
The next section tells the number of added leads. The number of added leads can be seen by day, week or month over a selected range of date
Deals and Revenue made by Assignees: Contains the number of deals done by Assignees (app users) and revenue generated by them over the selected date range. You can see the numbers for all departments together or by selecting a particular department
Current Lead Assignees and Stages: Gives an overview of the the number of leads assigned to assignees and the stage distribution of the leads in the system
Total Deals and Revenue: You can see the number of deals and revenue generated by all the assignees. You can choose a time period and then see the numbers by day, month or year
The bottom most link lets you see the live activities being done by Assignees in the Lead Manager
You can also see the recent activities through the link present at the top right of the Overview tab
The Lead Manager App
The Lead Manager App can be used by the sales agents to update their progress on the go. It also helps them to set reminders in the form of notifications and alarms for follow-ups. All the update being done by the sales agents can be seen in CMS by the managers.
Based on the settings done for different app users above, the assignees have access to leads, deals and clients. There are four sub sections of the feature in the app - Overview, Leads, Clients and Deals
Overview
The Overview section contains the shortcuts to important links and also the numbers associated with them.
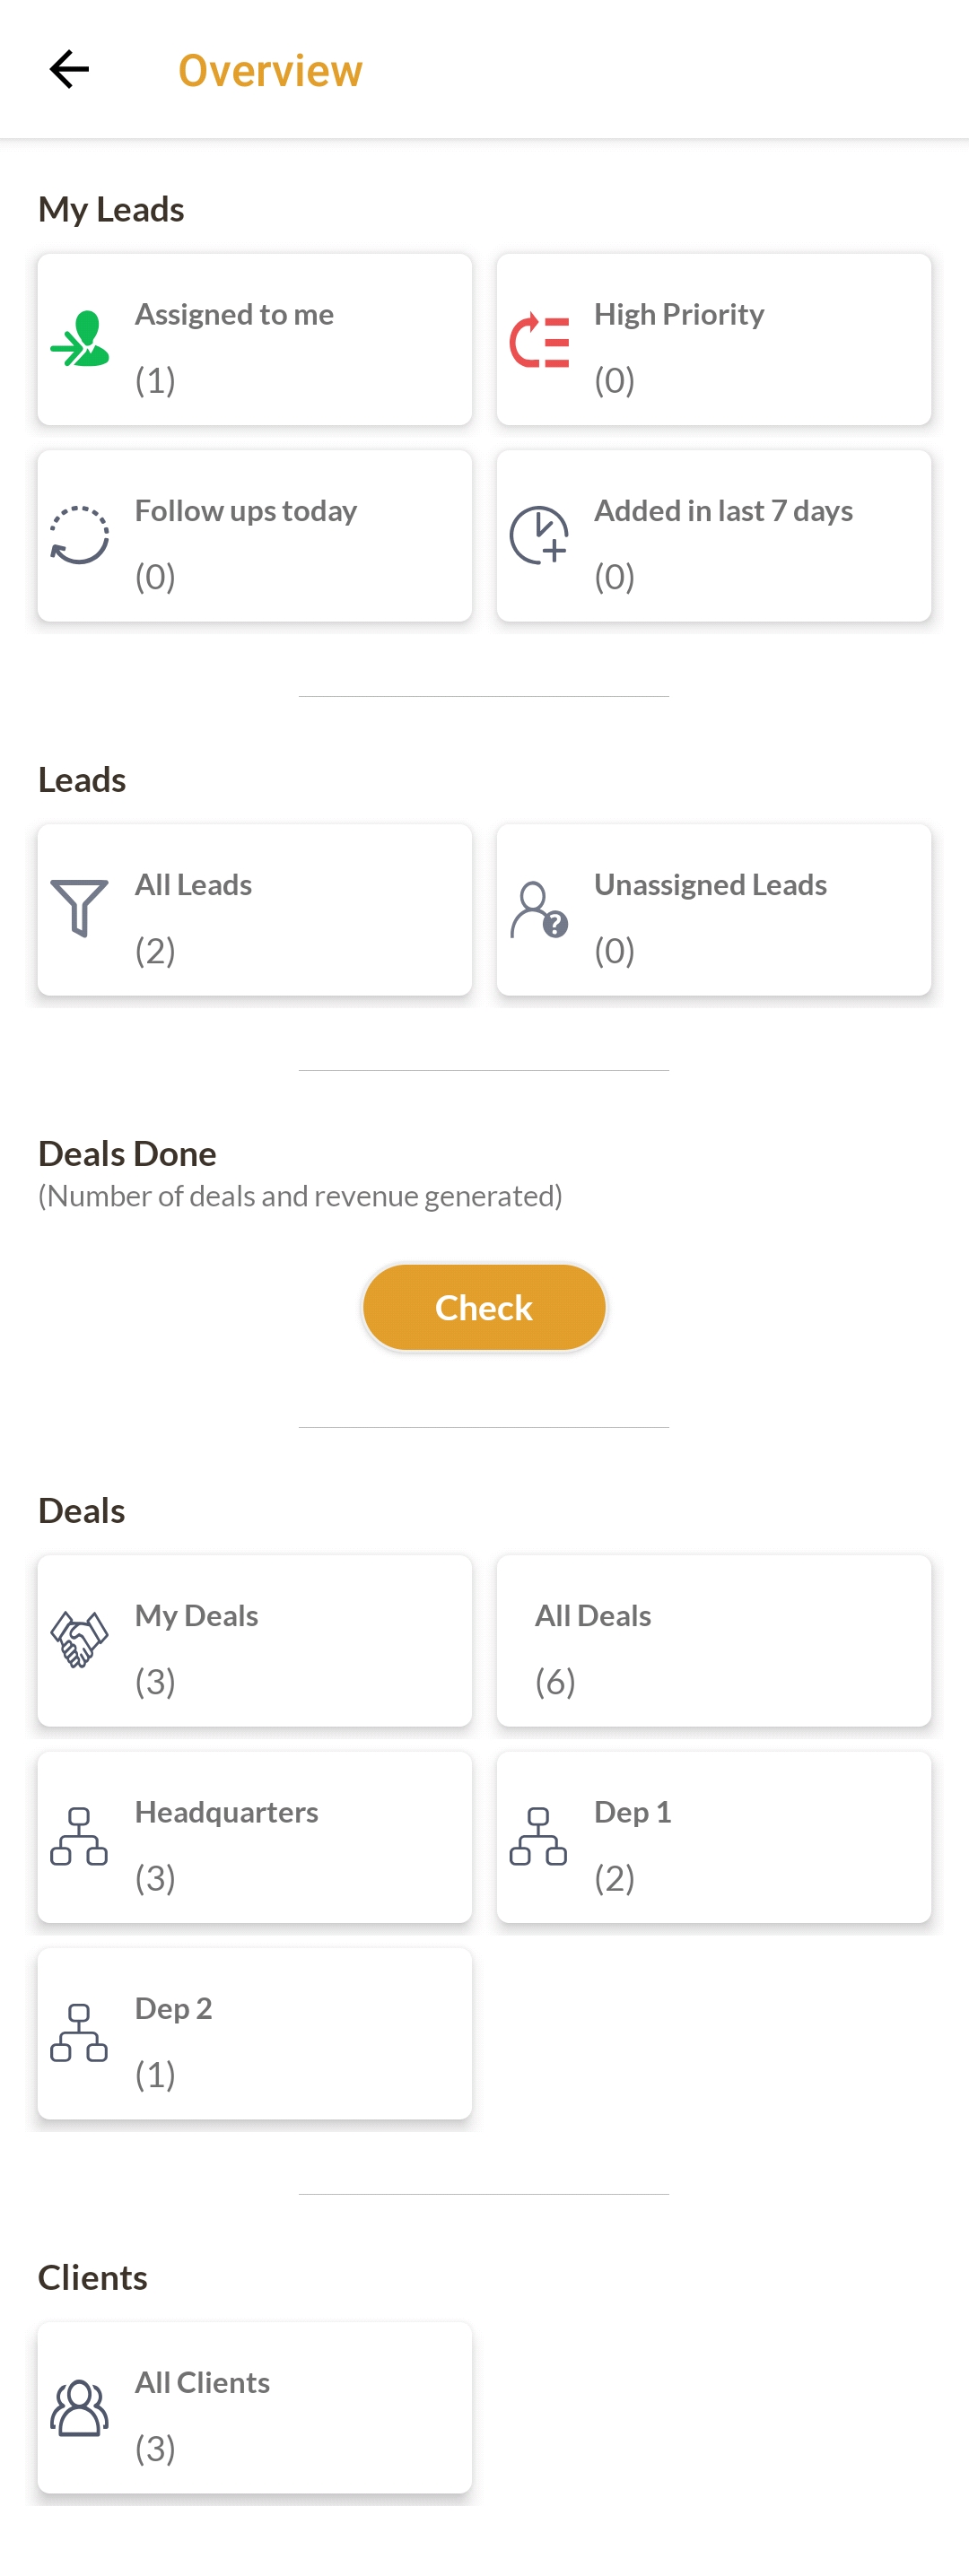
You can see links to leads at the top with frequently used quick links like leads with high priority, follow ups scheduled for today and recently added leads
You can see all leads and unassigned if you have been given the permission from the CMS
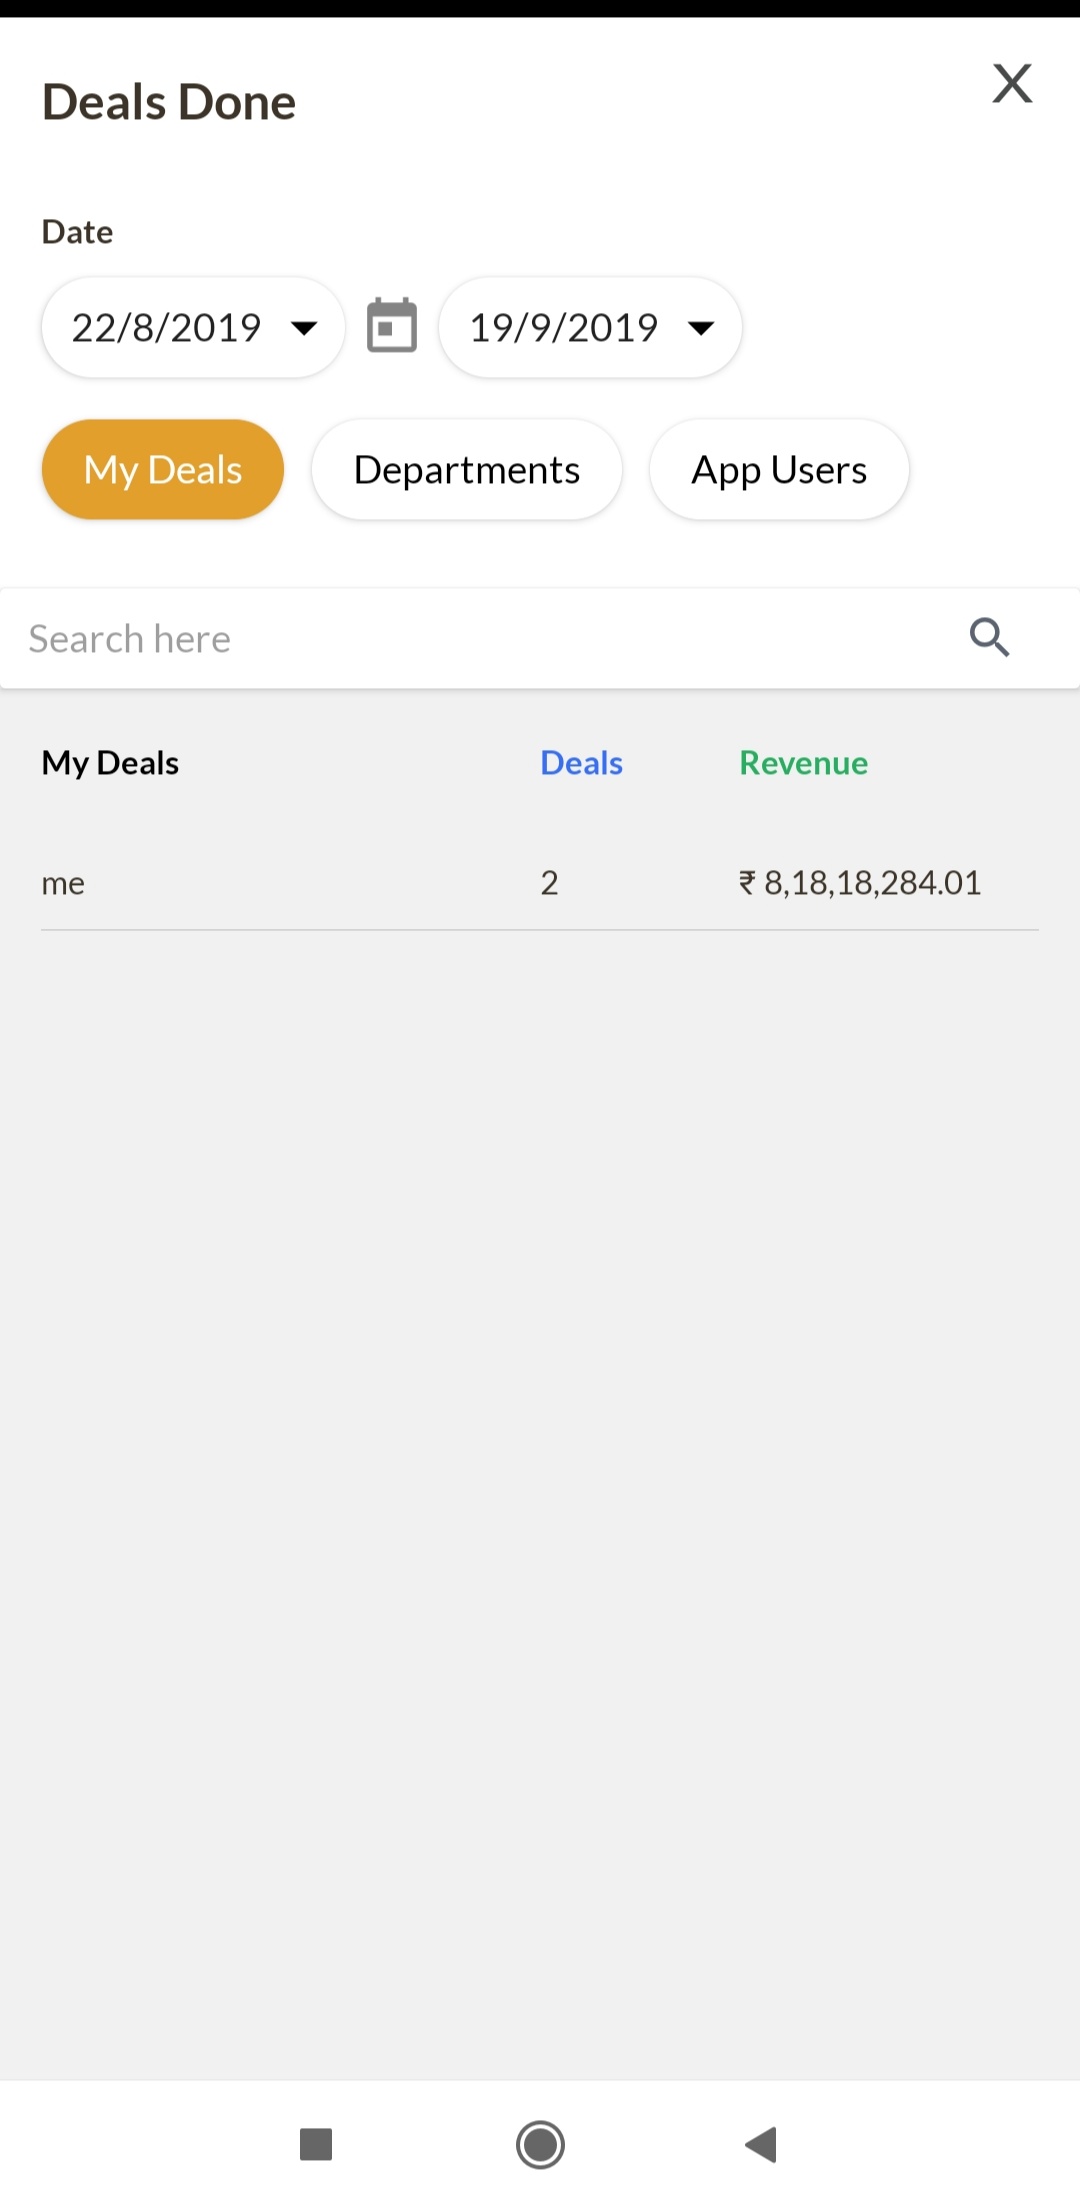
The next section allows you to see the number of deals done by selecting a time frame. You can see the deals done by you, department wise, or team member wise (other app users/assignees)
The overview sections also contains the links to the deals you have access to. You can see the deals assigned to you or see them department wise. There is also the link to see the list of all clients
Some of the links on the overview page might not be visible to some app users due to the restrictions in access as set in the Assignee Settings in the CMS
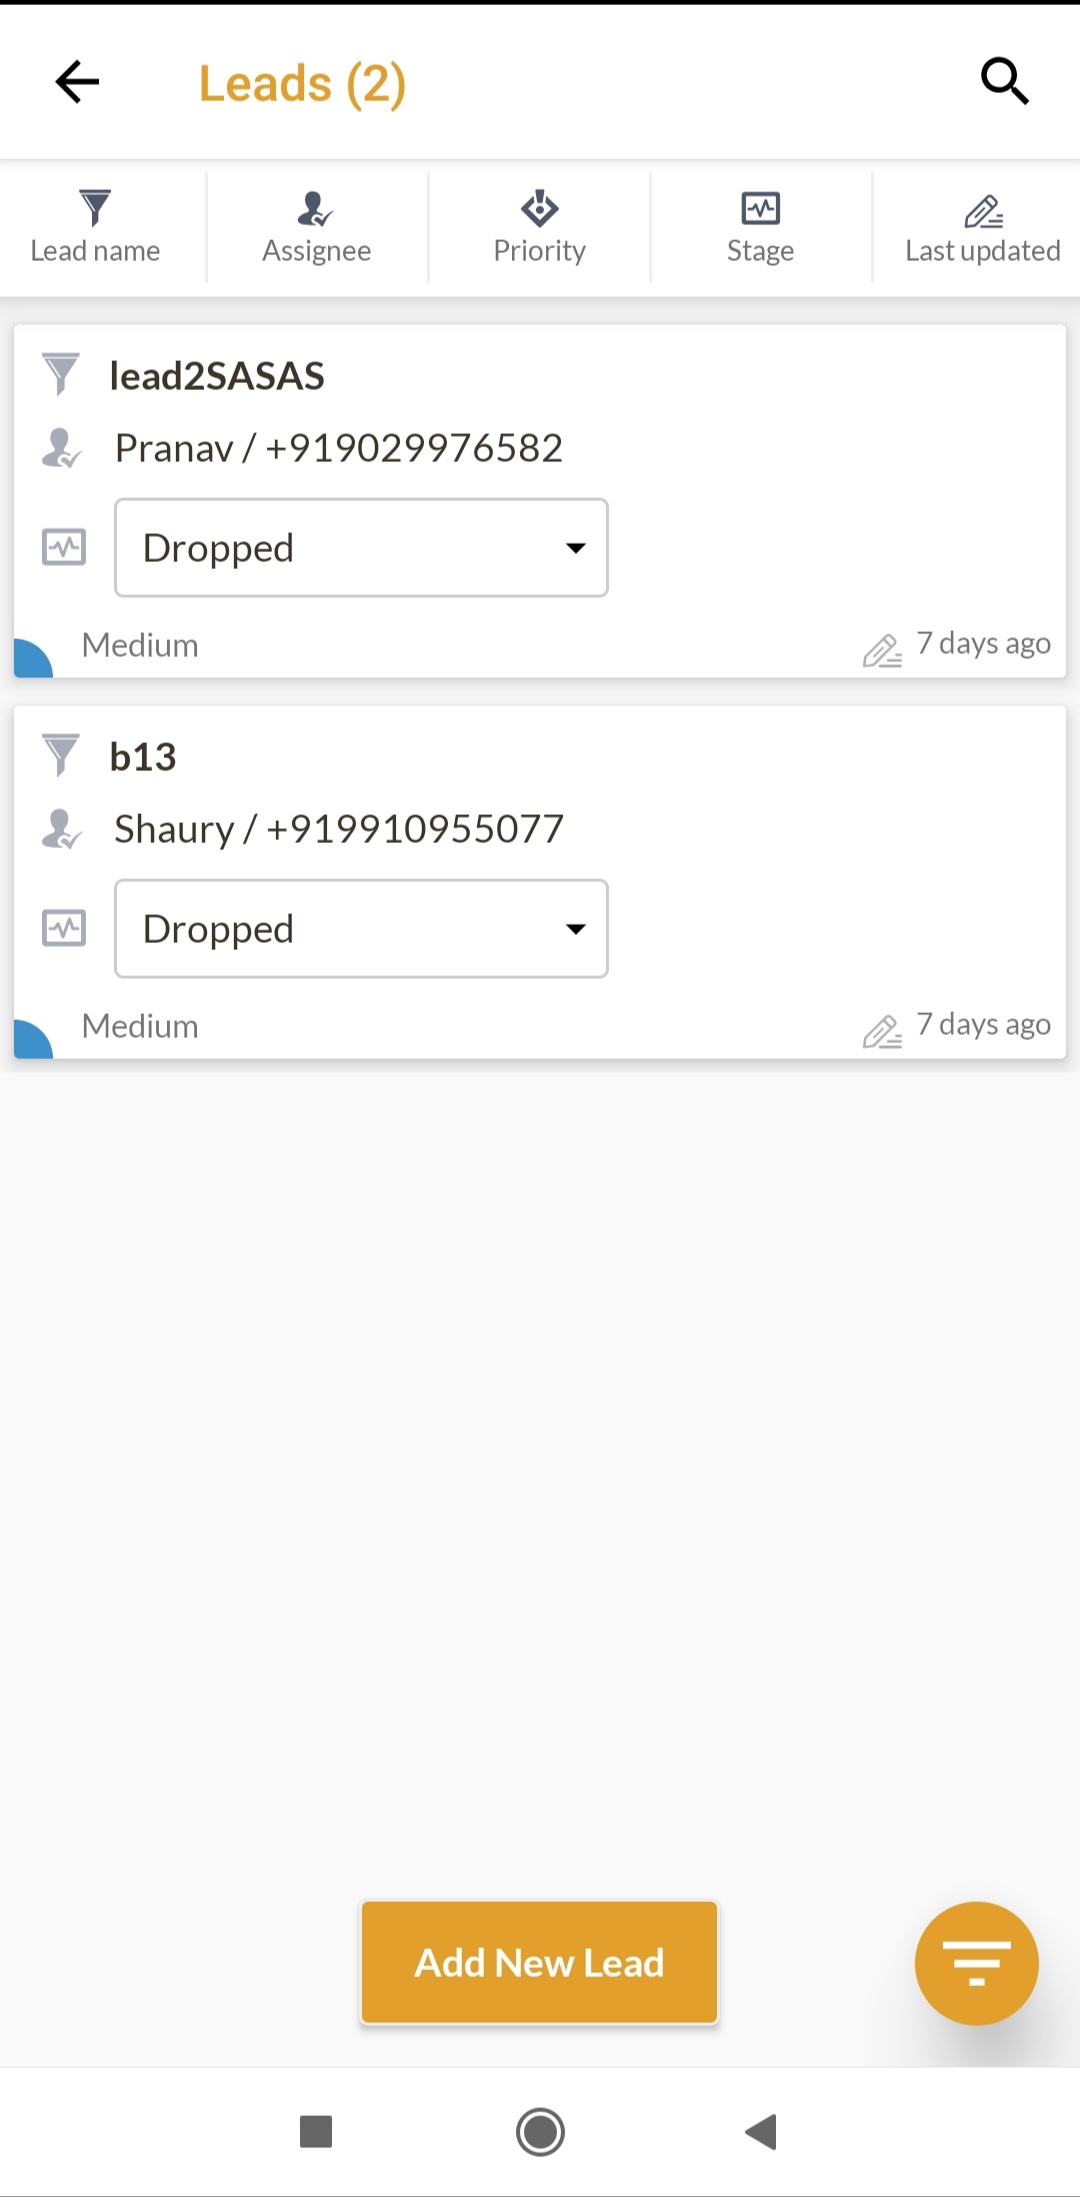
Leads
This contains the list of leads you have access to. App users can search, sort and filter these leads as needed. App users can also change the status of the leads directly from the list. There is also the option to add a new lead by filling in the required information (the button will not be visible if you don't have the rights to add a lead)
Tapping on any lead opens the lead detail page. This contains three tabs: Info , follow up and log of activities
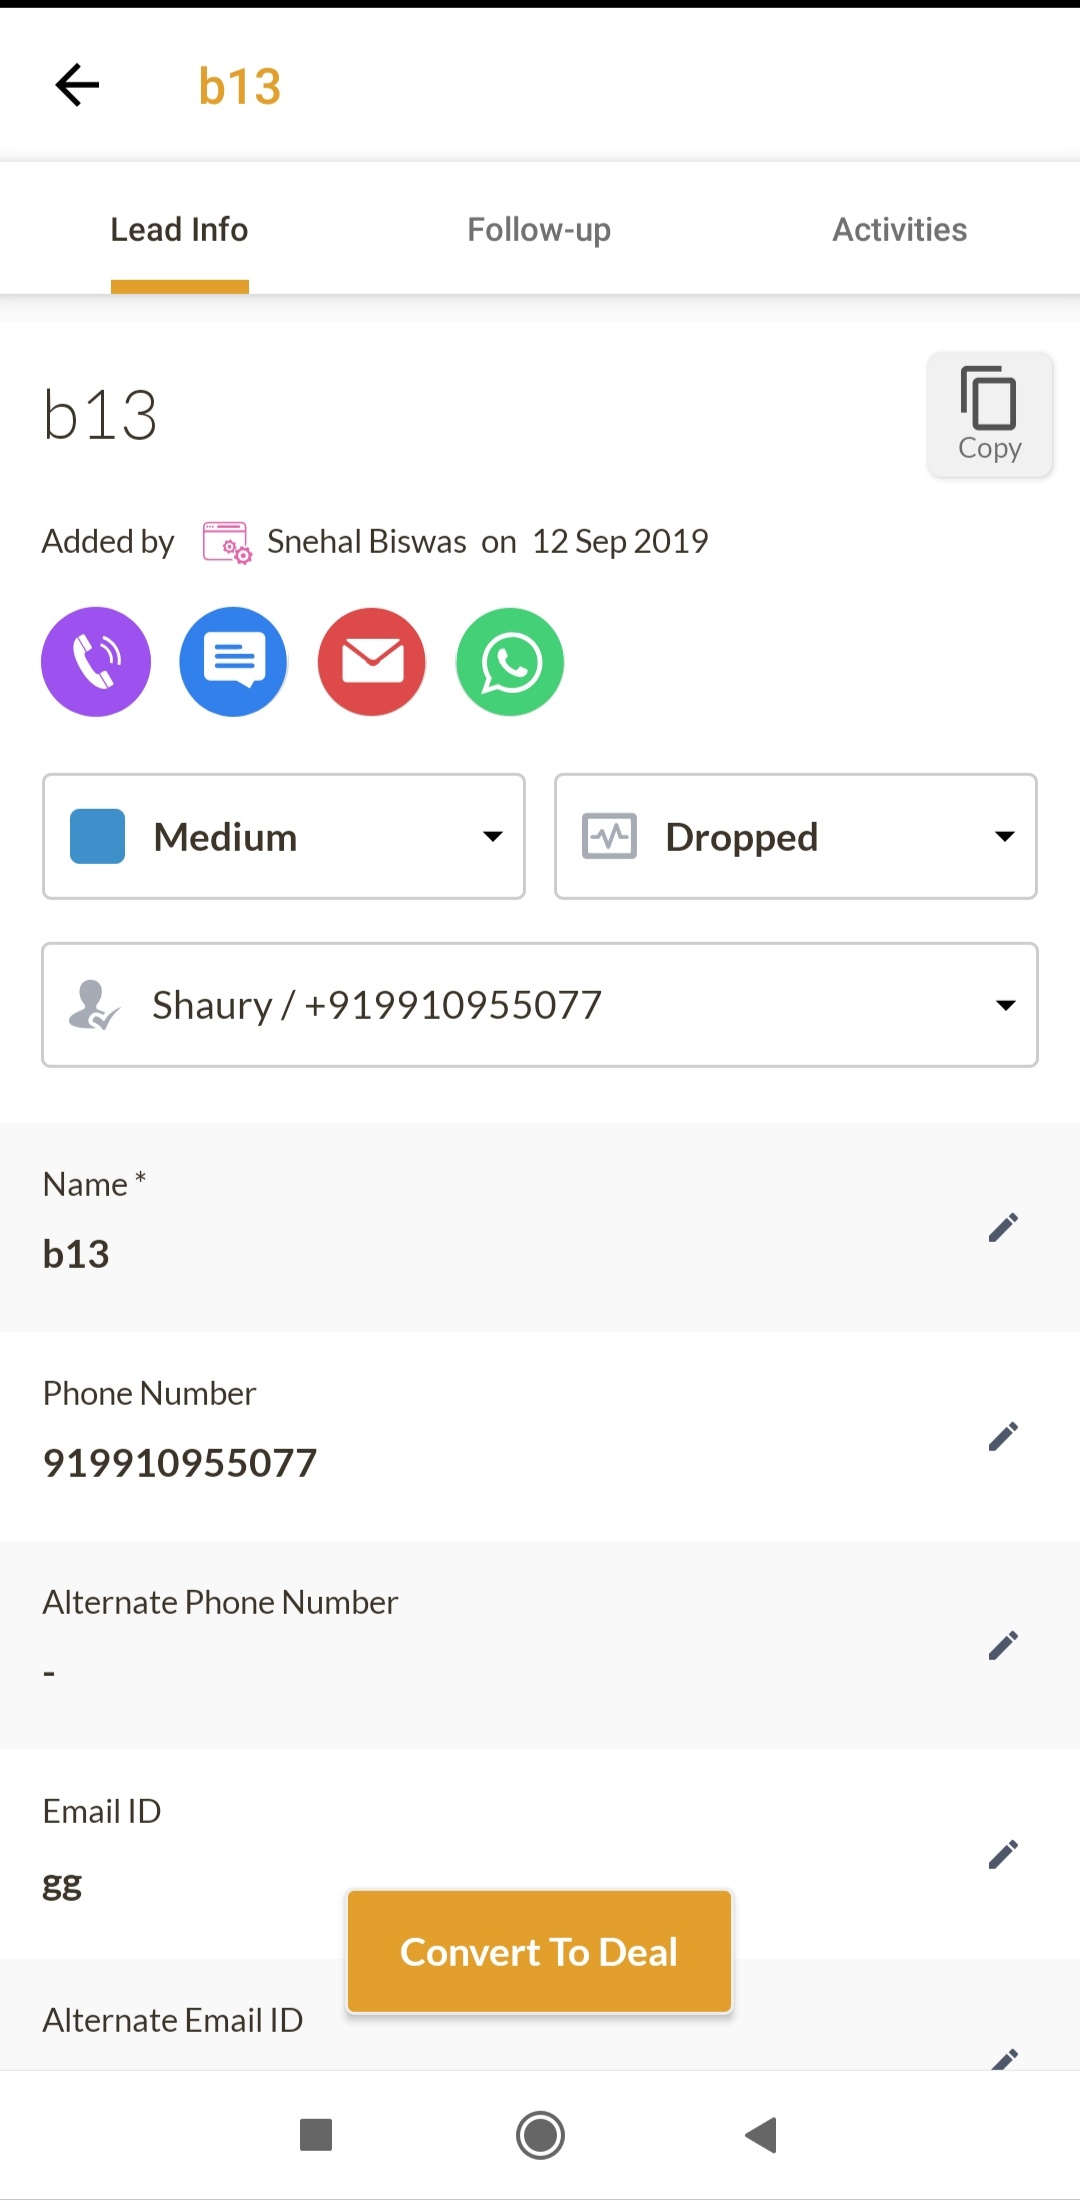
On the lead info tab, you can edit the information, use quick contact buttons to call, SMS, mail or whatsapp the lead, you can copy the lead (opens the new lead form pre filled with the information from this lead), and convert the lead into a deal
You can use the quick contact buttons only if the relevant contact information has been added for the lead. eg- the email ID should be added for the email button to function
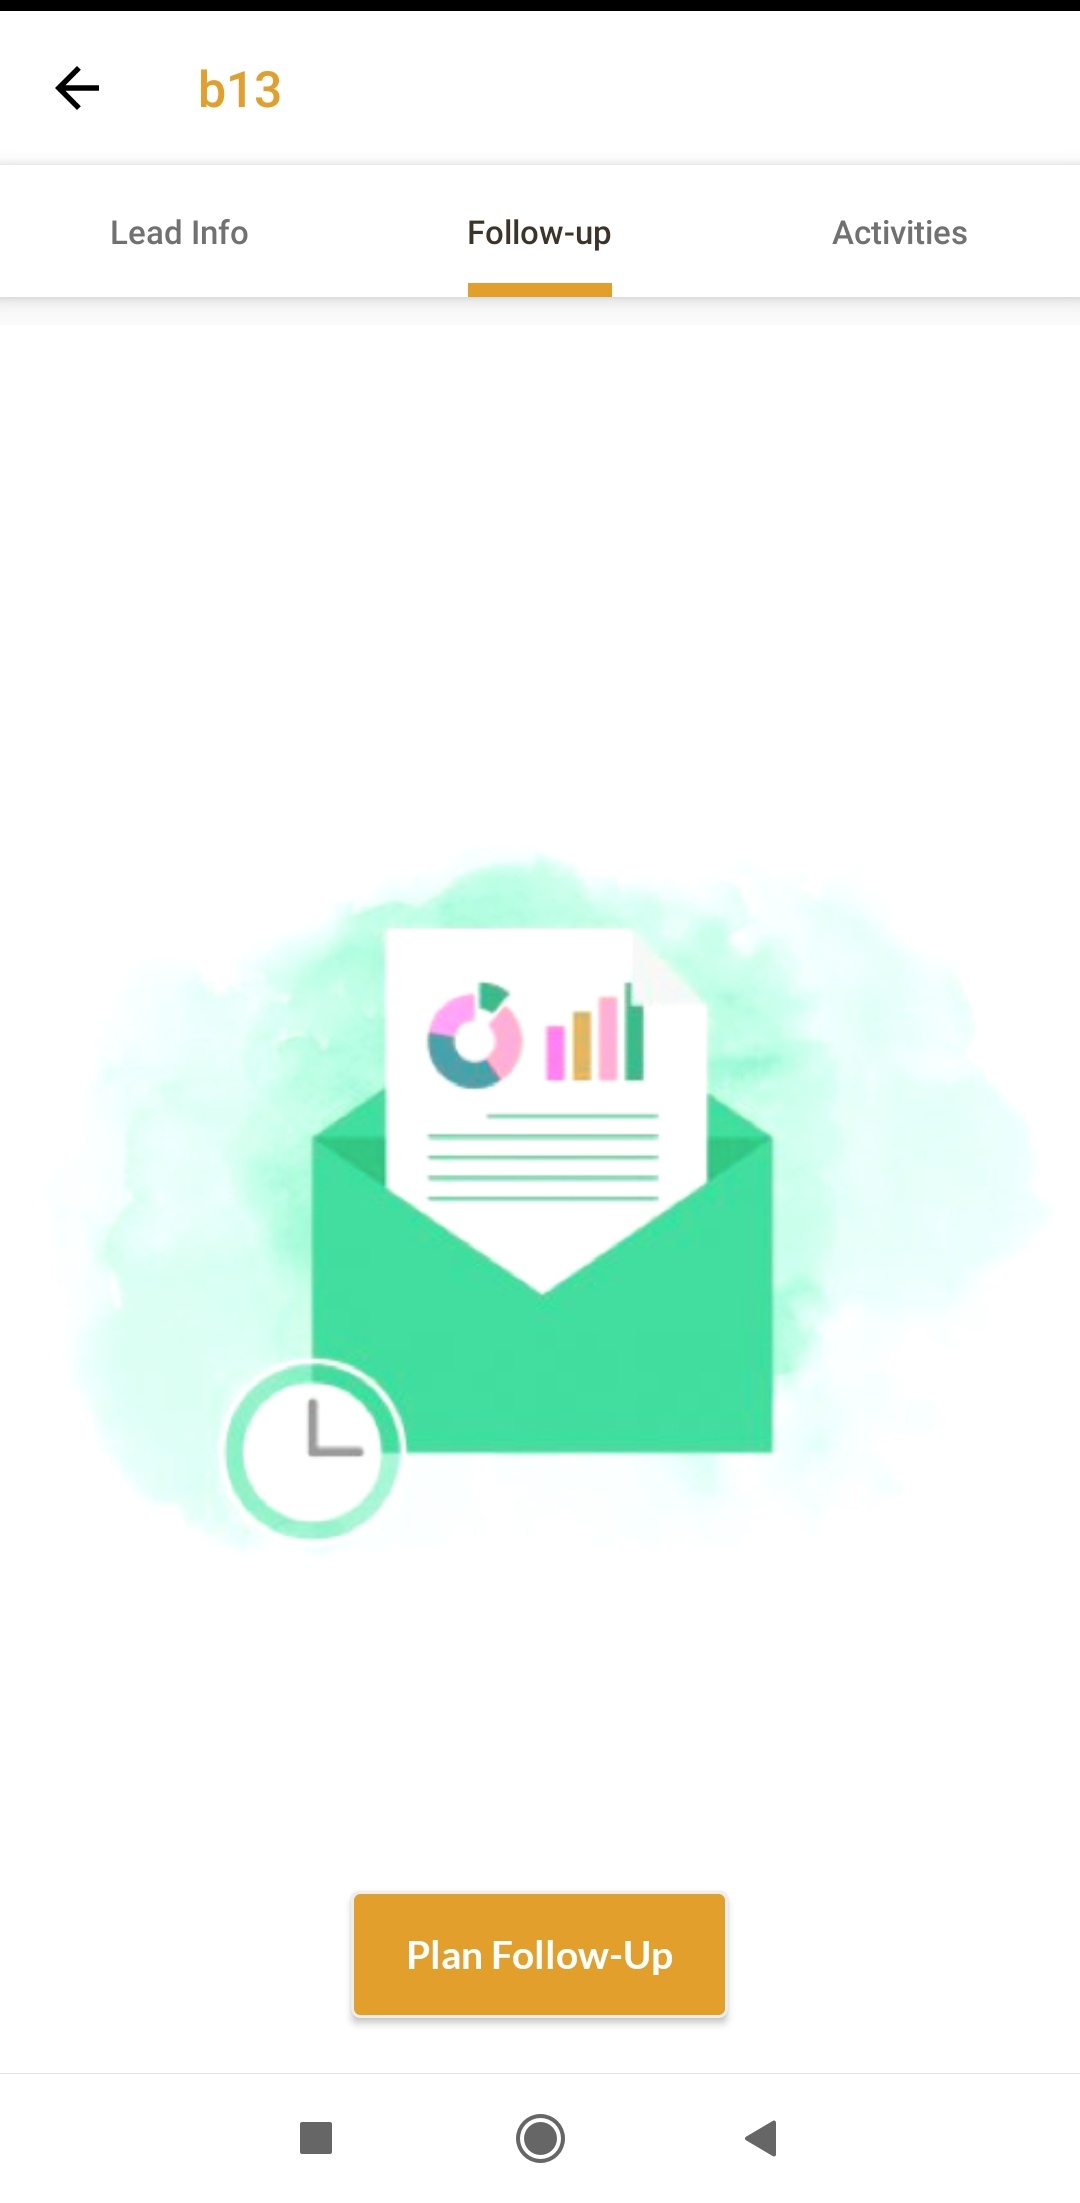
You can set reminder for yourself or for others by choosing the time and a note for the same. This will send a notification to the assignee at the time of follow up. If you are setting the follow up for yourself, then an alarm will also play at the time of follow up
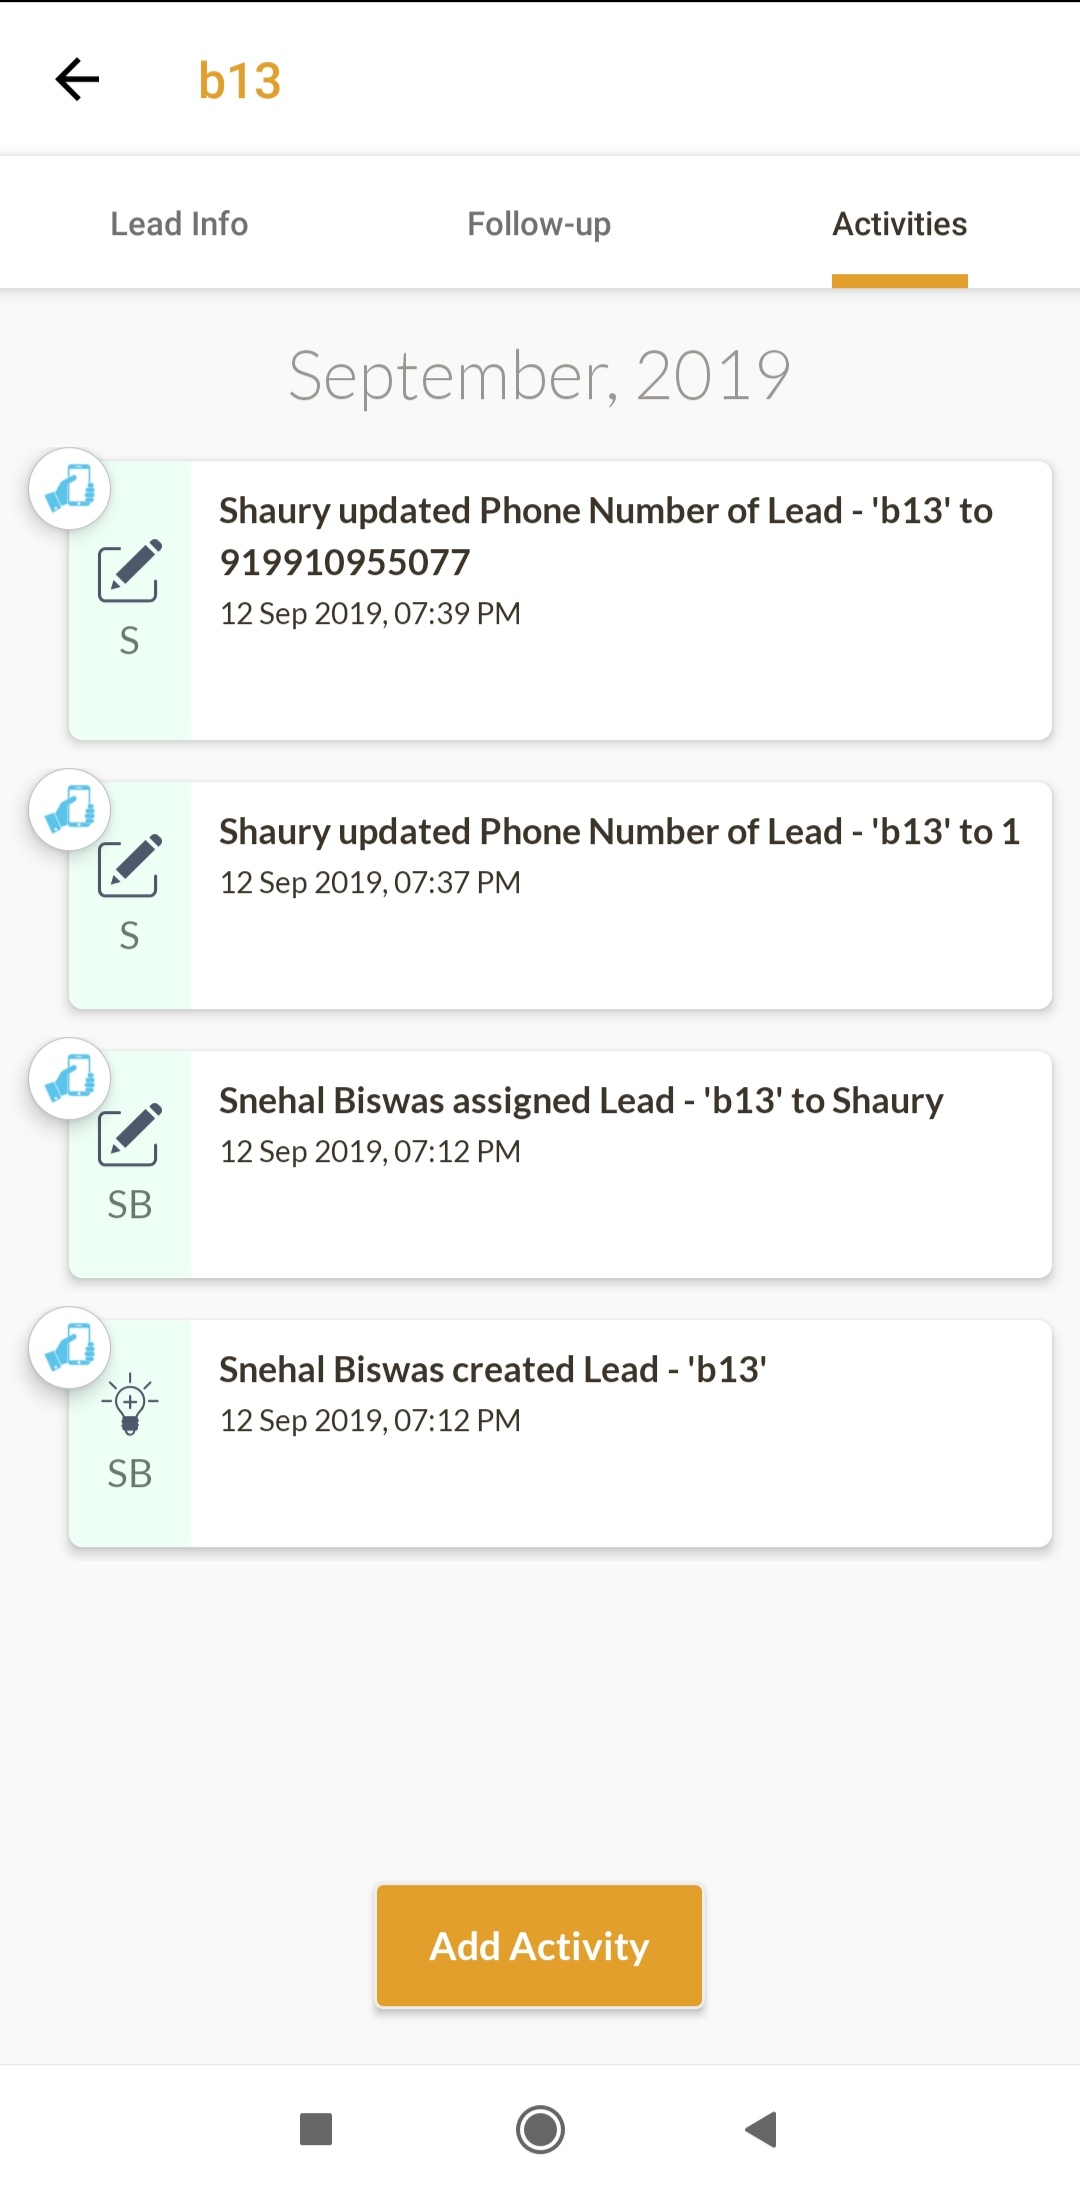
The third tab is used to see the history of actions on the leads. It contains the edit history, previous follow ups, activity history, conversion into deal and archive/restore history. You can activities by choosing from the pre defined list. You can also add a note and attachments with the same
Converting a lead into a deal
A lead can be converted into a deal in the same way as explained above for the CMS. It can either be linked to an existing deal or a new deal can be created.
Clients
This is list of the clients in the system. App users can see the clients whose deals they have access to. The number of deals and the total amount of deals is shown for clients in the list. App users can search, sort and filter on the list. They can also add a deal after choosing any of the Clients using the Add New Deal button at the bottom

Tapping any client opens the Client detail page. The client page contains 4 tabs, one more than the lead page - Client Info, Deal list, Follow up and Activity history. The Client info has the information about the Client - compared to Leads, the stage and Priority are not present for Clients
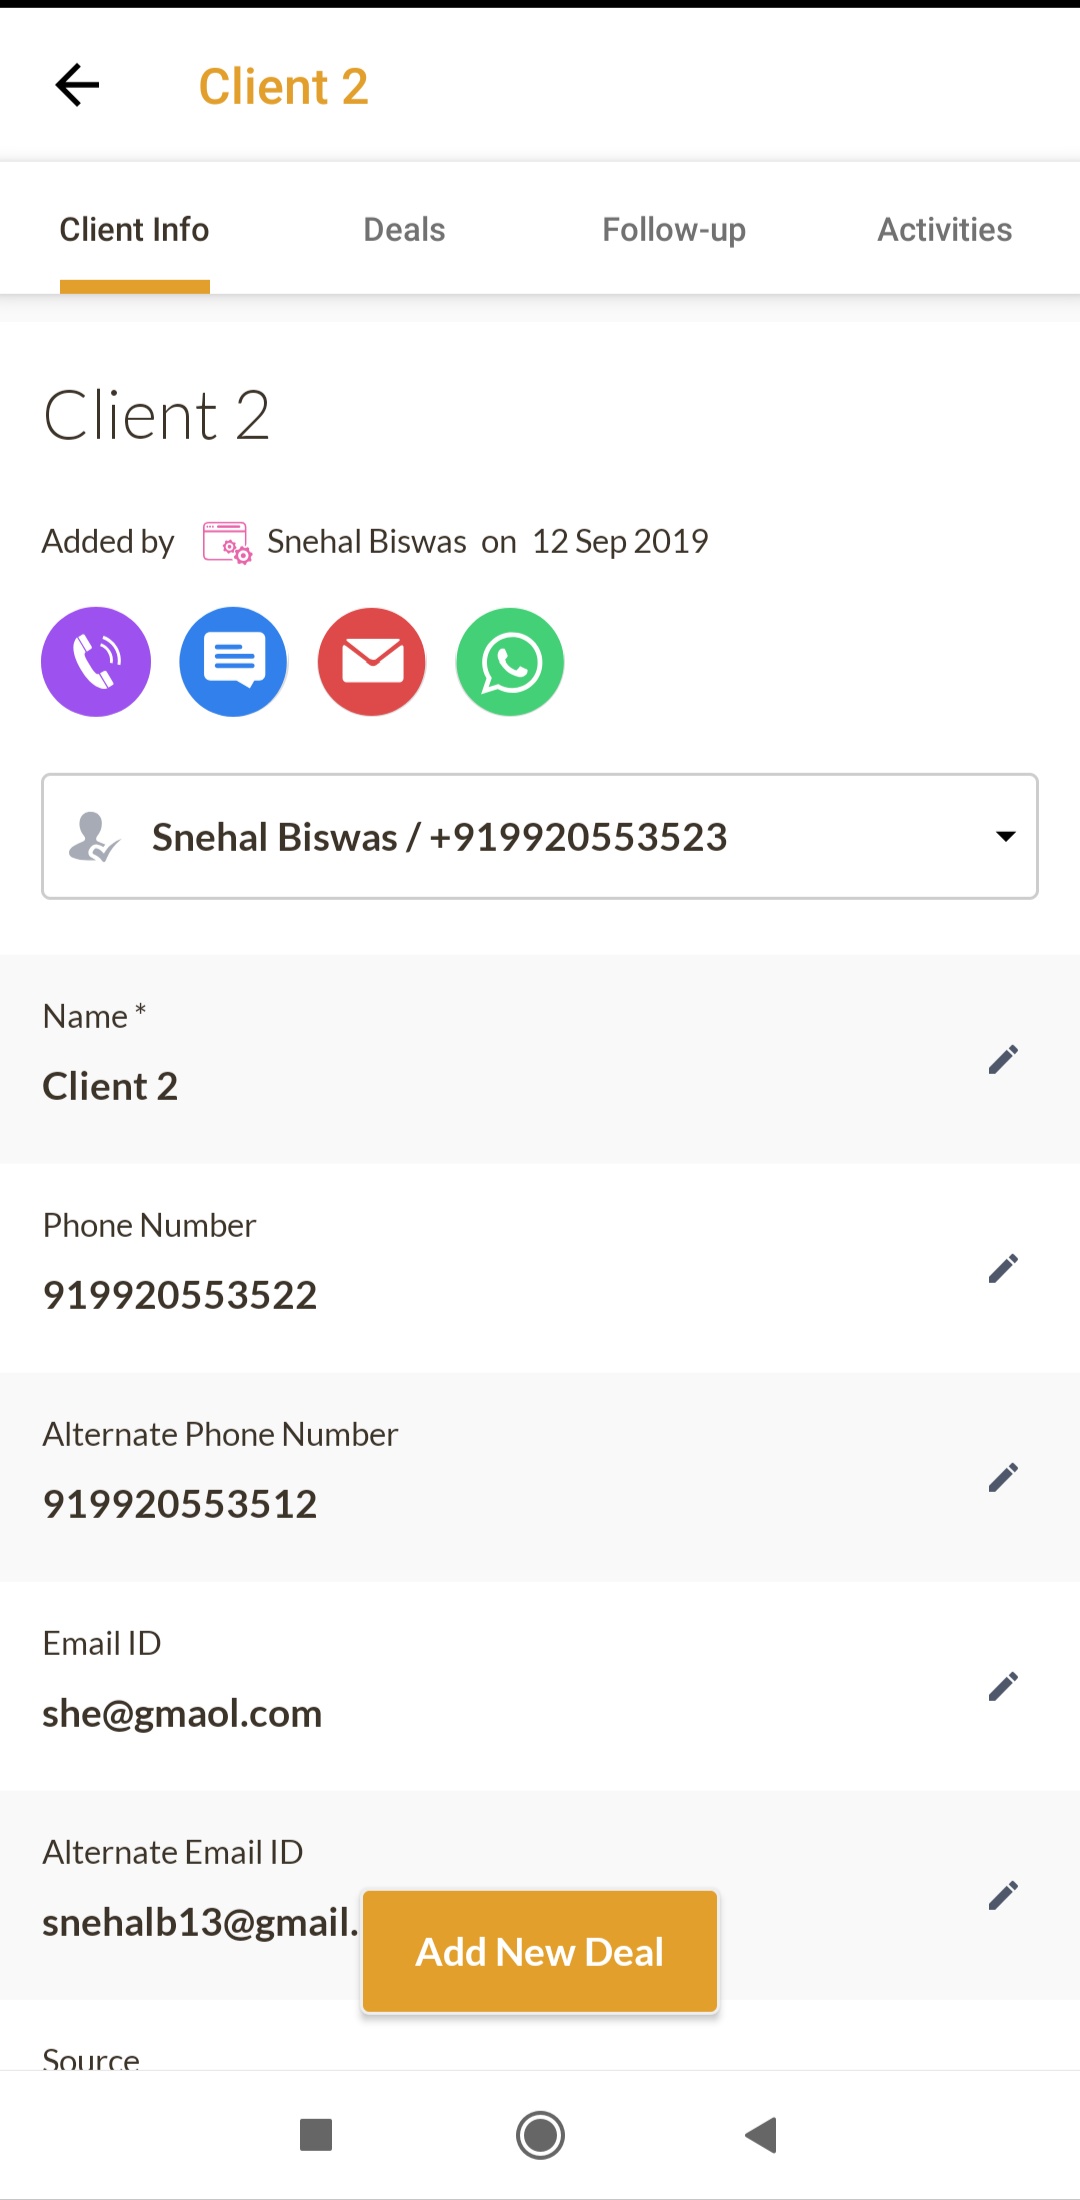
The Deals tab contains the list of deals of the Client with each card representing one deal each.

The follow up and the activity tabs of a client are similar to that of a lead.
Deals
This the list of deals that the app user has access to. The deal name, amount, closing date, client name and assignee are shown. App users can sort, search and filter the list
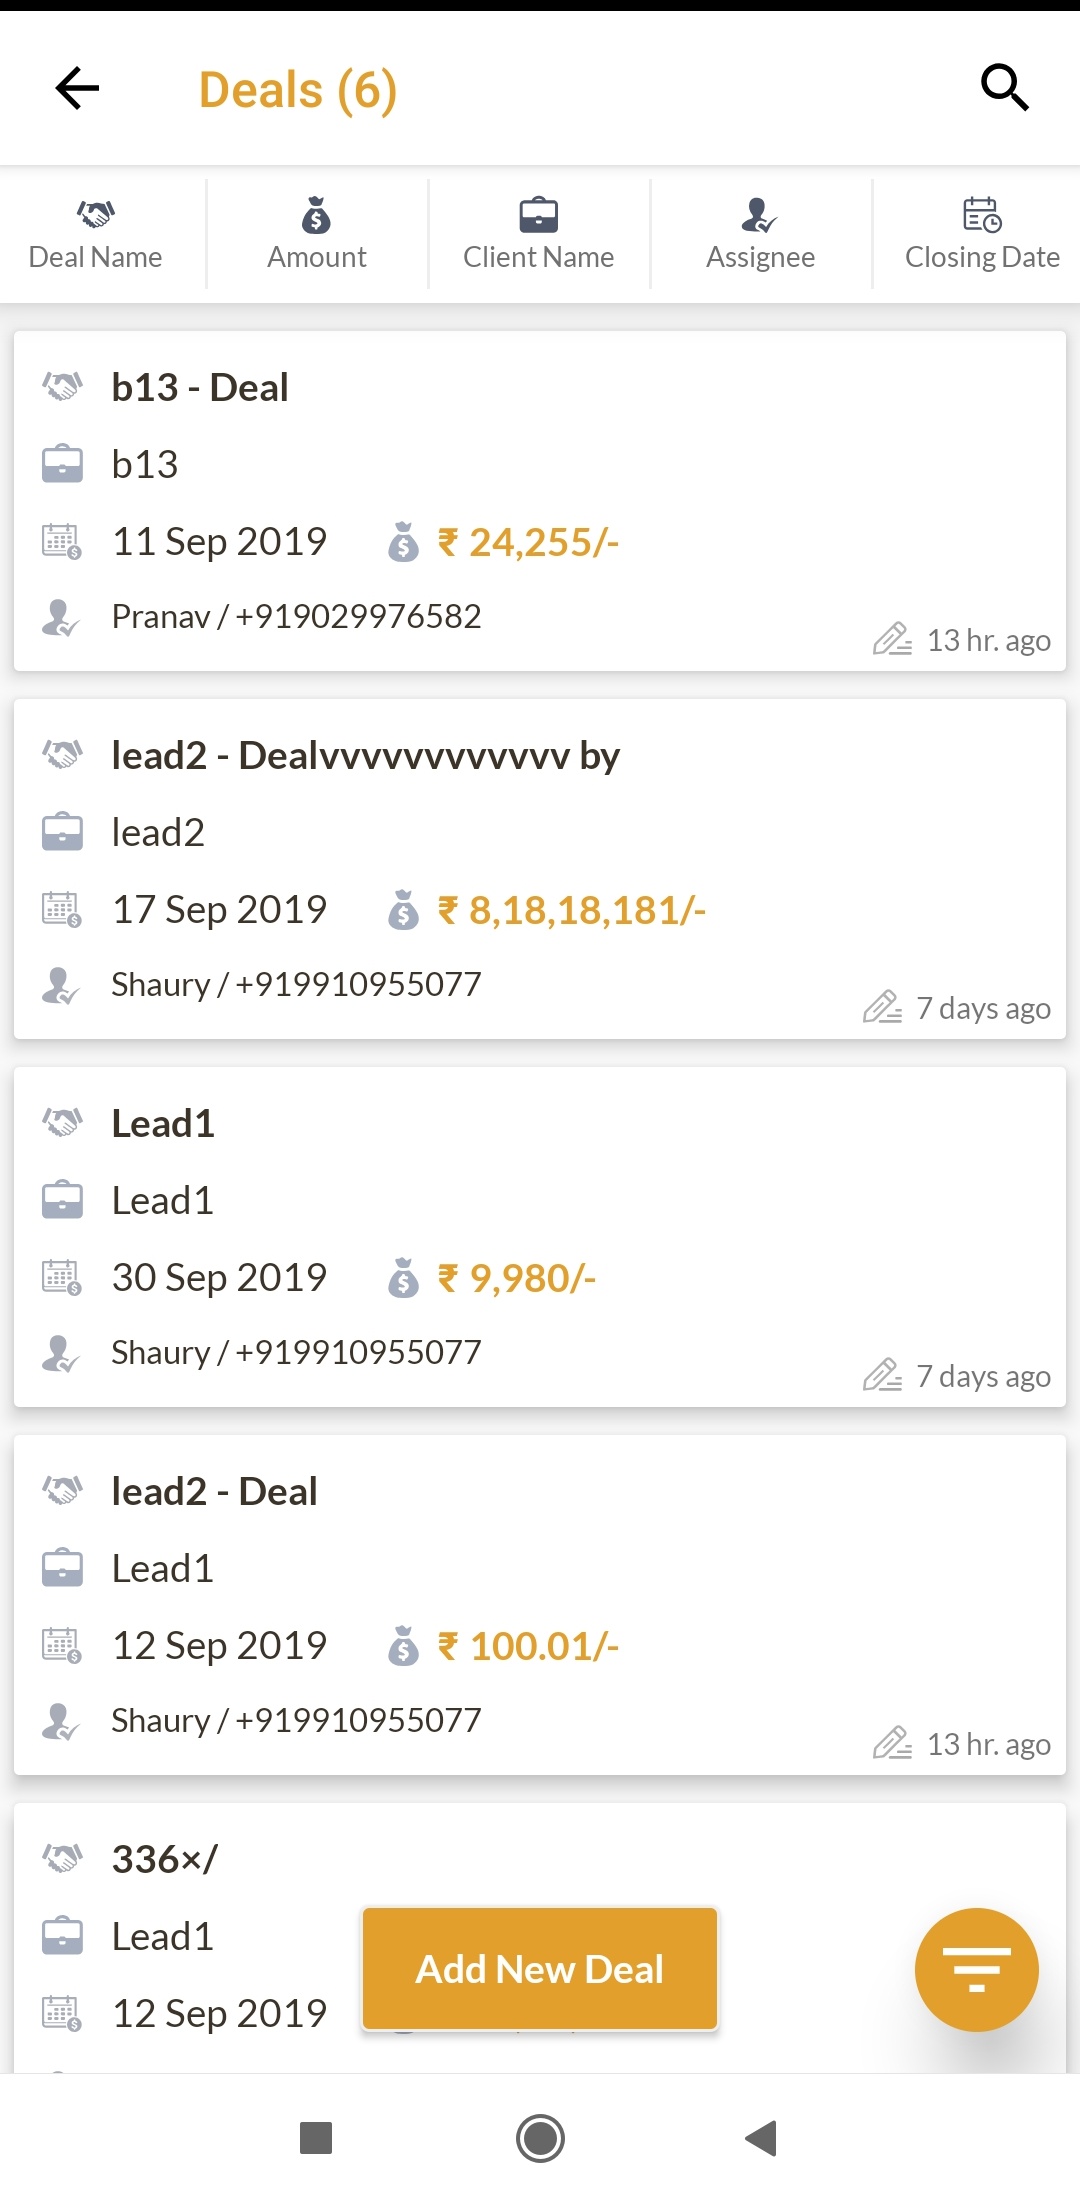
Tapping any deal takes the user to the corresponding tab of the client to which the deal belongs.
App users receive notifications about the addition and assignment of leads, deals and clients. They also are notified when a follow up is scheduled and when the time of follow up occurs.