Bookings
What's this?
Bookings is a highly customisable framework which you can setup and alter based on the requirements. It allows you to list your services and their providers. When your potential clients open the app, they can choose the service, the provider and their preferred time slot. You receive the booking details once submitted by the app user. You can also create bookings for your app.
When to use?
You can use this wherever you require booking of resources or where you want to receive time specific requests from your users. Different use cases where booking can help:
In service industry for receiving requests, eg - plumbing, electricians, salons etc
Conference Rooms, Halls
Theatres, Shows, Performances
Bike, Taxi hiring
Sports Grounds, Pools, Gyms
And wherever there is any kind of time based reservation is required.
SETUP
Booking comprises of setting up your service providers and services. You can customise the settings for each. Each service is required to be linked to atleast 1 provider.
You can also customise how you want the services and providers to be named in the app. On the page containing the list of services, at the top right corner, click 'Referred in App as:' and change what you want to call the services. You can do the same for providers on the page containing the list of providers
STATUSES
Each of the bookings received can have 4 possible statuses :Requested, Confirmed, Cancelled and Completed. A booking for which a provider has not been allotted can only have the status of Requested or Cancelled.
A Booking once Cancelled cannot be edited. Also, when a booking is cancelled, it frees that particular slot, so another booking can be received for the same.
Services
In this section, you add all the choices that you want your app user to see when the feature is selected. The list of services added is seen in the CMS along with its duration and a preview of the description. You can choose which services you want to keep live.
While adding/editing any service details, see the preview on the right to check how it looks in the app
Use the Set Order option at the top right of the list of services to specify in what order you want your services to appear in the app
The services created by you are seen by the app users in their apps:
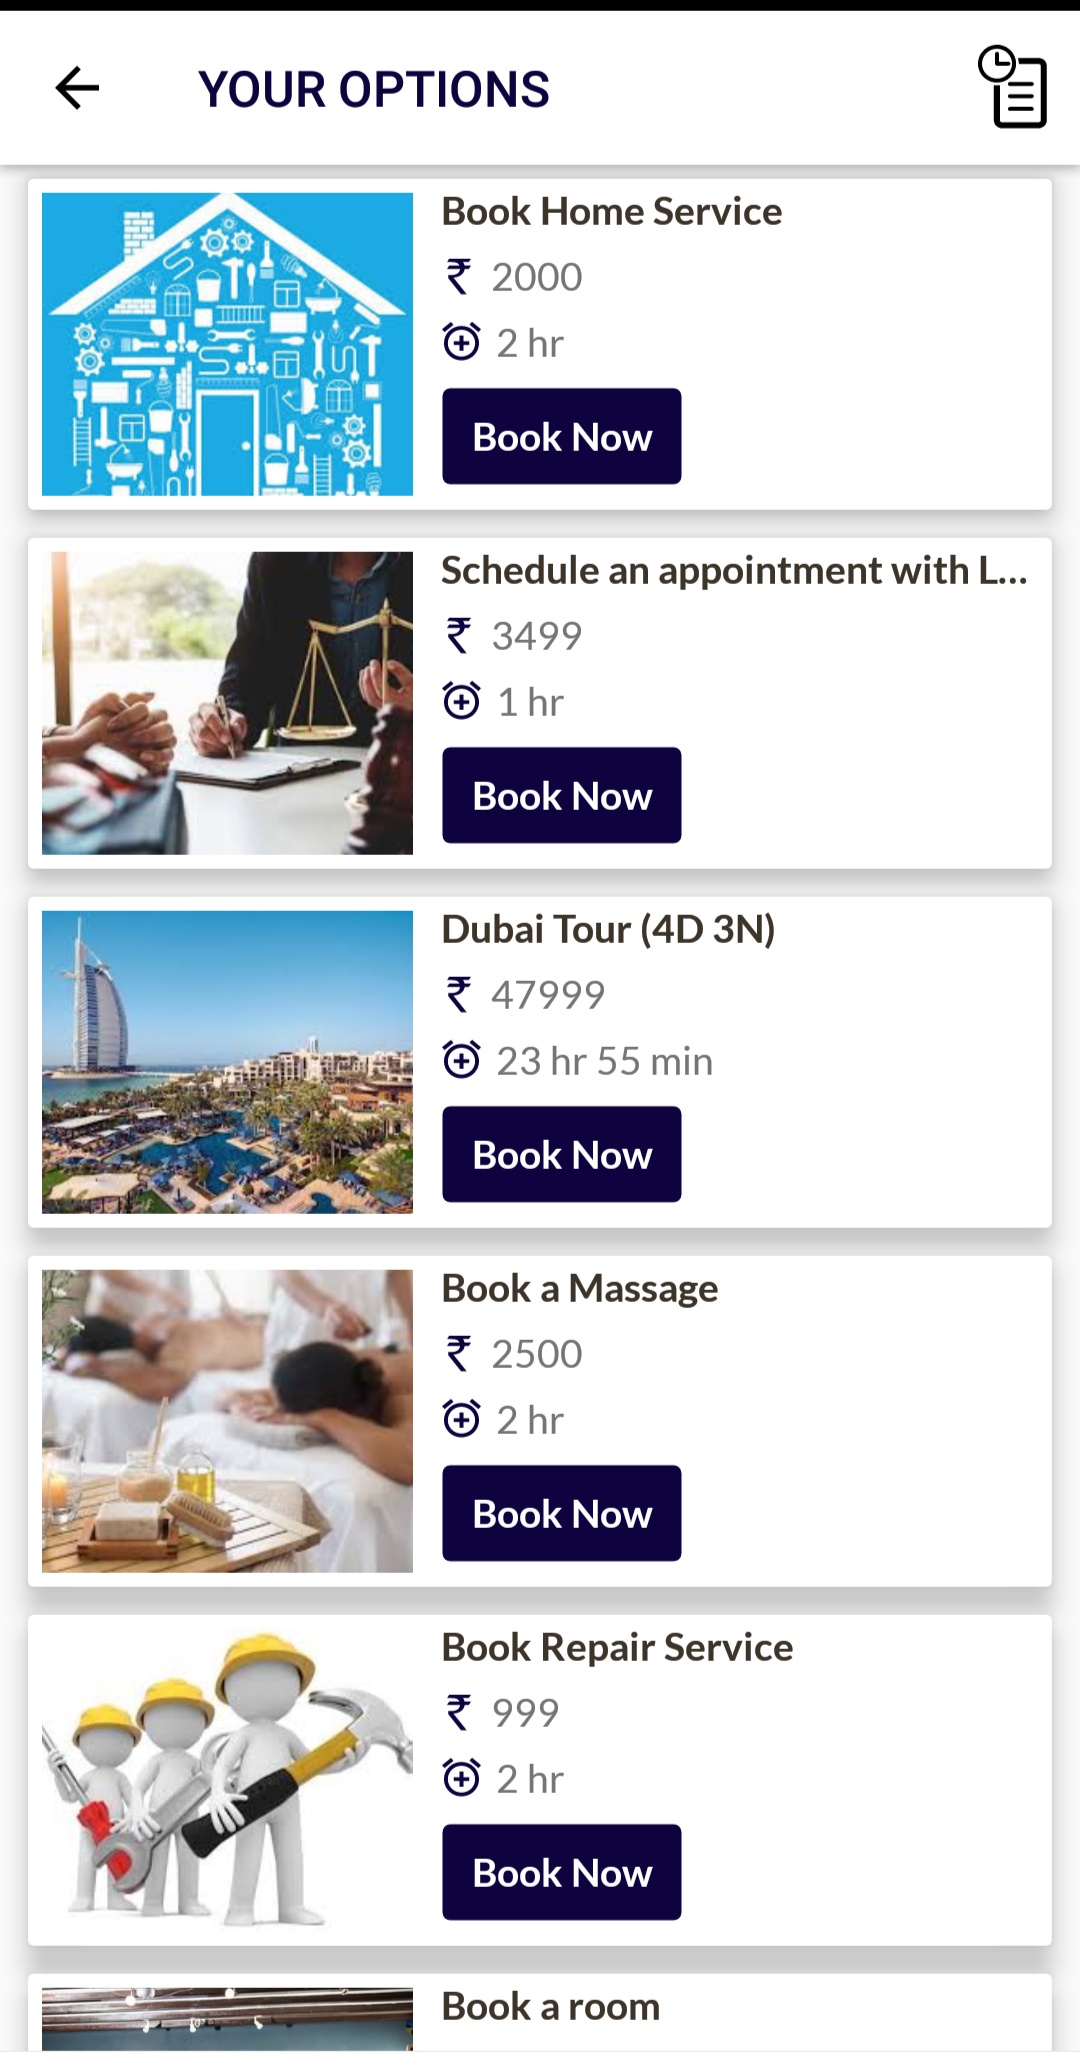
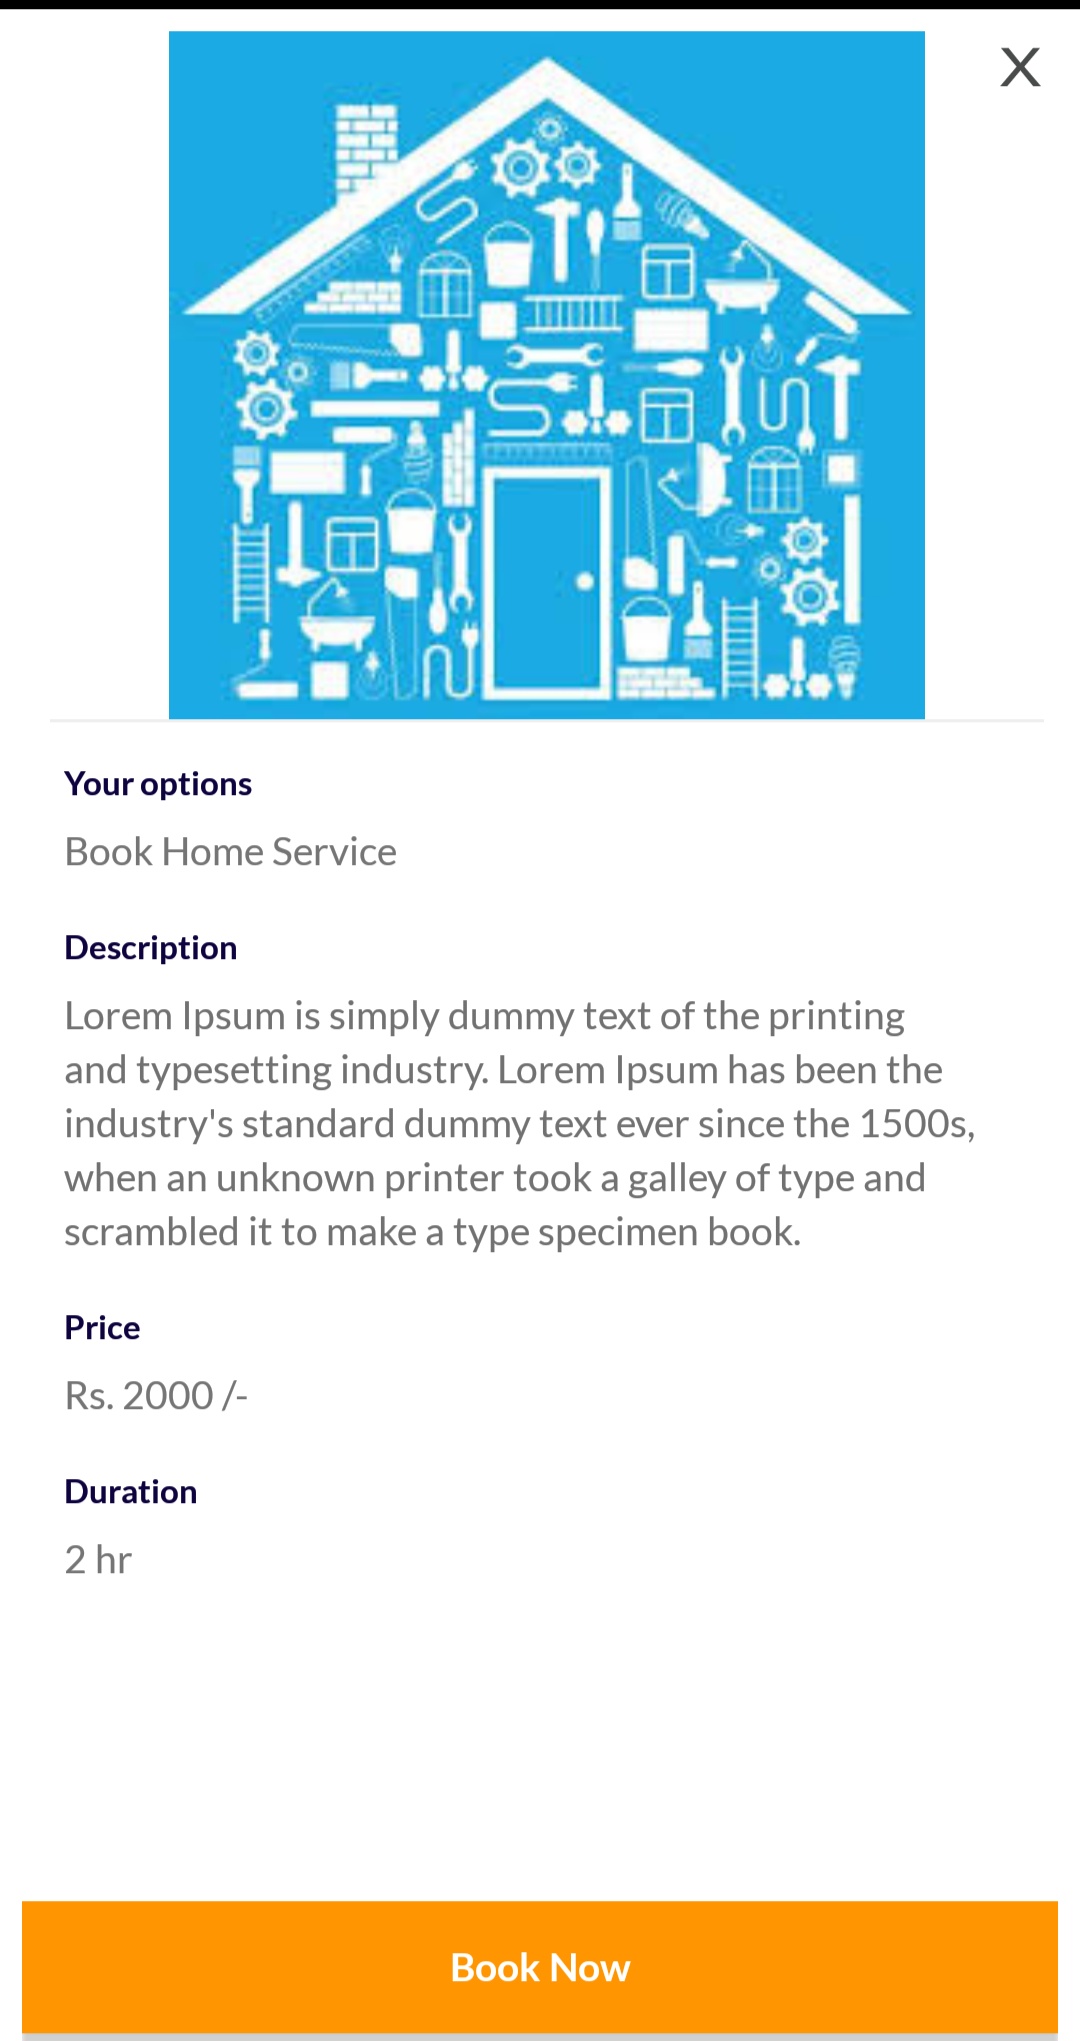
Each services contains the following specifications
The representative image of the service: Recommendations are - jpeg / .jpg / .png format, maximum 1 MB, recommended size 320*260 px
The title and description of the service: The app user can select to see the details of any service from the list
Duration: Specifies how long the service will last. This decides how the slots are formed which are then selected by the app user. You can specify multiple durations for a service. The app user will be able to select the duration for which they want to make a booking while selecting a service.
Reminder for booking: This defines how long before a booking should a notification be sent to the App user who made the booking. This serves as a reminder for the upcoming booking
Allow booking before how much time: This defines how far into the future can bookings be made. Eg. if you choose 3 months, then when the app user chooses this service, they will be able to make a 3 months into future - if today is 20 April, they will be able to make bookings till 20 July
Multiple seats or not: This specifies whether one app user can book multiple seats in the same booking. Eg. This might be useful for booking of theatres/shows etc. If you allow multiple seats to be booked, you have to set the maximum number of seats which can be booked in a single booking.
Price: The amount to be paid for the booking. If you have entered multiple durations for the booking, you will have to enter a separate price for each of the durations.
If you have allowed multiple people to make a booking, then you can choose whether you want the price of the booking to change as per the number of seats selected by the app user. If you check 'Calculate booking price per person' then the price increases for more seats. If the price is 100 and booking is made for 2 seats, then the total payable amount will be 200
Payment Information: There are 3 options for the same -
Payment Optional - In this case, at the last step of booking, the app user will see two options - Pay Later , Pay and Book. Pay Later allows user to make a booking without payment while he can also make the payment by clicking Pay and Book
Payment Mandatory - The App user only sees Pay and Book, payment is necessary to make the booking
No Payment - The App user does not need to make any payment.
Payment Optional and Payment Mandatory can only be chosen if the Payment is enabled in the Settings section of your account and valid credentials for a payment gateway have been added
Service Schedule: You can set the availability of the service you are offering in this section. You can choose the Weekly holidays, and then set the working hours for the rest of the days.
Mark the weekly holidays from the option on the right.
You can choose the 24 hour checkbox to automatically set the availability for the whole day 00:00 - 23:59
For other days, add the working hours while incorporating breaks. E.g. if your hours are 9am to 2pm and then 4pm to 8pm then add the intervals separately
You can use the 'Copy above' to copy the working hours for consecutive days
Apart from the weekly holidays, you can also choose the holidays from the calendar below. You will not receive bookings on these dates
Once you have marked the working hours for different days, see the slots that are generated by clicking on See Slots on the right side. By default they are created using the availability and service duration. Eg. If the duration is 2 hours and timings 10am to 6pm, then the slots would 10am to 12noon, 12 noon to 2pm, 2pm to 4pm, 4pm to 6pm. You will different slots for different possible durations
If you have a booking slot which is ending at 24:00 for any day, then see that the 00:00 for the next is included as available. For example if the availability of service is 18:00 to 24:00 on Monday with duration of 2 hours, then the 22:00 - 24:00 slot will only be formed if Tuesday has availability starting at 00:00
You can change how the slots are created by changing the time difference between consecutive slots (this is the duration of service by default). If you check the option 'Change the difference between starting time of the slot (by default it is the same as the service duration)', then you can enter the difference yourself. E.g. if you choose the time difference as 1 hour and the availability is 3pm to 9pm and duration 2 hours, then the slots would be 3pm-5pm, 4pm-6pm, 5pm-7pm, 6pm-8pm, 7pm-9pm.
Allotting the providers to the service chosen by the app user: For every booking, there has to be a provider assigned to it. First the service is chosen and then a provider is allotted to it. This can be done in 3 ways:
Automatically allocate to the first available provider - For the Time slot chosen, the list of available providers is obtained and the first available provider is assigned the bookings. In this case the app user only chooses the service followed by the time slot
Let the app user choose the provider: The App user is given the list of available providers for the chosen time slot. They can then choose the provider of their liking
Let me allocate providers to the requests made by the user: In this case you receive the booking requests made by the app user. There is no provider allotted and you can do that through the CMS.

If you choose 'Let me allocate providers to the requests made by the user', then the bookings received for that service will be seen under a different tab 'Unallotted' in the All Bookings List.
Linking the Providers: Every service needs to be linked to atleast 1 Provider. For any booking, these are the providers which can serve that particular service.
Once providers are chosen, you can sort the providers (not available if you have chosen 'Let me allocate providers to the requests made by the user' in the option above). The sort decides the order in which you want the bookings to be allotted to the available providers in the case of automatic allocation and the order in which the app user sees the providers in the case where they choose the providers themselves.
Default Status of booking: This defines what will be the status of the booking by default when the app user chooses this particular service. You can choose to automatically Confirm the booking by choosing 'Confirmed' here or you can set it to 'Requested'. If you have chosen to allot providers yourself in the question before, you won't be able to choose Confirmed here as a booking must have a provider assigned for it to be 'Confirmed'.
'Provider information in app when provider is allotted' : You can define here how much of provider info you want app users to see. You can choose to show no info, info with only image, name and description, and all info along with contact information.
If you have chosen the option of app users choosing the providers in one of the previous question, then the 'don't show' option will be disabled here as the app user can see the image, name and description of the provider while choosing the same.
Attaching a form: This allows you to attach a form with the booking for this service. You can choose any of the forms created in the Forms feature of your account. The data of the form filled can be seen in the booking details when the boking is received.
You can make the filling of the form mandatory for the completion of the booking by marking the 'star' icon besides the form.
Adding email to the service: The email added here receive the notifications about the bookings made for this service. Whenever a new booking is made or whenever the app user requests for the cancellation of an existing booking, an email with the relevant details is sent to this email. You can add multiple emails in this list
Department: The Department to which the service belongs. Admins and Users can only see services belonging to their own department.
App users who can see this: Set who can see this service in the app. For more details about this see here
Providers
For every booking to be completed, there needs to be a provider for the same. When a service is chosen, then from the list of providers which have been linked to that service, one must be allotted to complete the booking. Each service can have multiple providers but atleast one. Based on the settings of the service (as explained in the services section above), the app user can choose the provider or is allotted a provider automatically or you can allot the provider yourself as the admin.
Each Provider contains the following specifications
The representative image of the provider: Recommendations are - jpeg / .jpg / .png format, maximum 1 MB, recommended size 320*260 px. This is seen when selecting the provider or once the provider is allotted after booking.
The title and description of the provider
Phone: The reminders, updates, change alerts for bookings are sent on this number as SMSes
Email: The reminders, updates, change alerts for bookings are sent on this email
Send Reminder Before: Defines how much time before a booking starts, the SMS and email notifications should be sent
Serving Capacity: Defines the number of seats/clients a provider can handle simultaneously. Eg. If your provider is a hall, then the total number of seats would be the serving capacity
Provider Schedule: Just as the timings for the availability of a service, same is done for the providers. A Service can have multiple providers with each of them having different availability. E.g. You might offer appliance repair as a service and for the same you can have multiple electricians. Each electrician can have their own working hours. Electricians can offer services only in their own working hours.
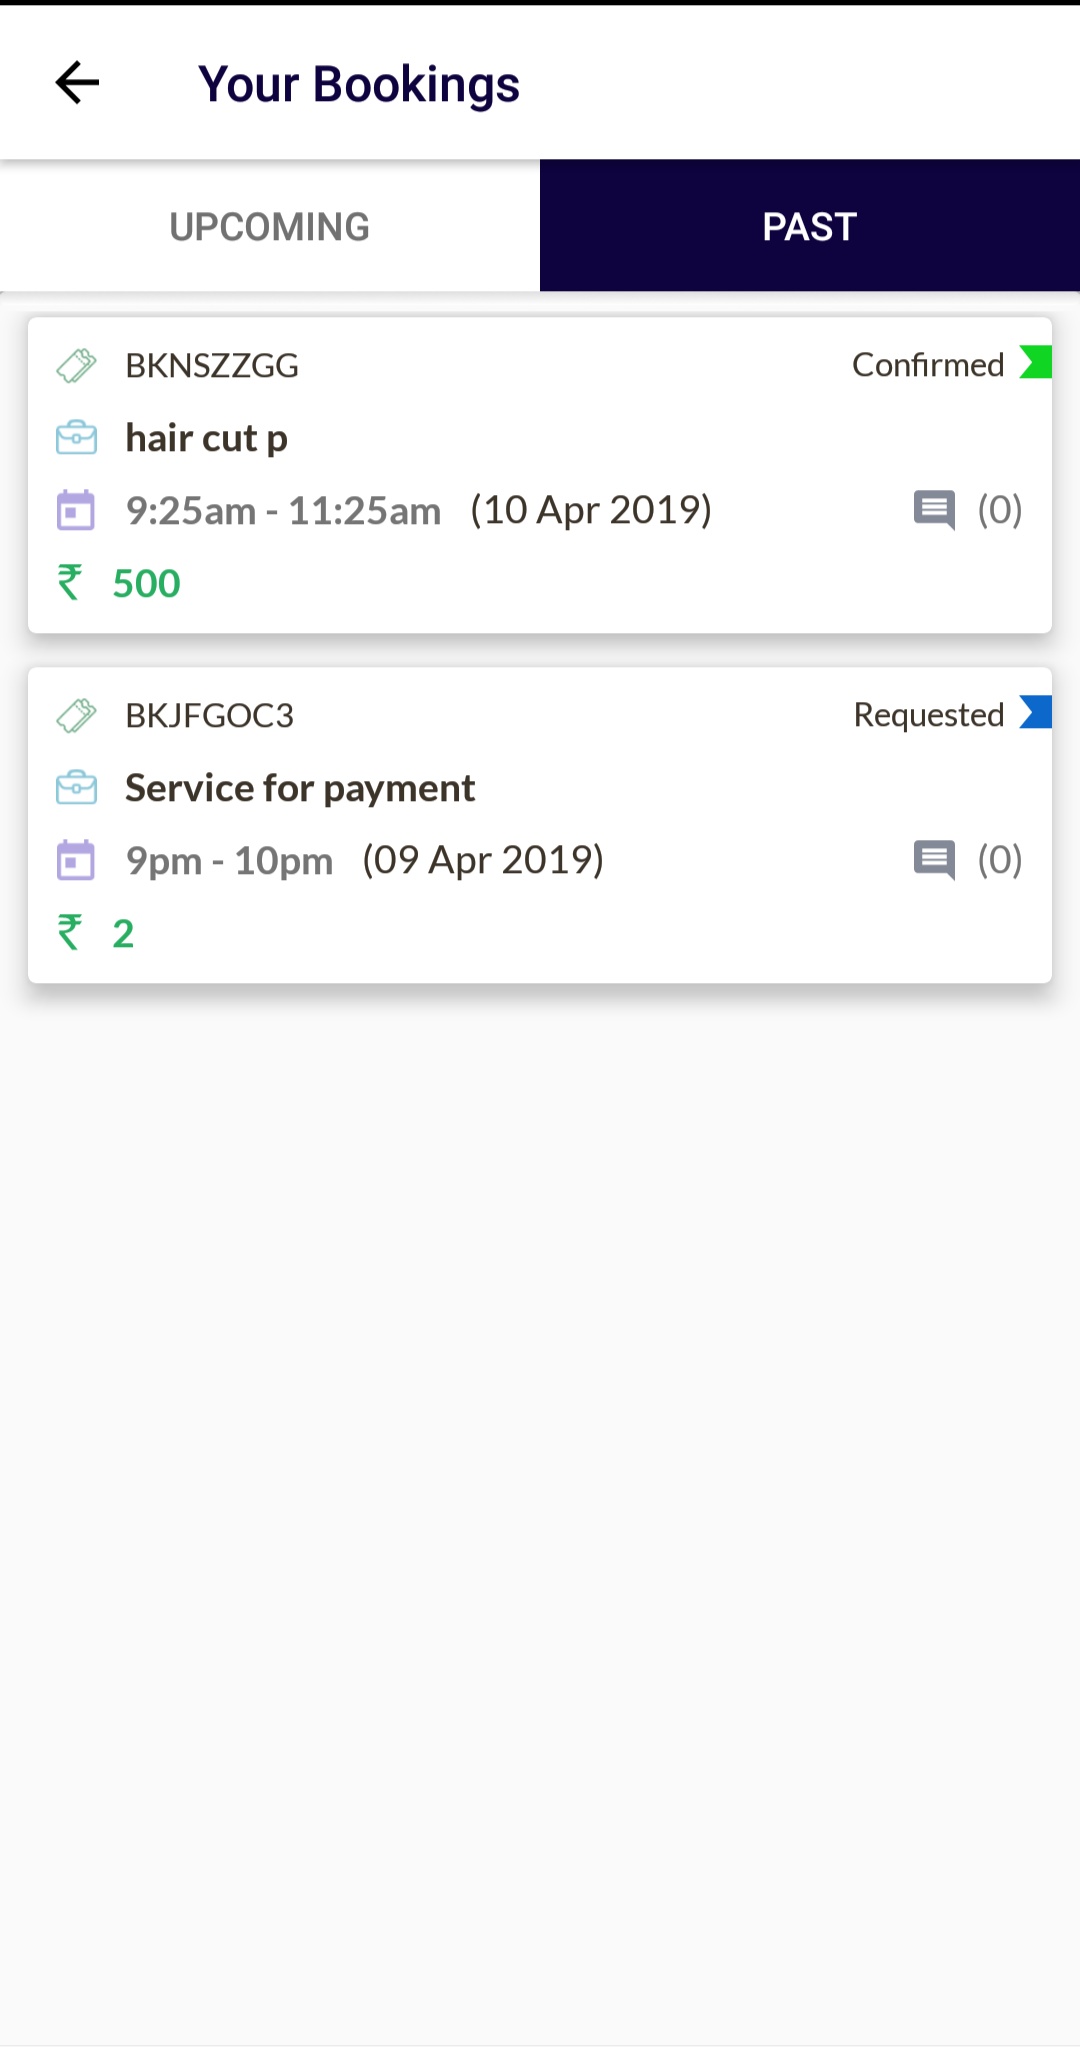
Bookings
All the bookings which you have received or created appear under the link 'All Bookings'. You can apply multiple filters and change the status from the list.
The bookings are grouped into two tabs - Allotted and Unallotted. Bookings for which no providers have been assigned are under unallotted tab. These bookings can only have Requested or Cancelled as their status. Once a booking in allotted to a provider, it is moved to the Allotted tab.
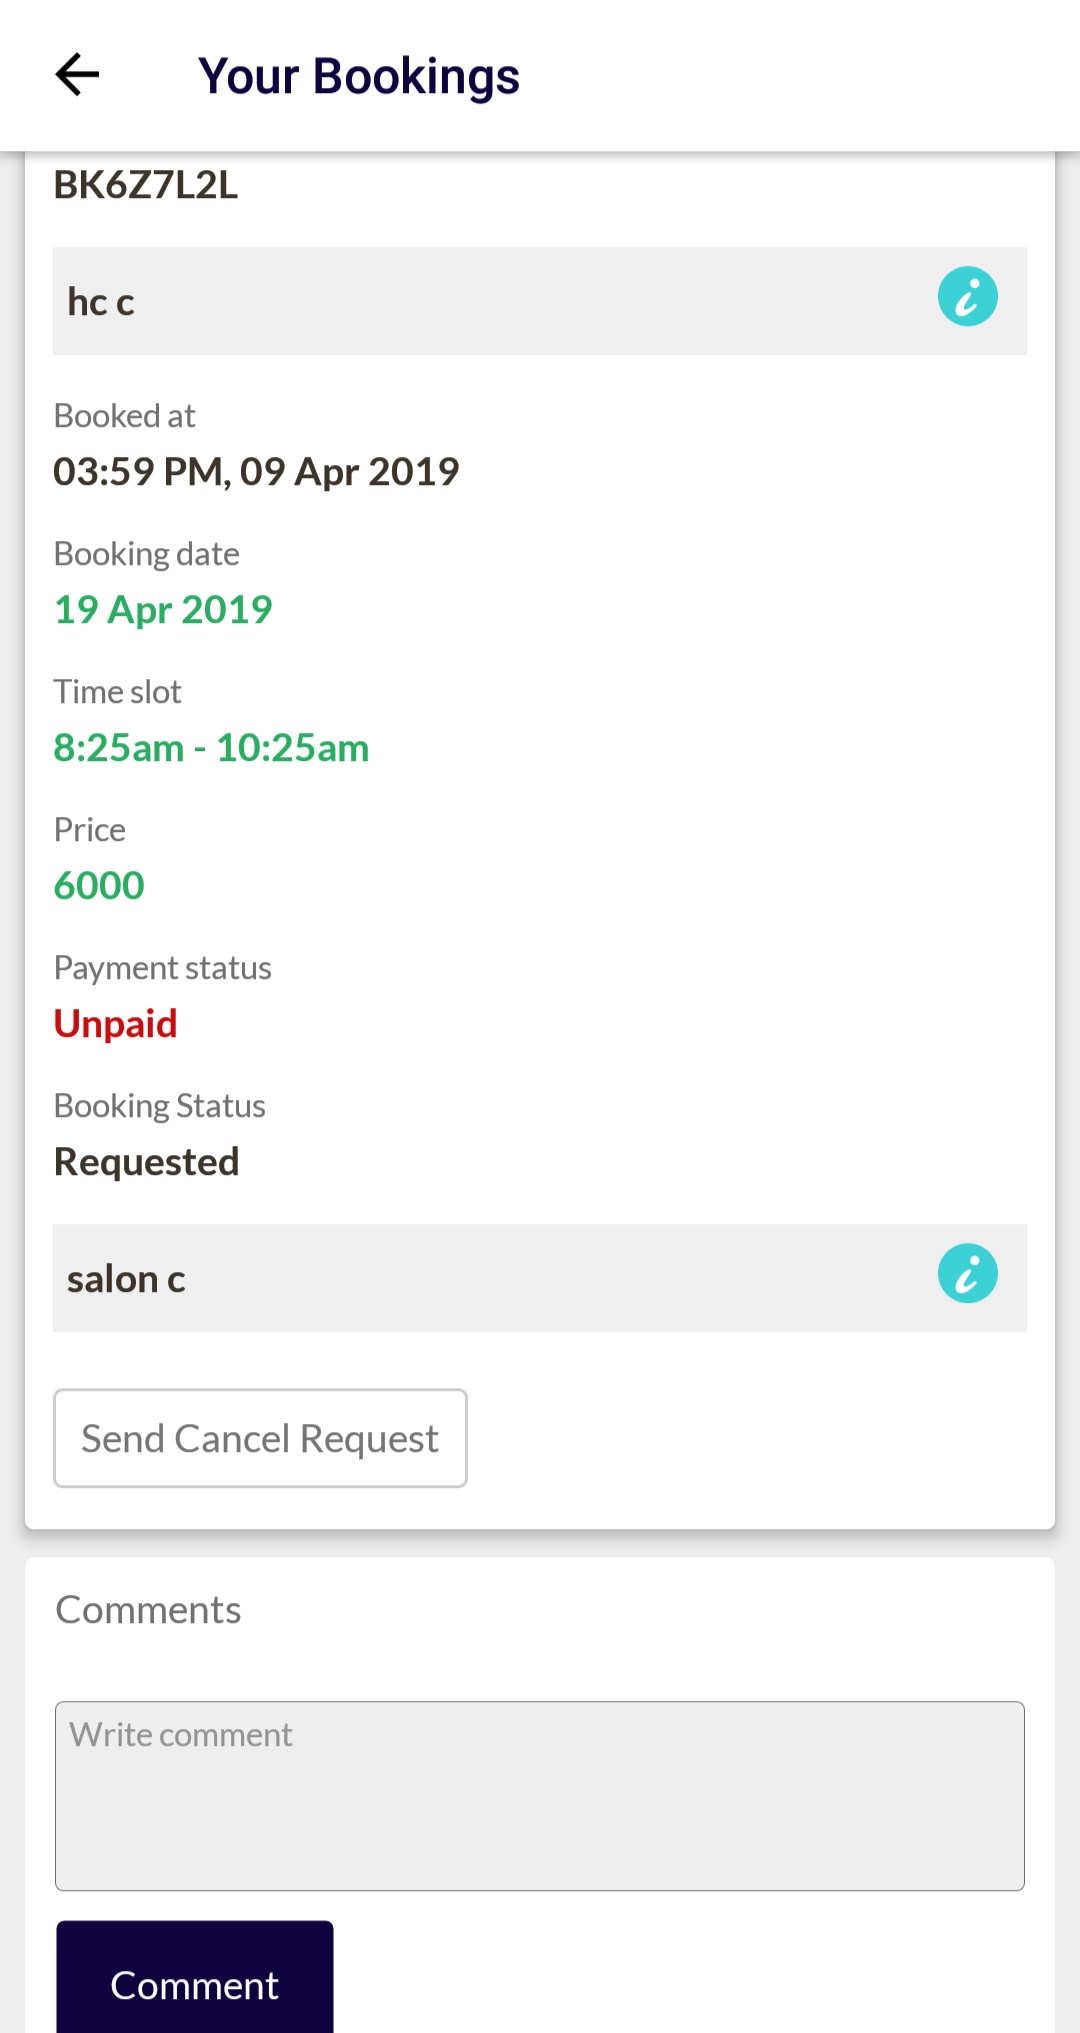
Managing a booking:
Clicking any booking opens its details. You can do the following with a booking
Send Reminder to the client/app user. This sends a notification to their phone reminding of the upcoming booking.
Send a Reminder to the provider. This sends a SMS or email or both (depending upon the contact information of the provider added) reminding the provider of the upcoming booking.
Edit a booking: You can change the slot, number of seats, and provider of the bookings if you wish. You can choose the same from the options as per availability. The Slot already occupied is not visible as available while trying to change the booking. The notification for the change is also sent to the concerned app user and provider.
Change the status. The notification for the change is also sent to the concerned app user and provider.
Add a comment: The Comment added by you is seen by the app user in booking details and a notification for the same is sent.
Apart from this, you can see the activity log of the booking which tells you about the creation and editing of booking in the past.
The App user has the option of sending a Request to Cancel the booking made by them. You receive a notification in your CMS and CMS app along with an email on the added email for the concerned service. An icon is also seen for such bookings in the booking list to indicate the cancel request.
Creating a Booking
Apart from receiving Bookings from your app users, you can also create bookings for your app users yourselves. Click on the 'Add Booking' button at the top right to do the same.
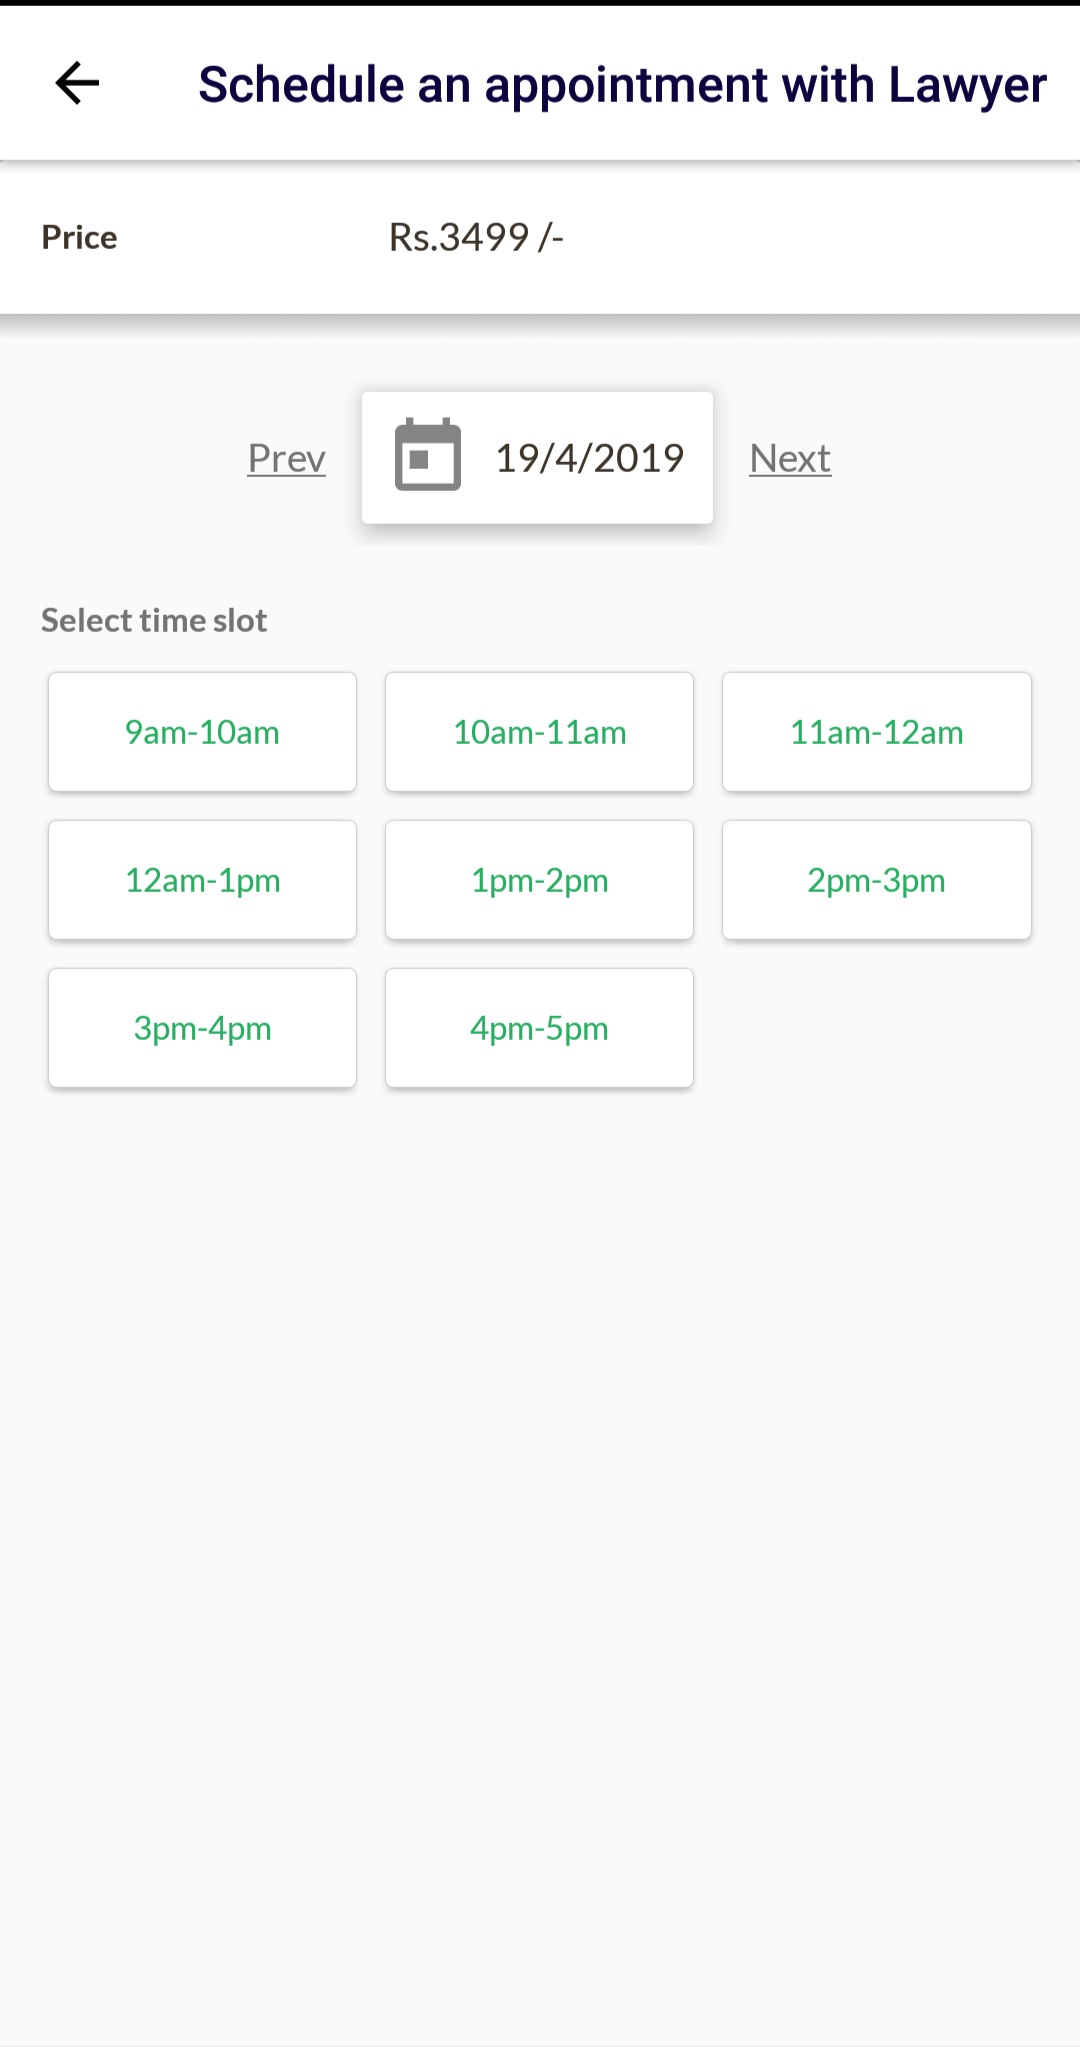
The booking creation goes in this order: Select a service --> Choose the Booking date --> Choose the number of seats (if applicable) --> Choose the slot --> Choose the Provider --> Choose the App user/Client --> Set the Status
You cannot create bookings in CMS for services where the payment in mandatory or where a form submission is mandatory as such bookings require necessary actions/inputs from the app side.
Once the Booking is created, the app user and providers receive notifications about the same. The App user can also see the booking in their existing booking section