
Business Center
What's this?
Business Centre is a comprehensive tool that enables organisations to showcase their products and services. It allows them to receive order requests and in-app payments through a payment gateway. The two payment gateway supported by forBinary are PayU and Razorpay. You can choose either of the two. If you want to receive payments, you have to provide the credentials of the chosen gateway and build the app again. This feature contains two sections:
Payment Links:
You can create Payment Links to receive payments from app users for the services/membership offered by you. You can also create customised payment links and set their visibility to specific customer(s).
Product Categories:
You can use this option to list products under relevant categories in your App. This is your online store. Add as many products as you like and segment them for convenient discovery.
Payment and Requests
Through this feature, you can get two types on inputs from the app users
Payments: App user can select the link or products, and then make an in app payment. For this to work, you will need to have an account at either PayU or Razorpay (we can help you with the same) and you need to enter the account credentials in the payment setting section under your profile (top right side)
Requests: The app users can also send you a request without making any payment. You don't need any payment settings for this to function
When to use?
This is used by organisations to:
List their products and arrange them in specific categories.
B2B orders
One time payments like membership fees, renewal fees etc
Receive orders for Cash on Delivery
Donation
Analyse the details of the orders and payments received
Preference and Customisation
Before your app users can use this feature, we suggest that you go through the setup of Business Center and make some changes as per your use case. Go to the Settings menu under the profile icon on the top right. You will see Business Center preferences at the top. The changes that you can make here:
Choose if you want to receive payments in-app or receive order requests or both. You will see the action buttons (below) change for both Payment Links and Product Categories as you make changes in your choice. If you choose one of either payment or request, app user will see only 1 button; there will be two buttons if both are enabled.
If you choose to enable payment, you will have to add valid credentials of your account in the payment gateway
You can choose the button text for the action buttons that your customers see in both the sections. You can edit the text separately for both the sections. You can see the preview of the screens that your customers see when you click on the edit icon next to the sections under 'Button text in Business Center'. Choose the text which fits best your use case and see the preview change.
You have to build the app again to apply any changes made to the Business Center settings
Once you've made all the changes, you will have to click on the button 'Build App Again' . We will make the changes requested and generate a new apk and send it to you. You can then update your app on the Play Store or send the updated apk directly to your app users.
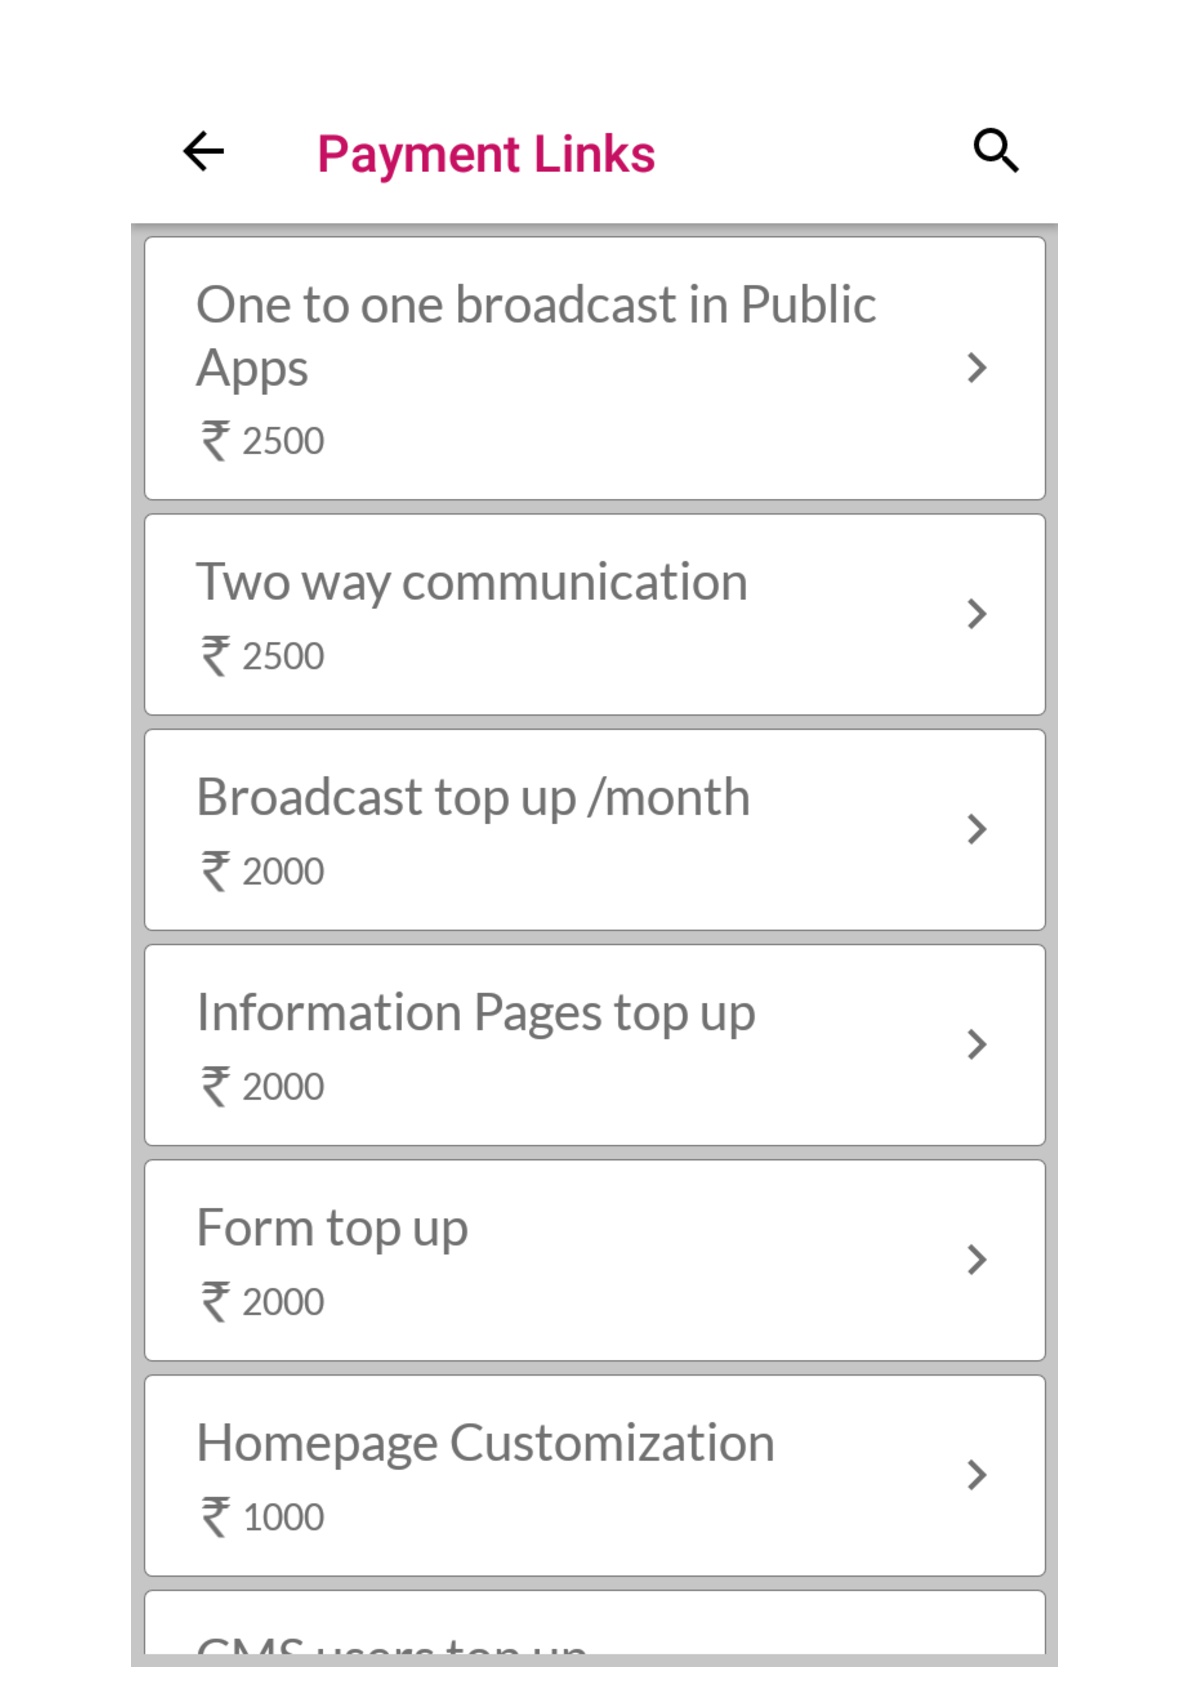
Payment Links
You can see all the payment links that you created in this section. You can do the following from the list of payment links:
Toggle the status to Live/Offline
Edit a payment link's details
See the payments and requests received against each payment links
Create a new payment link
Step 1: Click on 'Create New' from under Business Centre > Payment Links
Step 2: Enter the name and description of the payment link.
Step 3: Specify the amount associated with the link. Include taxes if any applicable.
Step 4: Authorise the department that can manage the link
Step 5: Select the required users who can view the link
You can customise and make different links for different app users. You can also ensure that only a particular users sees a payment link if that is your requirement
Step 6: Add attachments or interlink other app elements
Step 7: Switch on the email notification toggle to receive email updates when any payment is made by the app user. Add the email IDs that you want to be notified
Step 9: Click on ‘Create’. You will then be asked if you want to make it live. You can choose to keep the it offline or make it live. If you choose to make it live, you will then have an option to send the app users who can see this a notification about the status change. You can choose to send the notification or not as per your convenience.
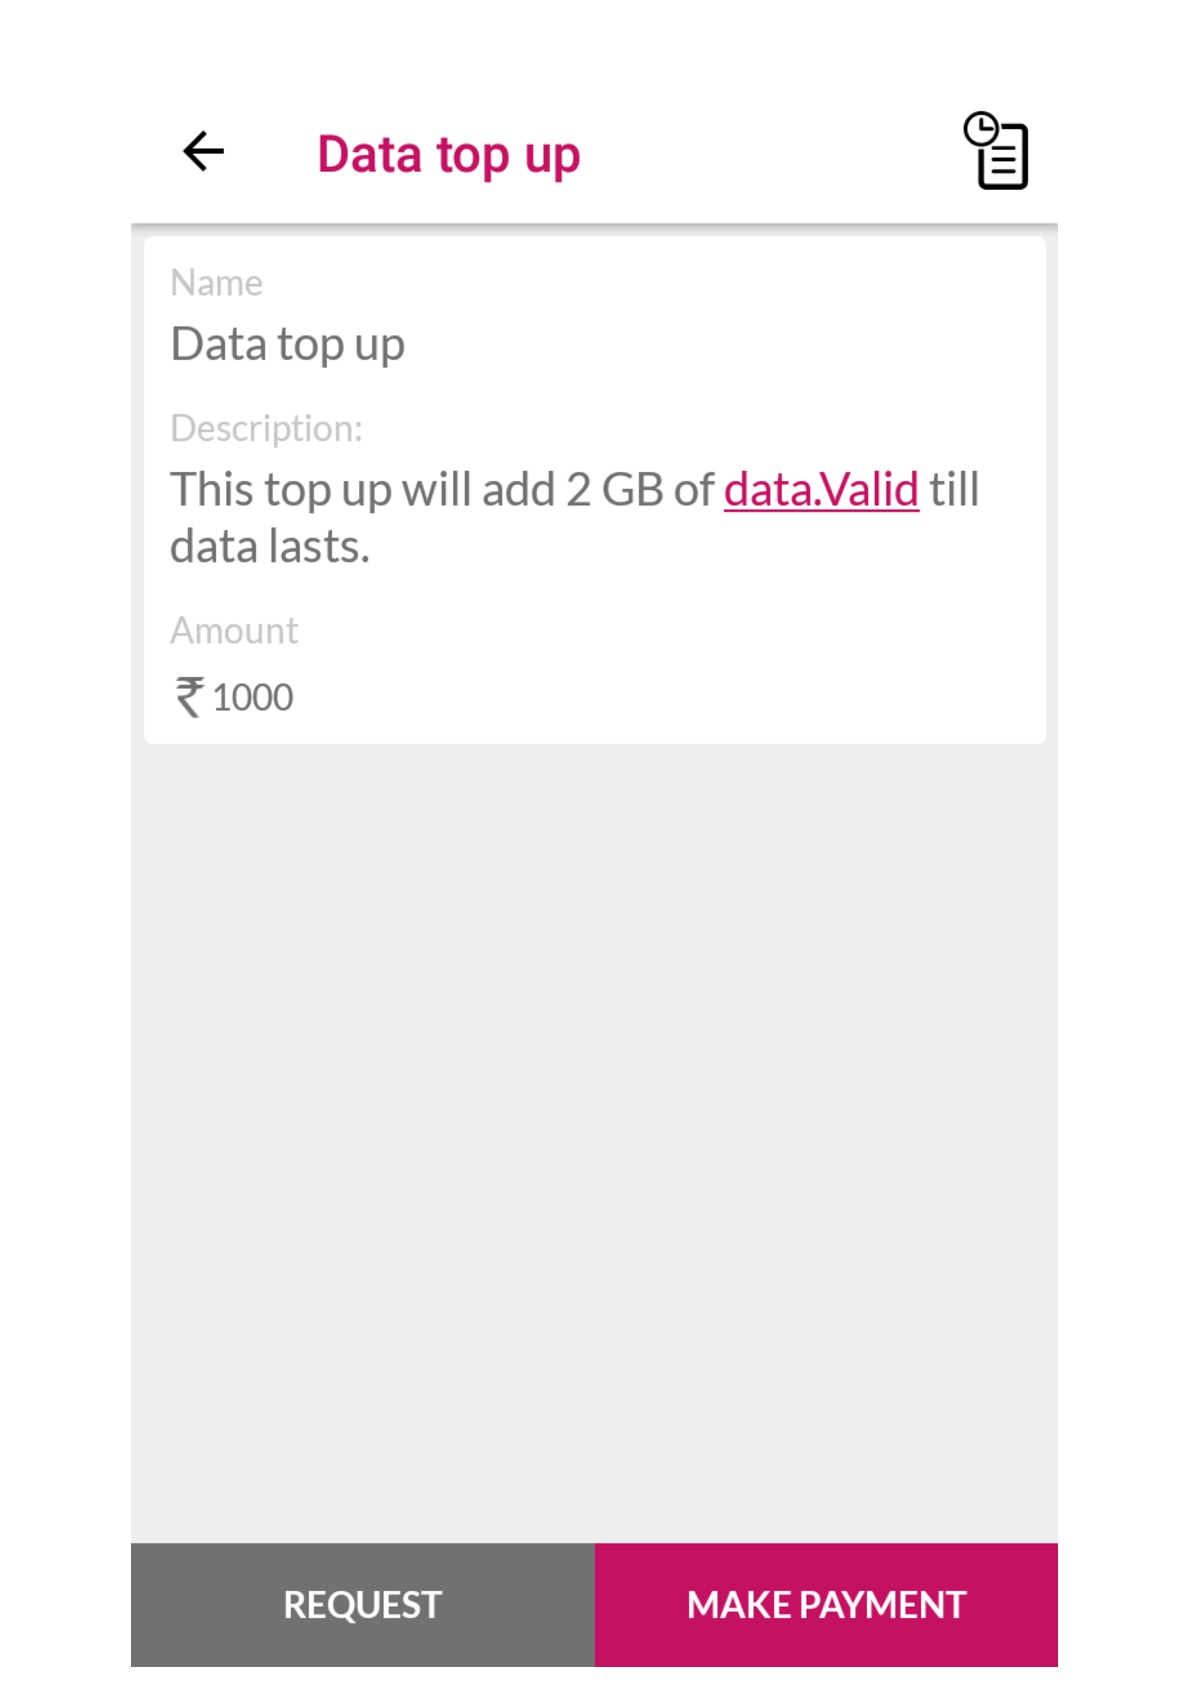
Review Payments and Requests - Payment Links
Depending upon your choices in the Business Center preferences, you can receive payments or requests or both for every payment link that you make. They are listed below the payment link details. Select any payment link and scroll down to see the list of payments and requests received separately. You can change the status of these to notify the app who made the request/made the payment. You can also add a comment by clicking any of these. The app user will be notified again.
Payment Categories
You can see all the product categories that you created in this section. You can do the following from the list of payment categories
Toggle the status to Live/Offline
Edit a category's details
Click on any category to see it's contents
See the list of all payments and requests received in this section below
Add email IDs on which you want to receive payment and request alerts
Create a new Product Category
Step 1: Click on 'Create New' from under Business Centre > Payment Categories
Step 2: Enter the name and description for the category to be created.
Step 3: Upload the cover image, jpeg / .jpg / .png format, maximum 1 MB size, recommended ratio 1:1.
Step 4: Authorize the department that can manage the category
Step 5: Select the required users who can view the category
Step 6: Add attachments or interlink other app elements
Step 7: Specify whether you want to add prices to the products that will belong to this category
Step 8: Click on ‘Create’. You will then be asked if you want to make it live. You can choose to keep the it offline or make it live. If you choose to make it live, you will then have an option to send the app users who can see this a notification about the status change. You can choose to send the notification or not as per your convenience.

Add a new Product
Step 1: Select the Category that you want to add the product to from the list of Product Categories
Step 3: Click on ‘Add Product’
Step 4: Enter the name and description for the product to be created.
Step 5: Upload the images of the product. You can upload multiple images, .jpeg / .jpg / .png format, maximum 1 MB size, recommended ratio 1:1.
Step 6: Enter the amount to be paid by the app users for the product. This will be visible only if you choose to add prices in this category's details while creating it
Step 7: Click on ‘Create’. You will then be asked if you want to make it live. You can choose to keep the it offline or make it live. If you choose to make it live, you will then have an option to send the app users who can see this a notification about the status change. You can choose to send the notification or not as per your convenience.
Review Payments and Requests - Product Categories
Depending upon your choices in the Business Center preferences, you can receive payments or requests under Product Categories. They are listed below the product categories. You can change the status of these to notify the app who made the request/ payment. You can also add a comment by clicking any of these.