
Forms
What's this?
A comprehensive tool that enables easy data collection, the forms stands out due to its exceptional functionalities. It enables organisations to create custom forms with a wide variety of questions to choose from. The data submitted by the app users can be viewed separately for each form, thus enabling data analysis.
When to use?
This is used by organisations for:
Data collection and surveys
Work reporting and inspections
Approvals
HR requests
Service requests and updates
Booking
Attendance
Forms list
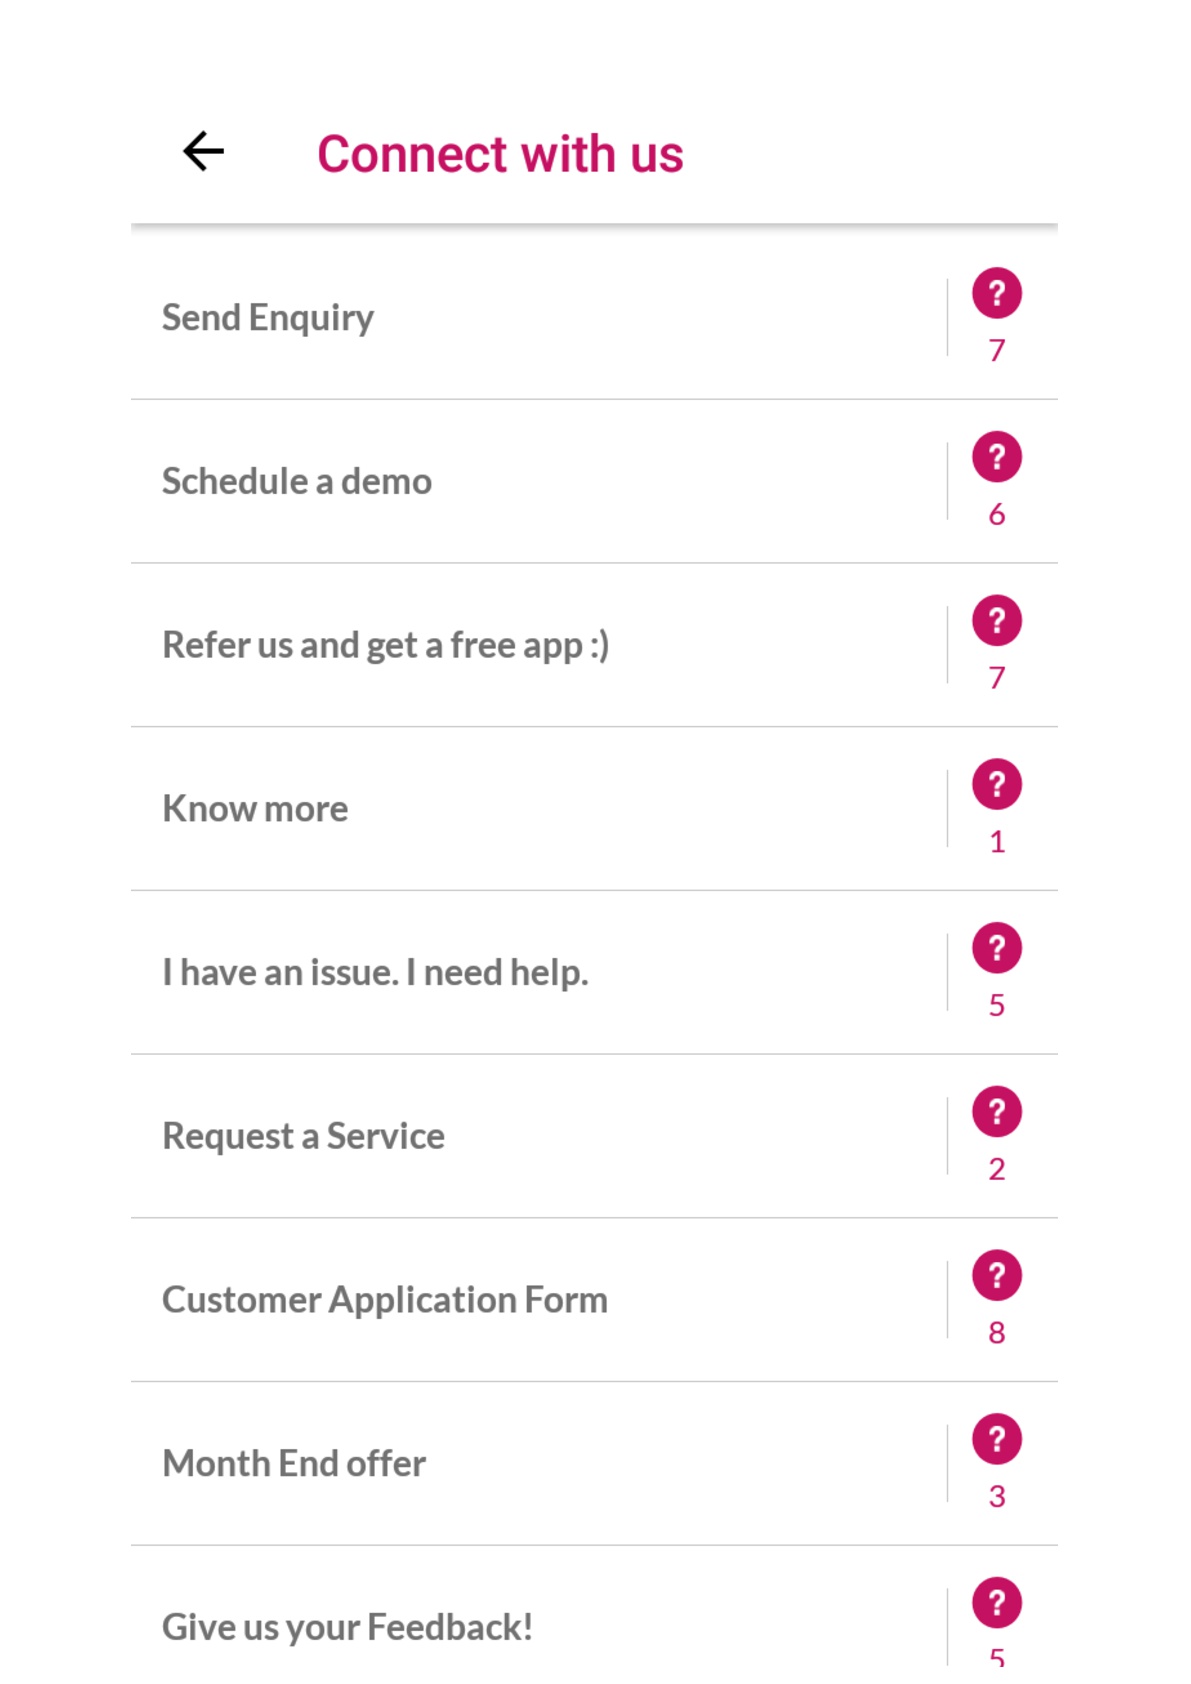
There are infographics giving information about the current status of forms and submission numbers at the top. To set the order, you will have to drag and drop them to the position you want them to appear in the app. All the existing forms are visible in a list. The list has following;
Online/Offline Toggle: You can make a form live on the app or keep it offline with this toggle
The number of questions added in the form
Total numbers submissions received against the form
Edit: To edit the form details
Copy: To create a copy of the form along with all the questions
Delete: To delete a form
Creating and editing a form
When you click any existing form, you are shown some basic analytics about the submissions received at the top
Follow along the below given steps to create a form:
Step 1: Select ‘Create New’
Step 2: Two tabs will open on the screen - Edit Tab and Questions Tab. Type in the necessary details in the Edit Tab:
Name of the form
Department to which the form belong (only the CMS users belonging to the chosen department will be able to see this form, superadmins can see everything)
App Users that can view the form, see more here;
Link other app elements. These will be seen when the app user submits the forms. Read more about interlinking other elements here
Lastly you can find a toggle for receiving email updates (a mail will be sent to the added email IDs)
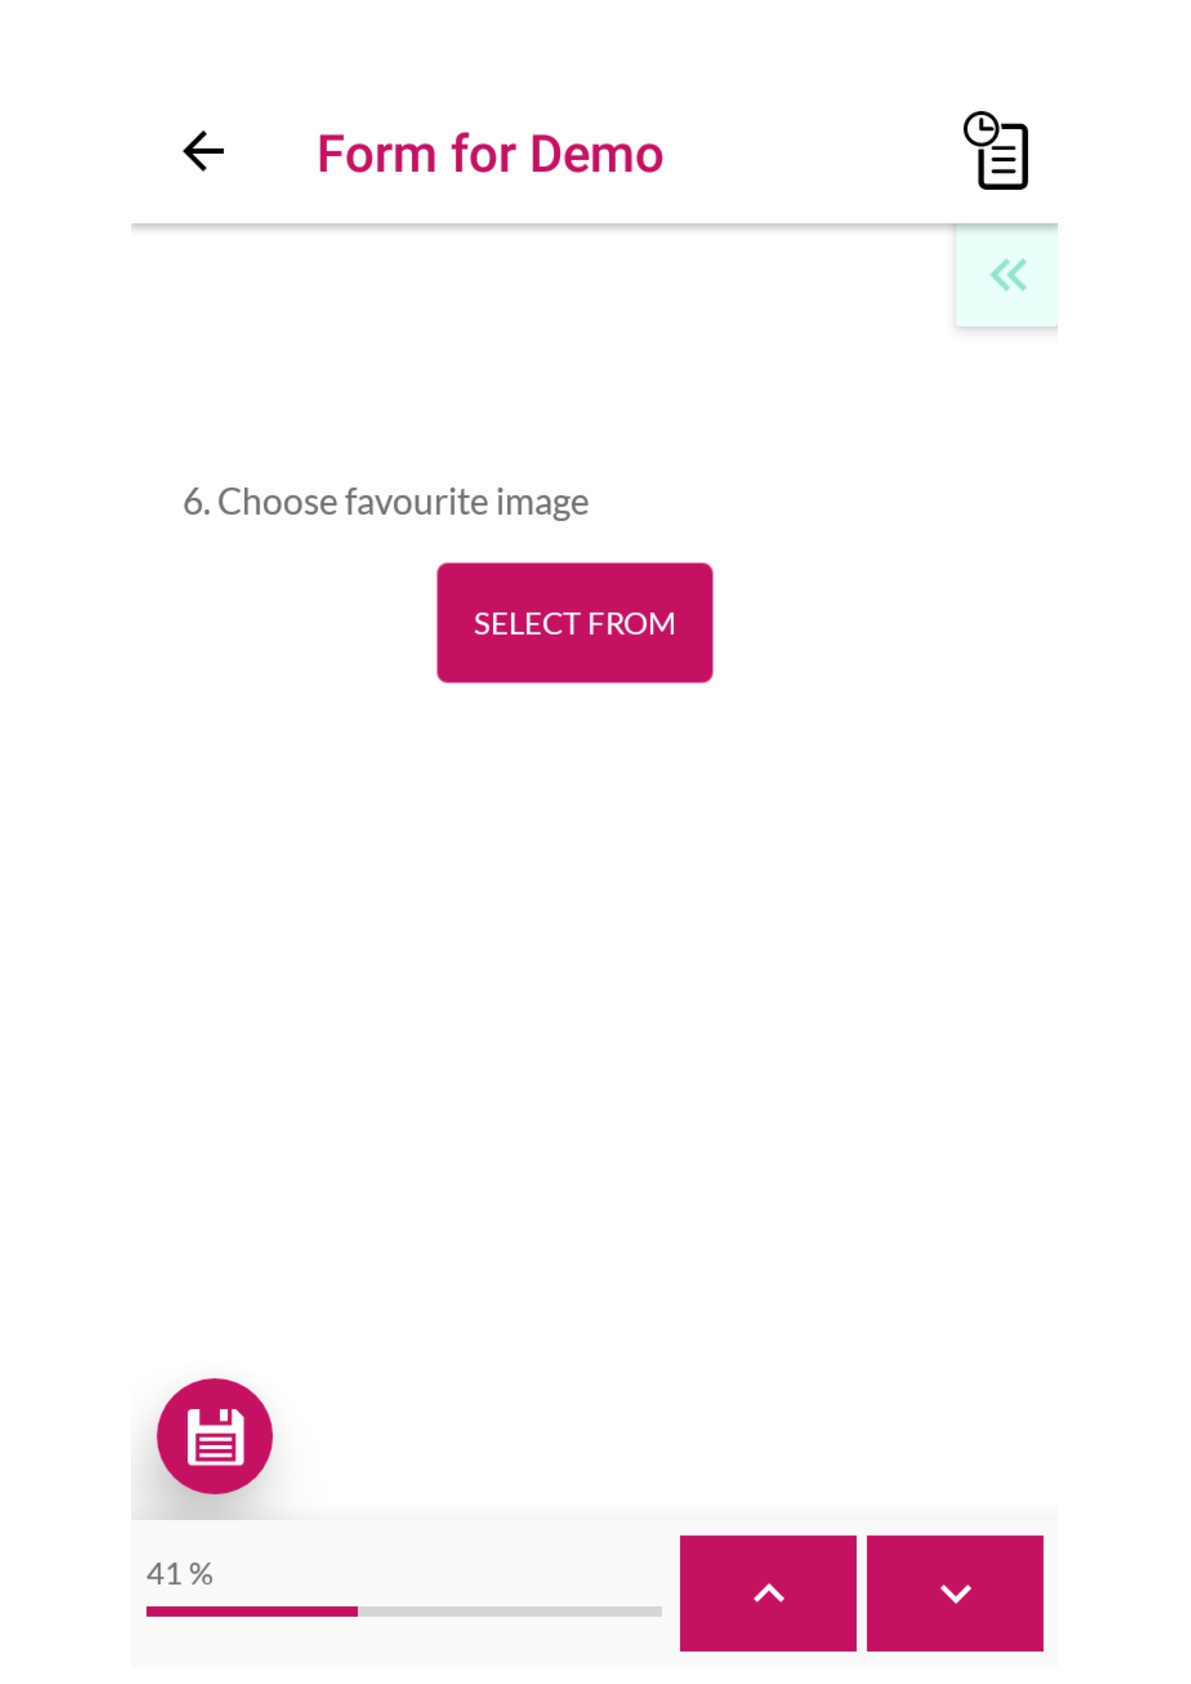
Step 3: Further move on to the Questions Tab. This step is basically designing your custom form with questions of your choice. All the different types of questions are explained below. The preview of each of the questions is visible while adding/editing them.
Details of questions can’t be edited when once the form is saved. You can only add or delete questions later
You Add the questions and edit them.
You can copy already added questions.
You can also change the order of the questions using drag and drop.
You can add images to all the questions
You can set any question as mandatory (app user won't be able to submit form without answering that question)
You can add pre-filled inputs for the questions, can be used where particular responses are expected.
Step 4:Once you are done adding and editing questions, click on 'Create'. Your form will be created. You will then be asked if you want to make it live. You can choose to keep the it offline or make it live. If you choose to make it live, you will then have an option to send the app users who can see this a notification about the status change. You can choose to send the notification or not as per your convenience.
You can't save a form without adding any questions
Form Question types
Welcome Screen
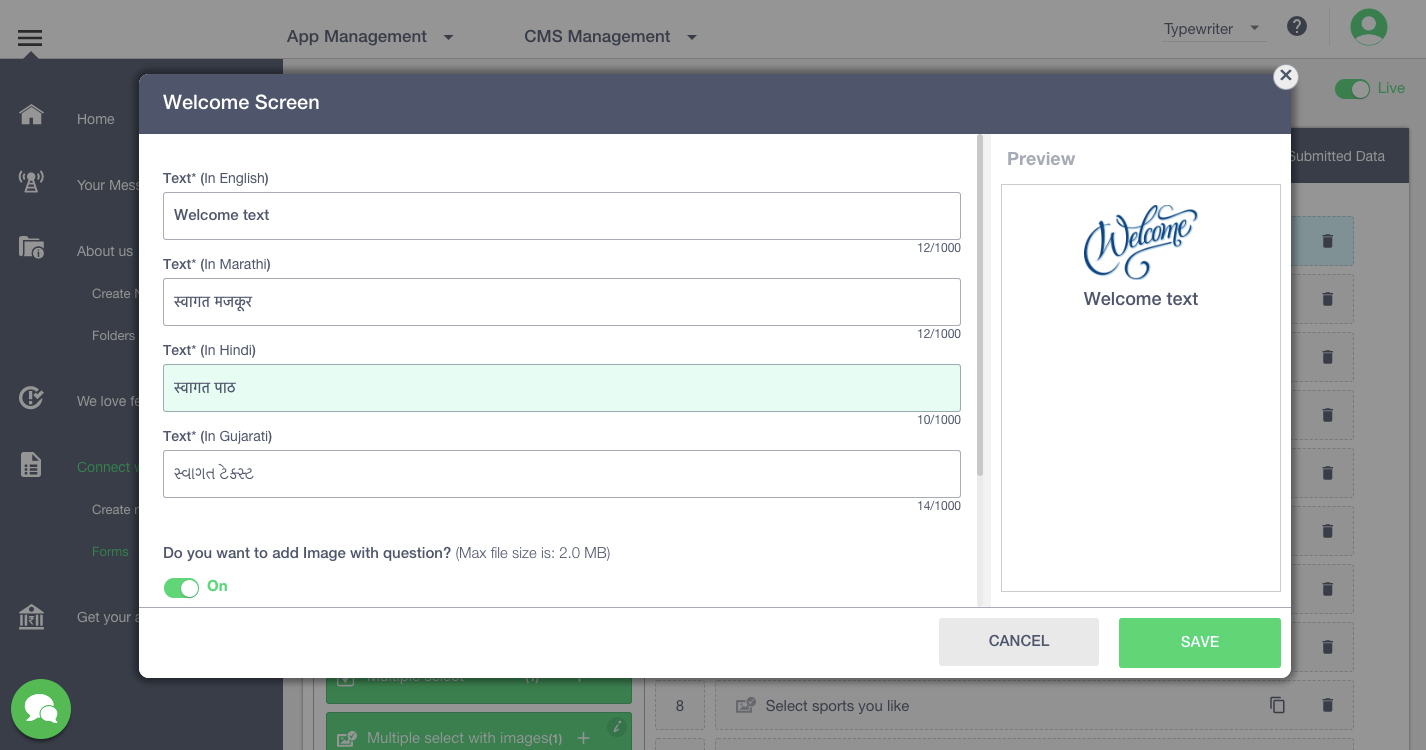
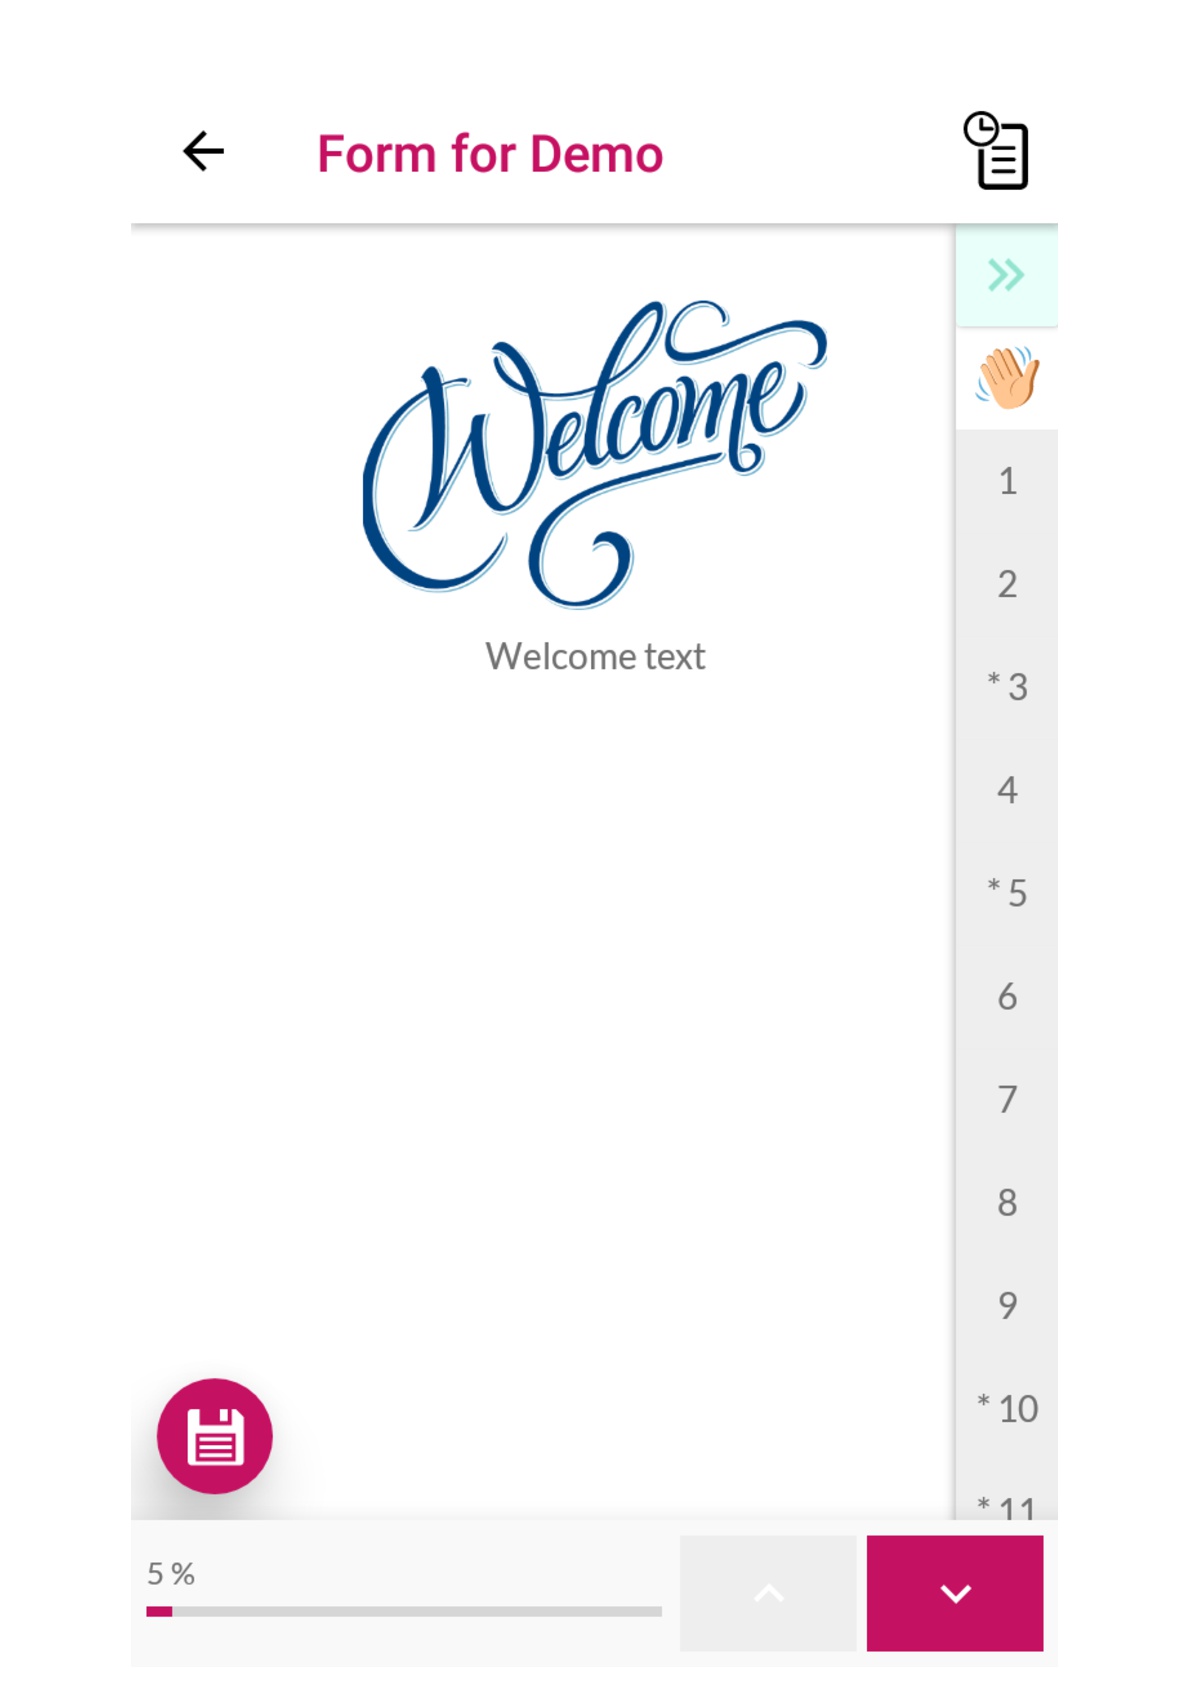
It is the initial message that you want to show your app users before they fill the form.
Click on ‘Welcome Screen’ (left panel in Questions tab)
In the pop - up window, enter the text and upload an image (if required)
Press ‘Save’
The Welcome Screen will be added to the form.
Short Text
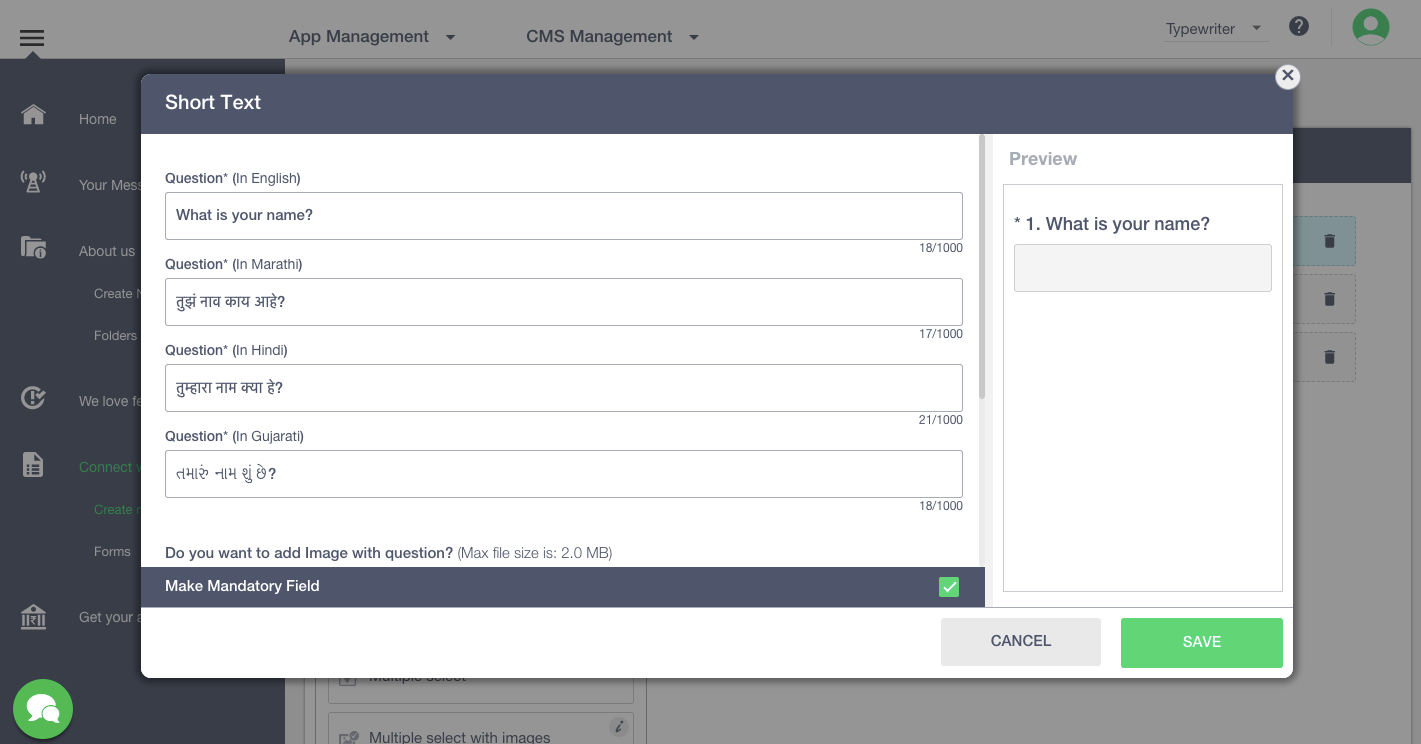
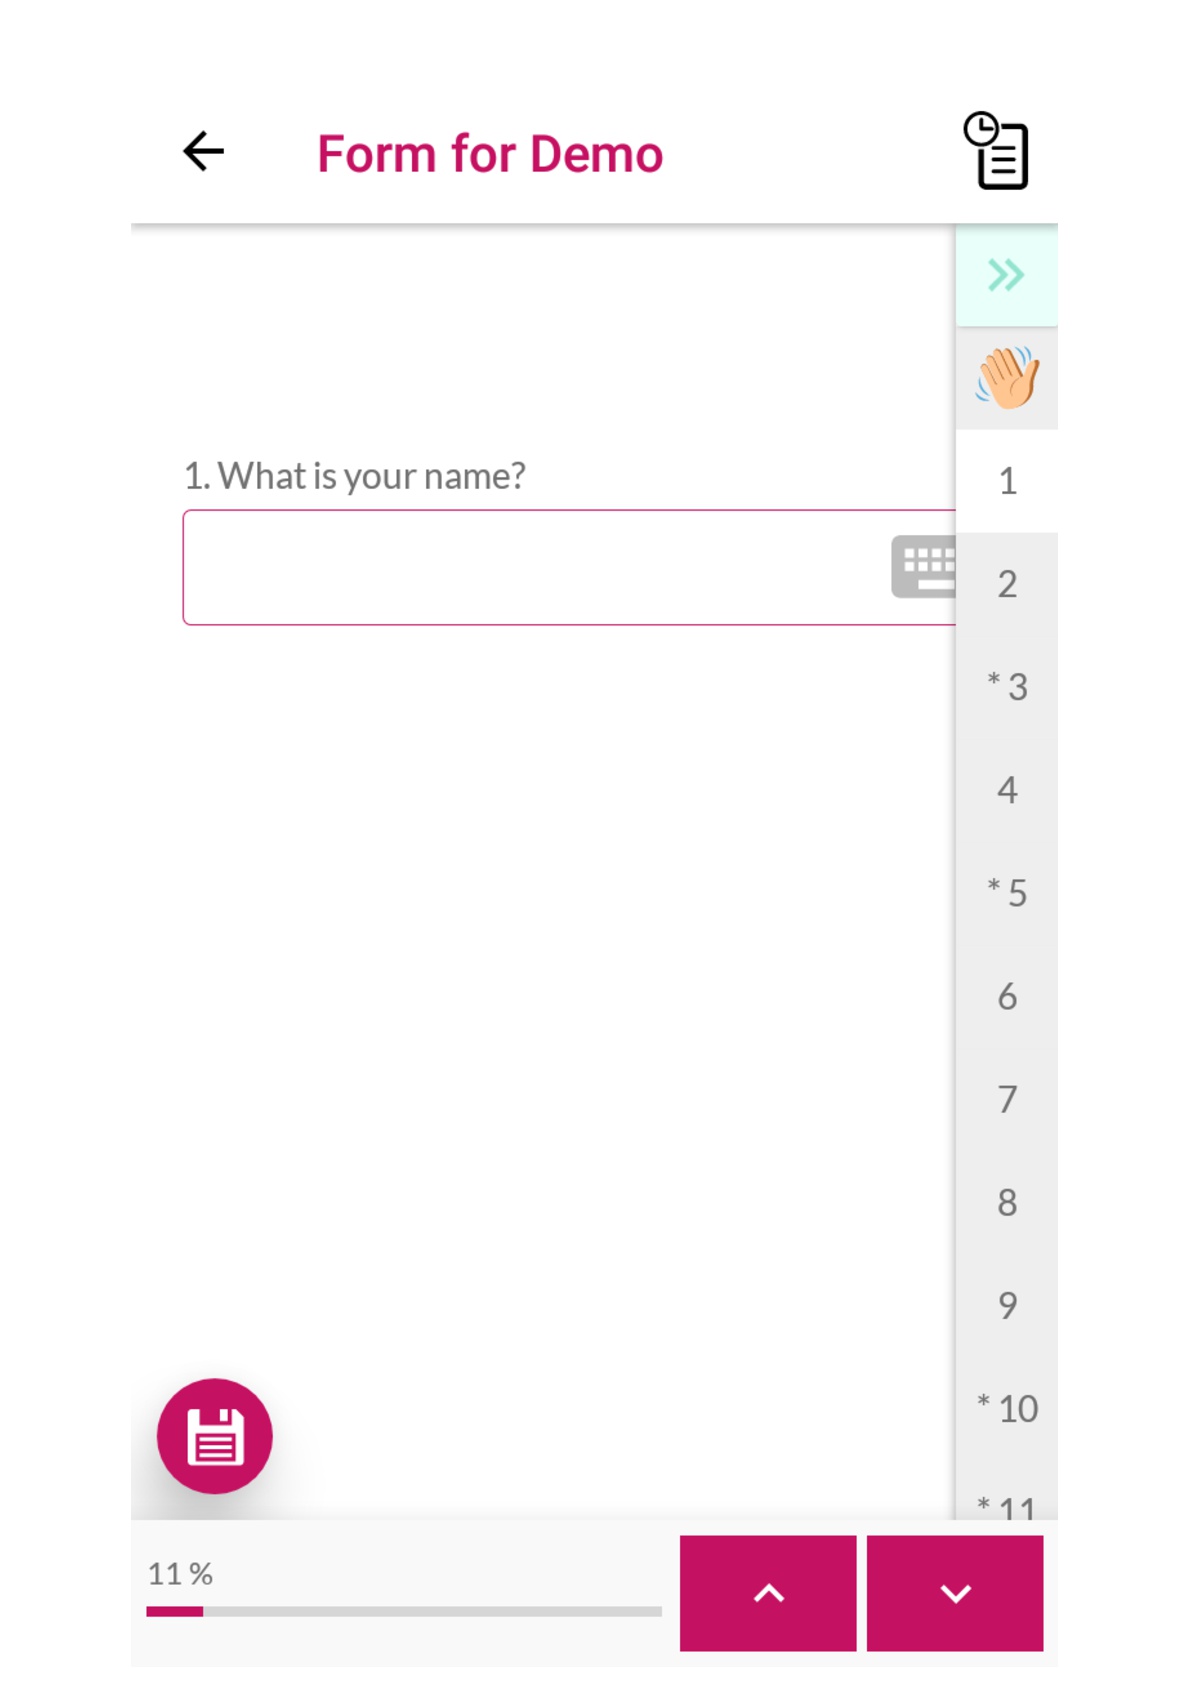
These are the questions that require small responses (1 - 2 lines).
Click on ‘Short Text’ (left panel in Questions tab)
In the pop - up window, enter the question and upload an image (if required)
Add condition if needed (through this you can limit the number of characters that can be entered in the input box)
Switch on the pre-fill toggle, if you want a default text to appear in the input box
To make the question mandatory, you can check the box present at the bottom of the window
Click on ‘Save’
The short text question will be updated in the form.
Long Text
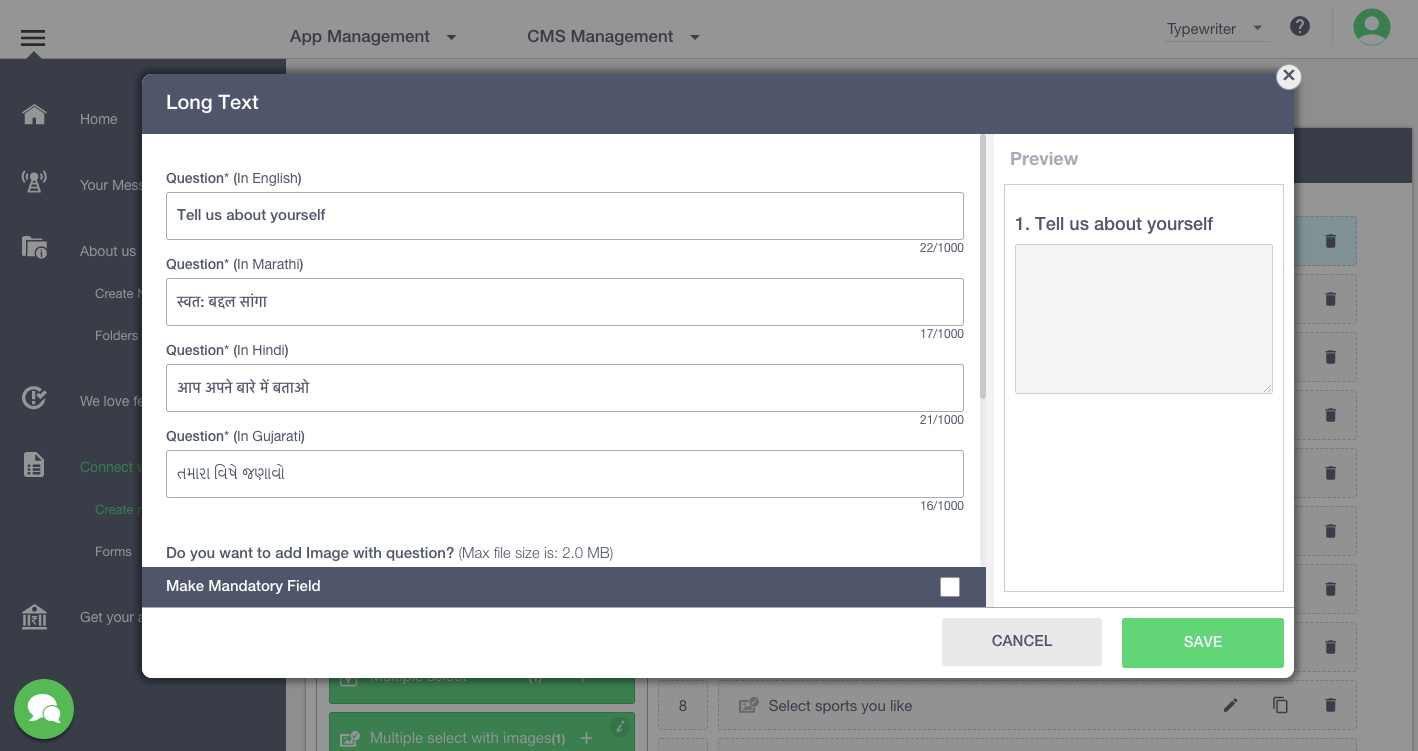
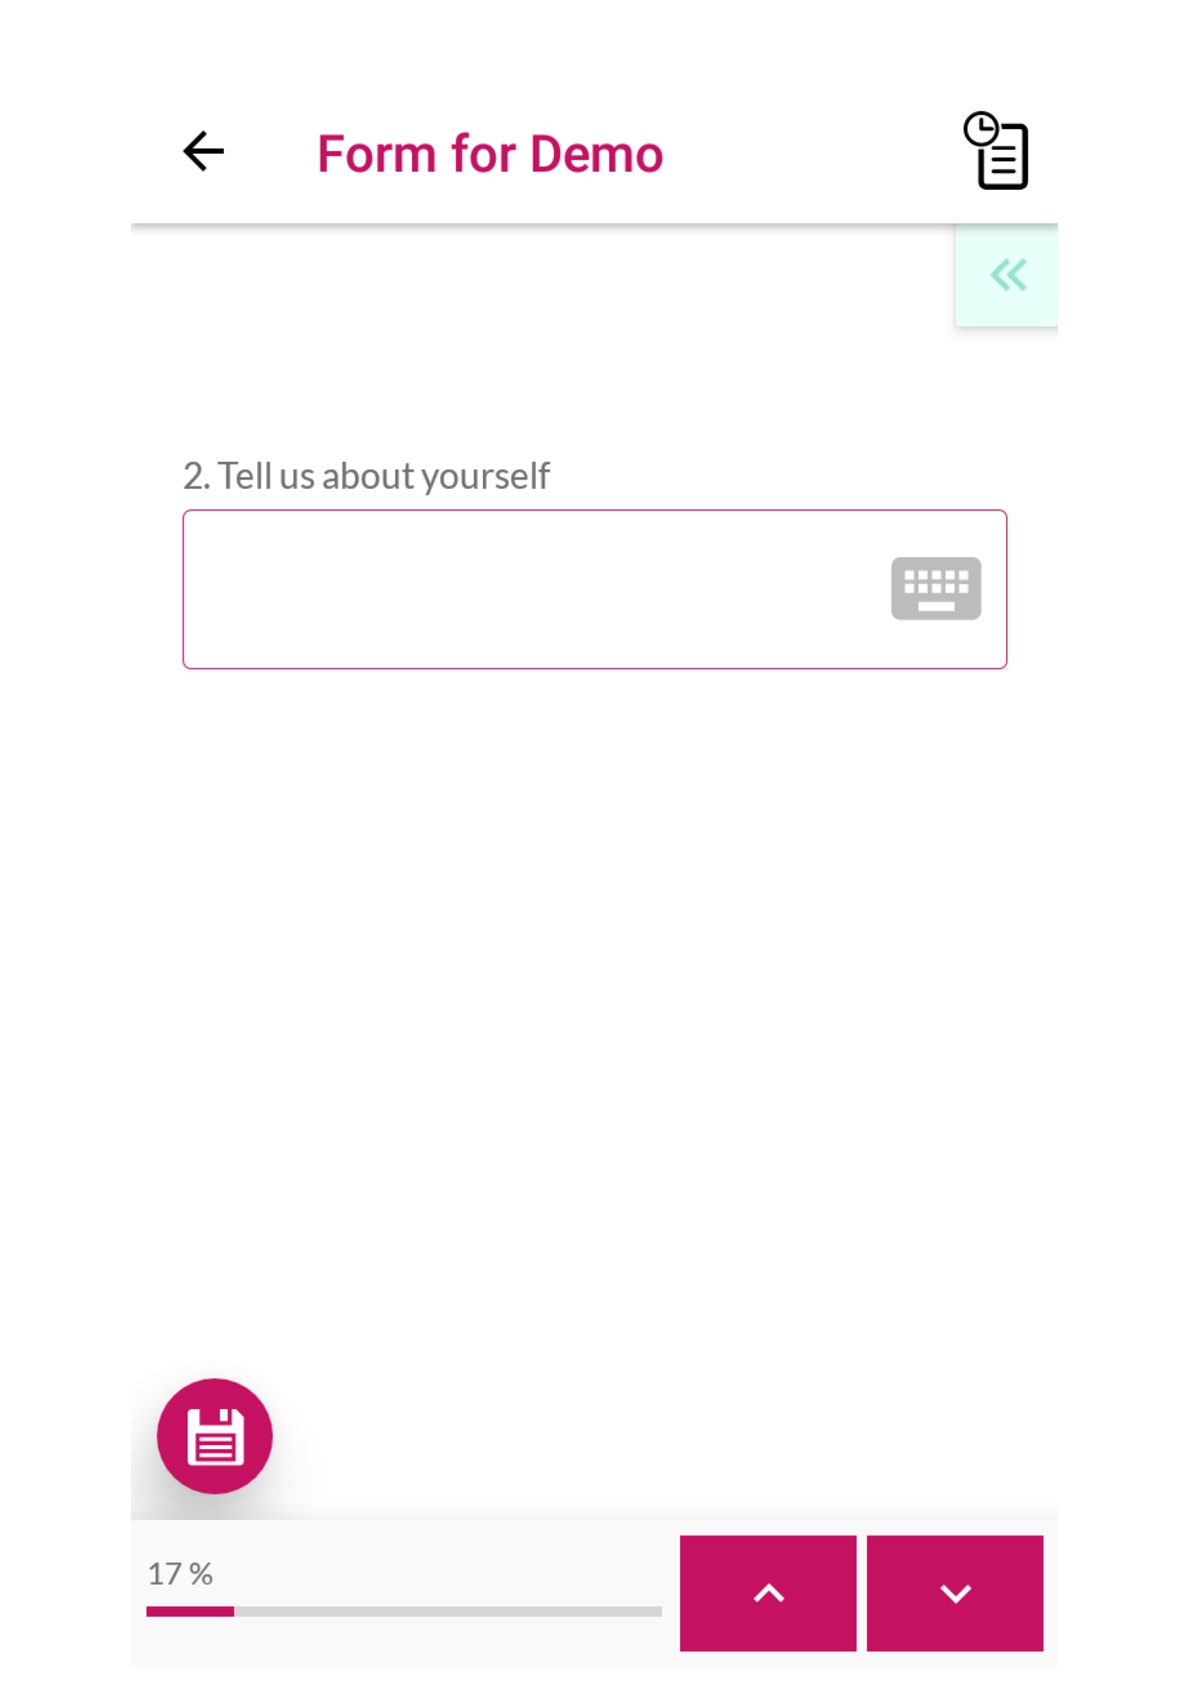
These are the questions that require longer responses (3 - 4 lines or more).
Click on ‘Long Text’ (left panel in Questions tab)
In the pop - up window, enter the question and upload an image (if required)
Add condition if needed (through this you can limit the number of characters that can be entered in the input box)
Switch on the pre-fill toggle, if you want a default text to appear in the input box
To make the question mandatory, you can check the box present at the bottom of the window
Click on ‘Save’
The long text question will be updated in the form.
Number
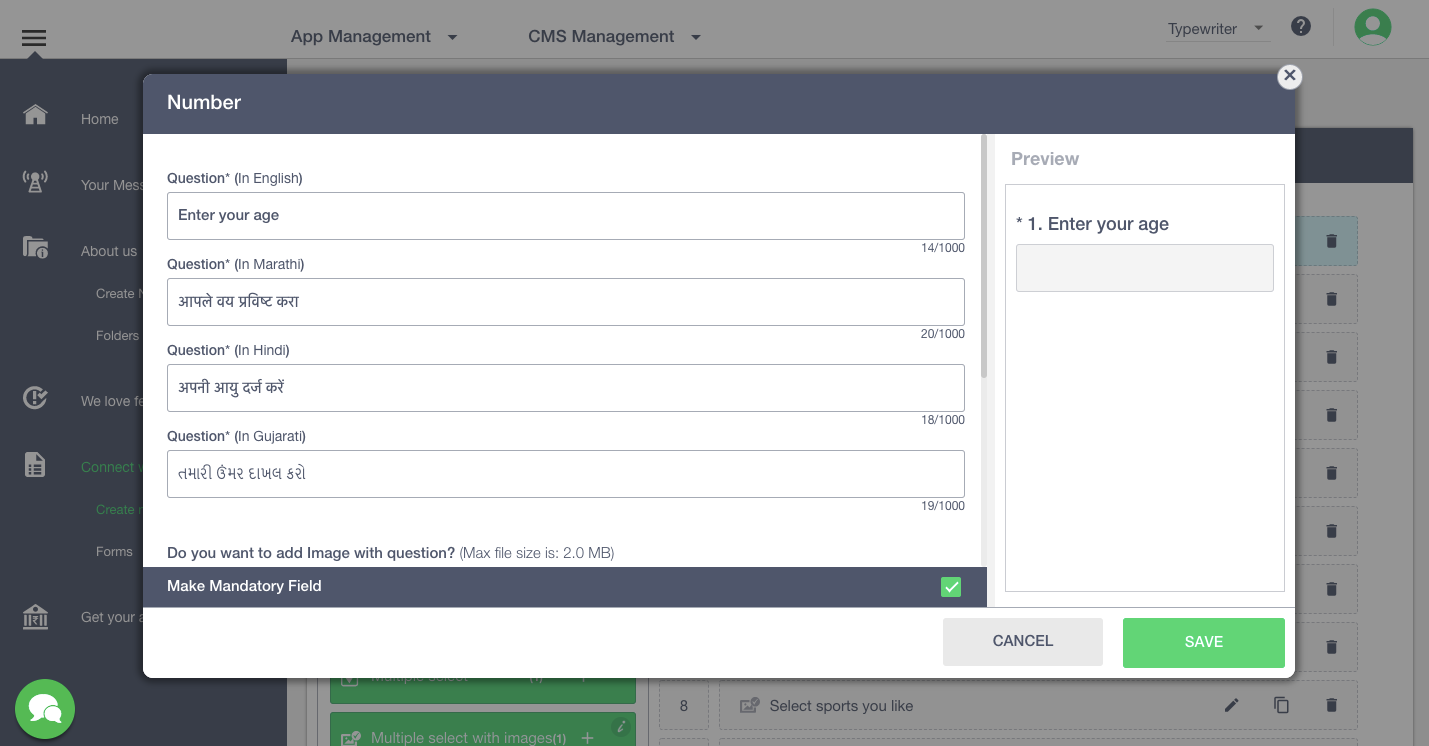
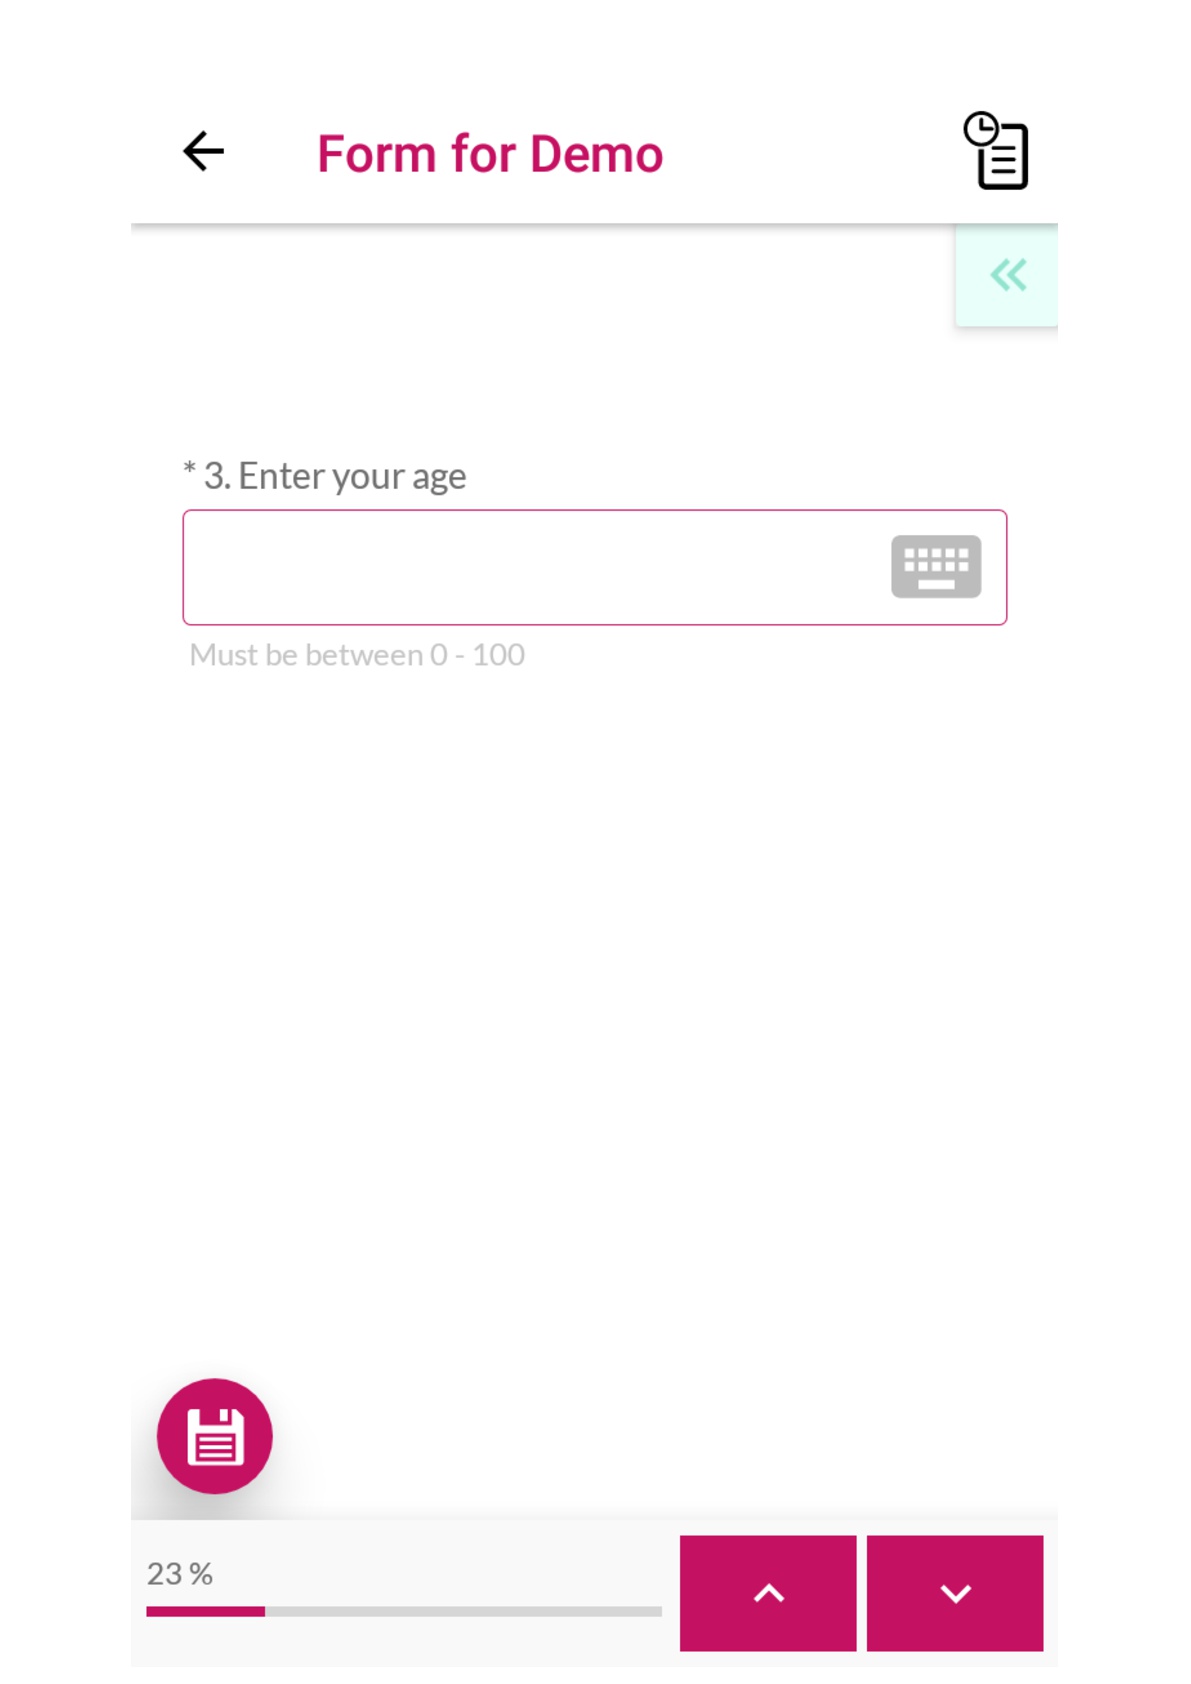
These are the questions that require numerical input.
Click on ‘Number’ (left panel in Questions tab)
In the pop - up window, enter the question and upload an image (if required)
Add condition if needed. The different conditions which can be applied to the input are: Value range- you can enter the range in which input is accepted ; condition on the number of digits- you can specify the maximum, minimum or the fixed number of digits you want as input.
Switch on the pre-fill toggle, if you want a default number to appear in the input box
To make the question mandatory, you can check the box present at the bottom of the window
Click on ‘Save’
The question will be updated in the form.
Number Range
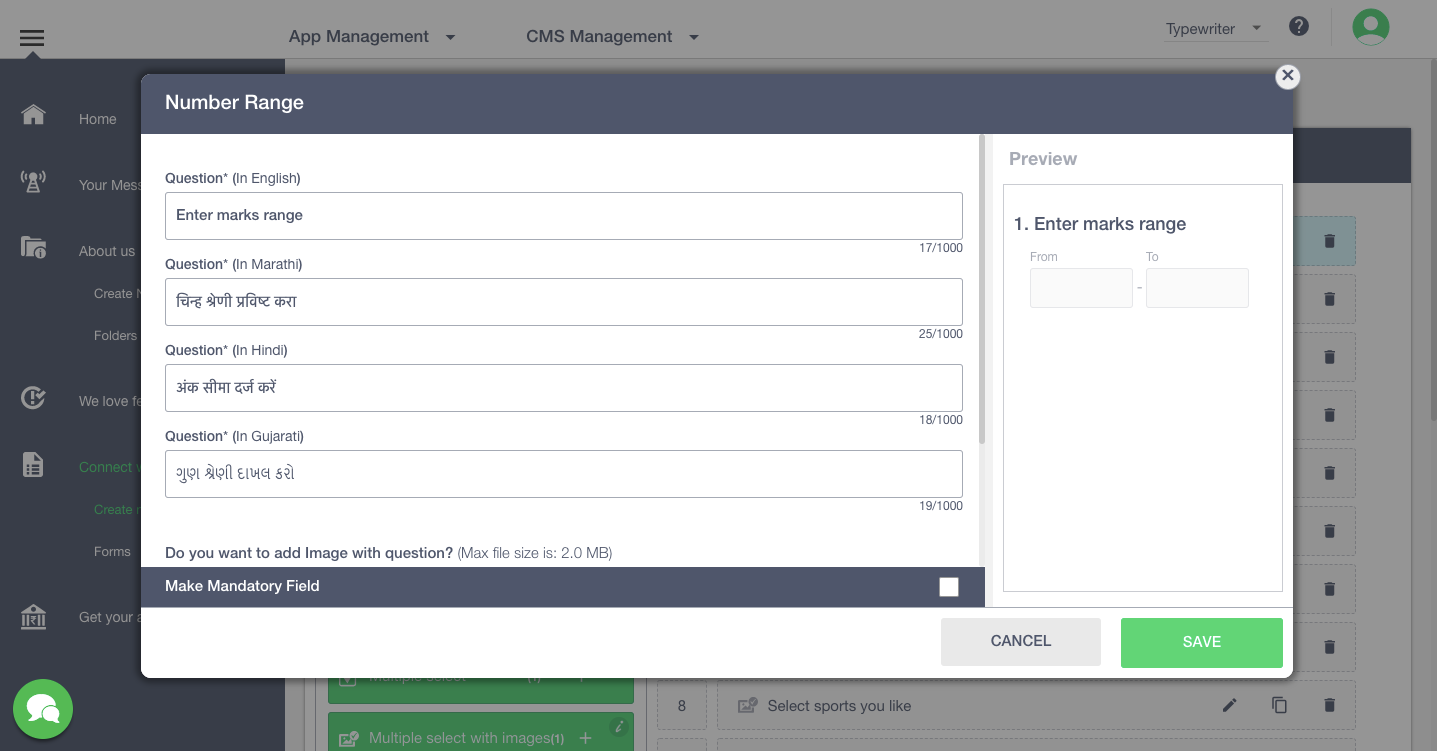

This question would ask the user to enter a number range (start and end value)
Click on ‘Number Range’ (left panel in Questions tab)
In the pop - up window, enter the question and upload an image (if required)
Switch on the pre-fill toggle, if you want a default number range to appear in the input boxes
To make the question mandatory, you can check the box present at the bottom of the window
Click on ‘Save’
The question will be updated in the form
Single Select
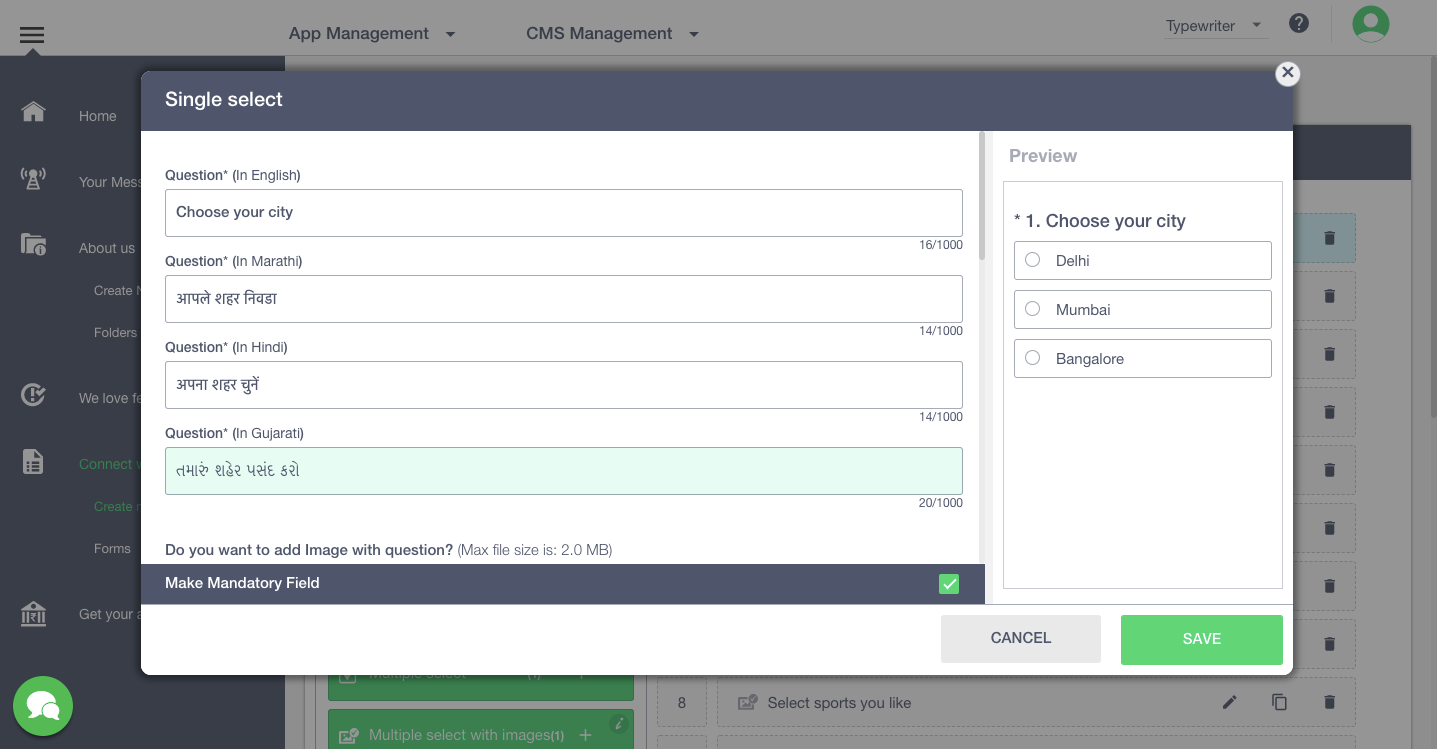

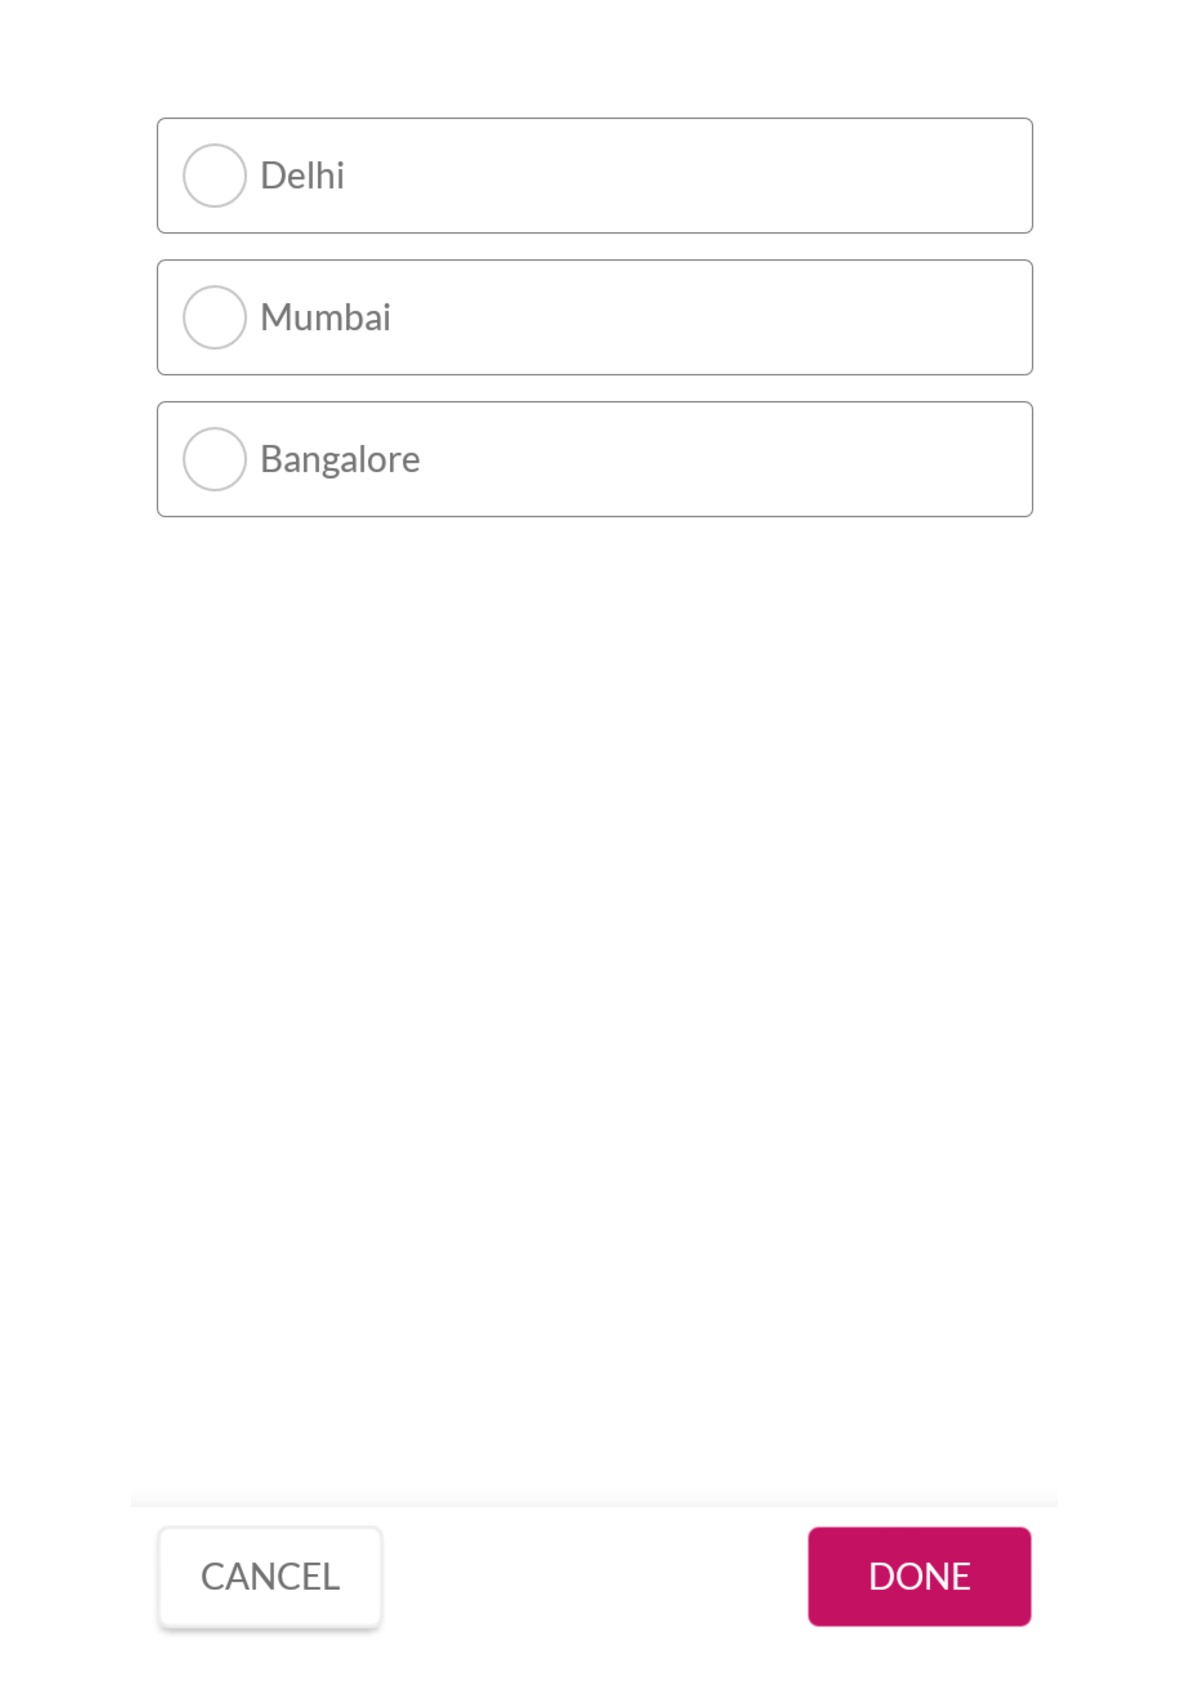
These are multiple choice questions that allow app users to select one option.
Click on ‘Single Select’ (left panel in Questions tab)
In the pop - up window, enter the question and upload an image (if required)
Add choices (options from which the app user can choose).
You can select any of the options to be pre-selected
To make the question mandatory, you can check the box present at the bottom of the window
Click on ‘Save’
The question will be updated in the form.
Single Select with Images
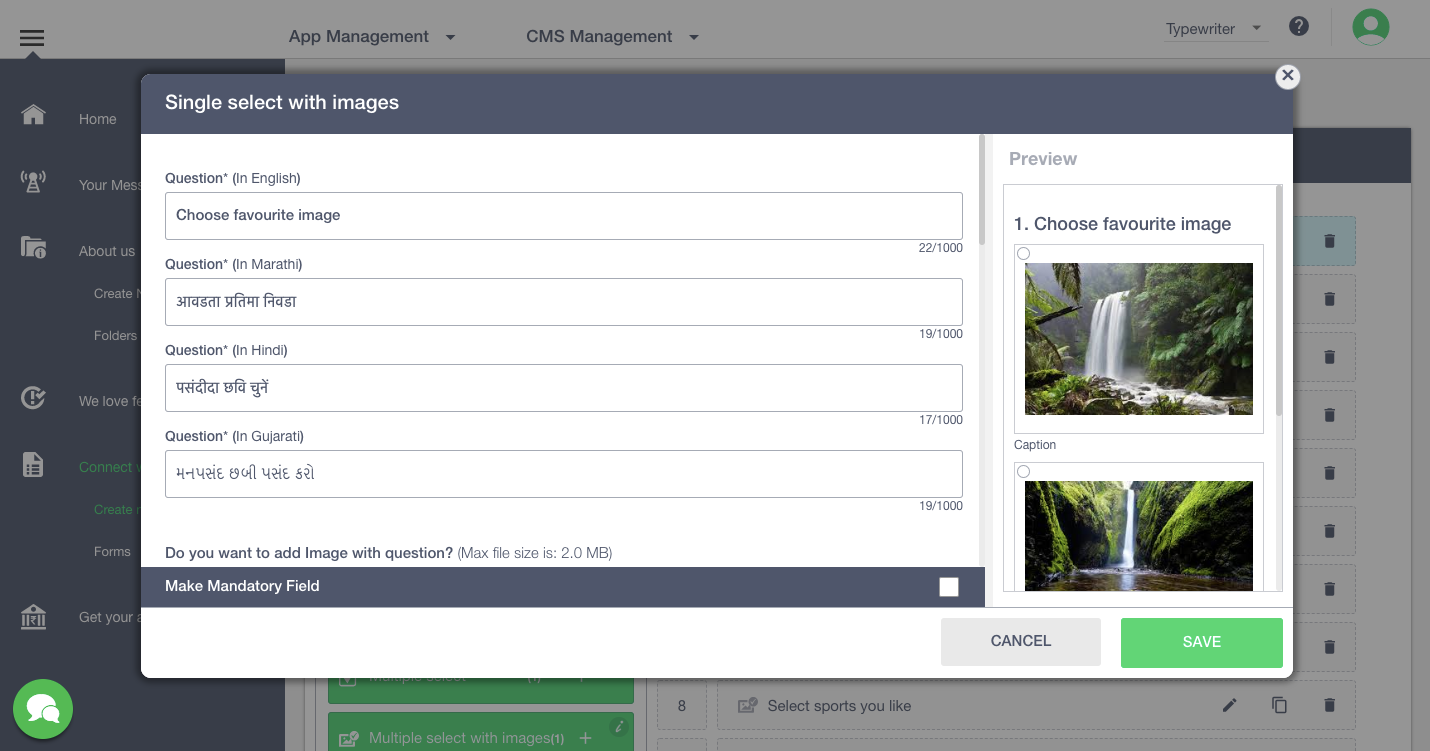
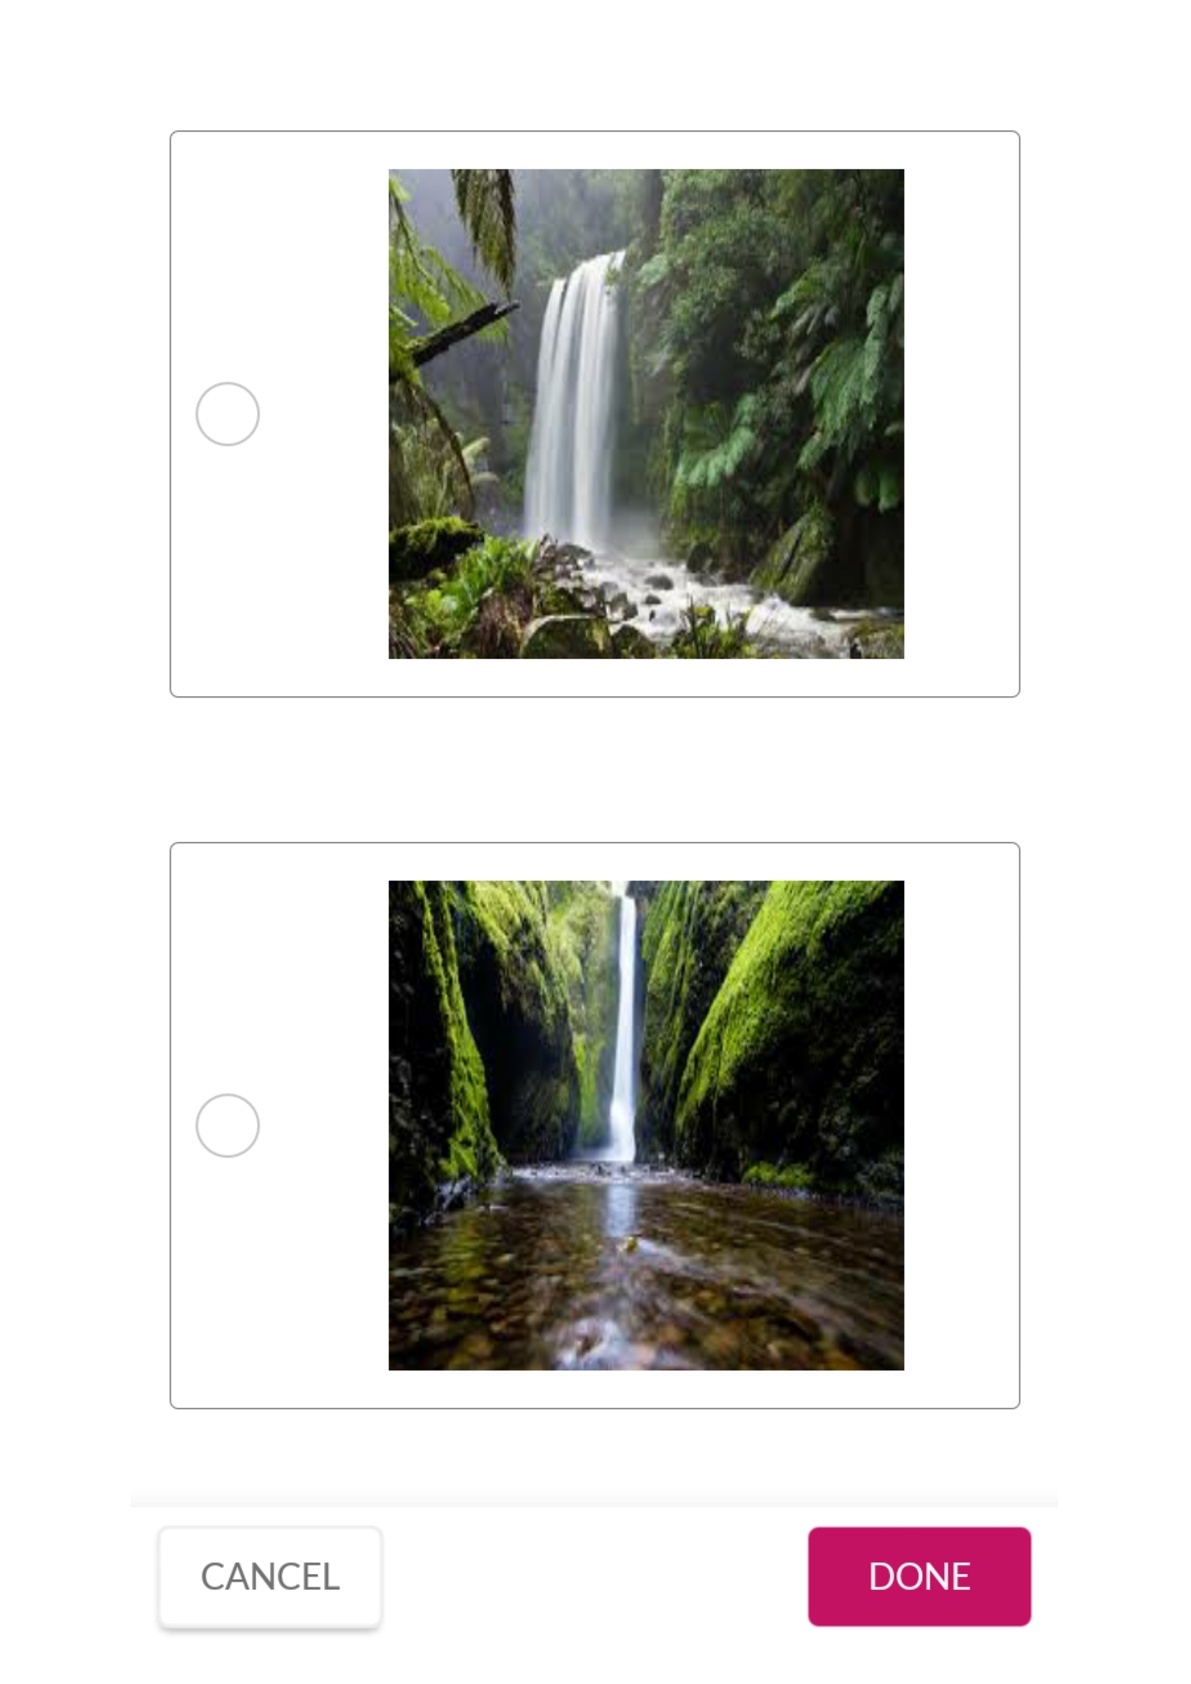
Multiple choice questions that allow app users to select one option. For each option, an image has to be added.
Click on ‘Single Select with Images’ (left panel in Questions tab)
In the pop - up window, enter the question and upload an image (if required)
Add choices (options from which the app user can choose). In this case, you have to add images as options to be chosen. You can also add captions to images added as options
You can select any of the options to be pre-selected
To make the question mandatory, you can check the box present at the bottom of the window
Click on ‘Save’
The question will be updated in the form.
Multiple Select
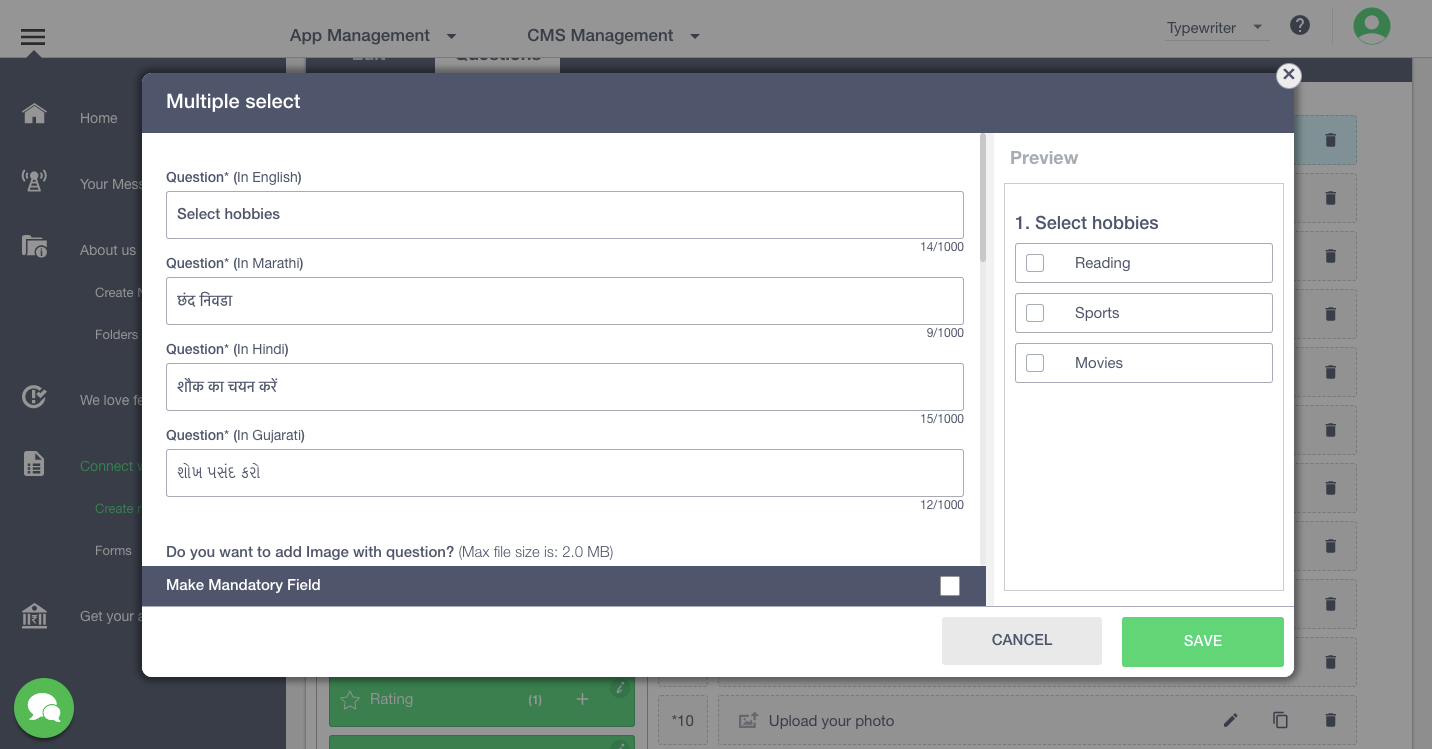
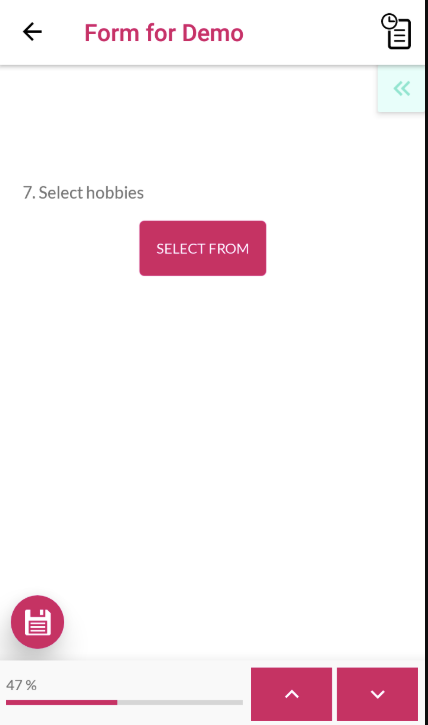
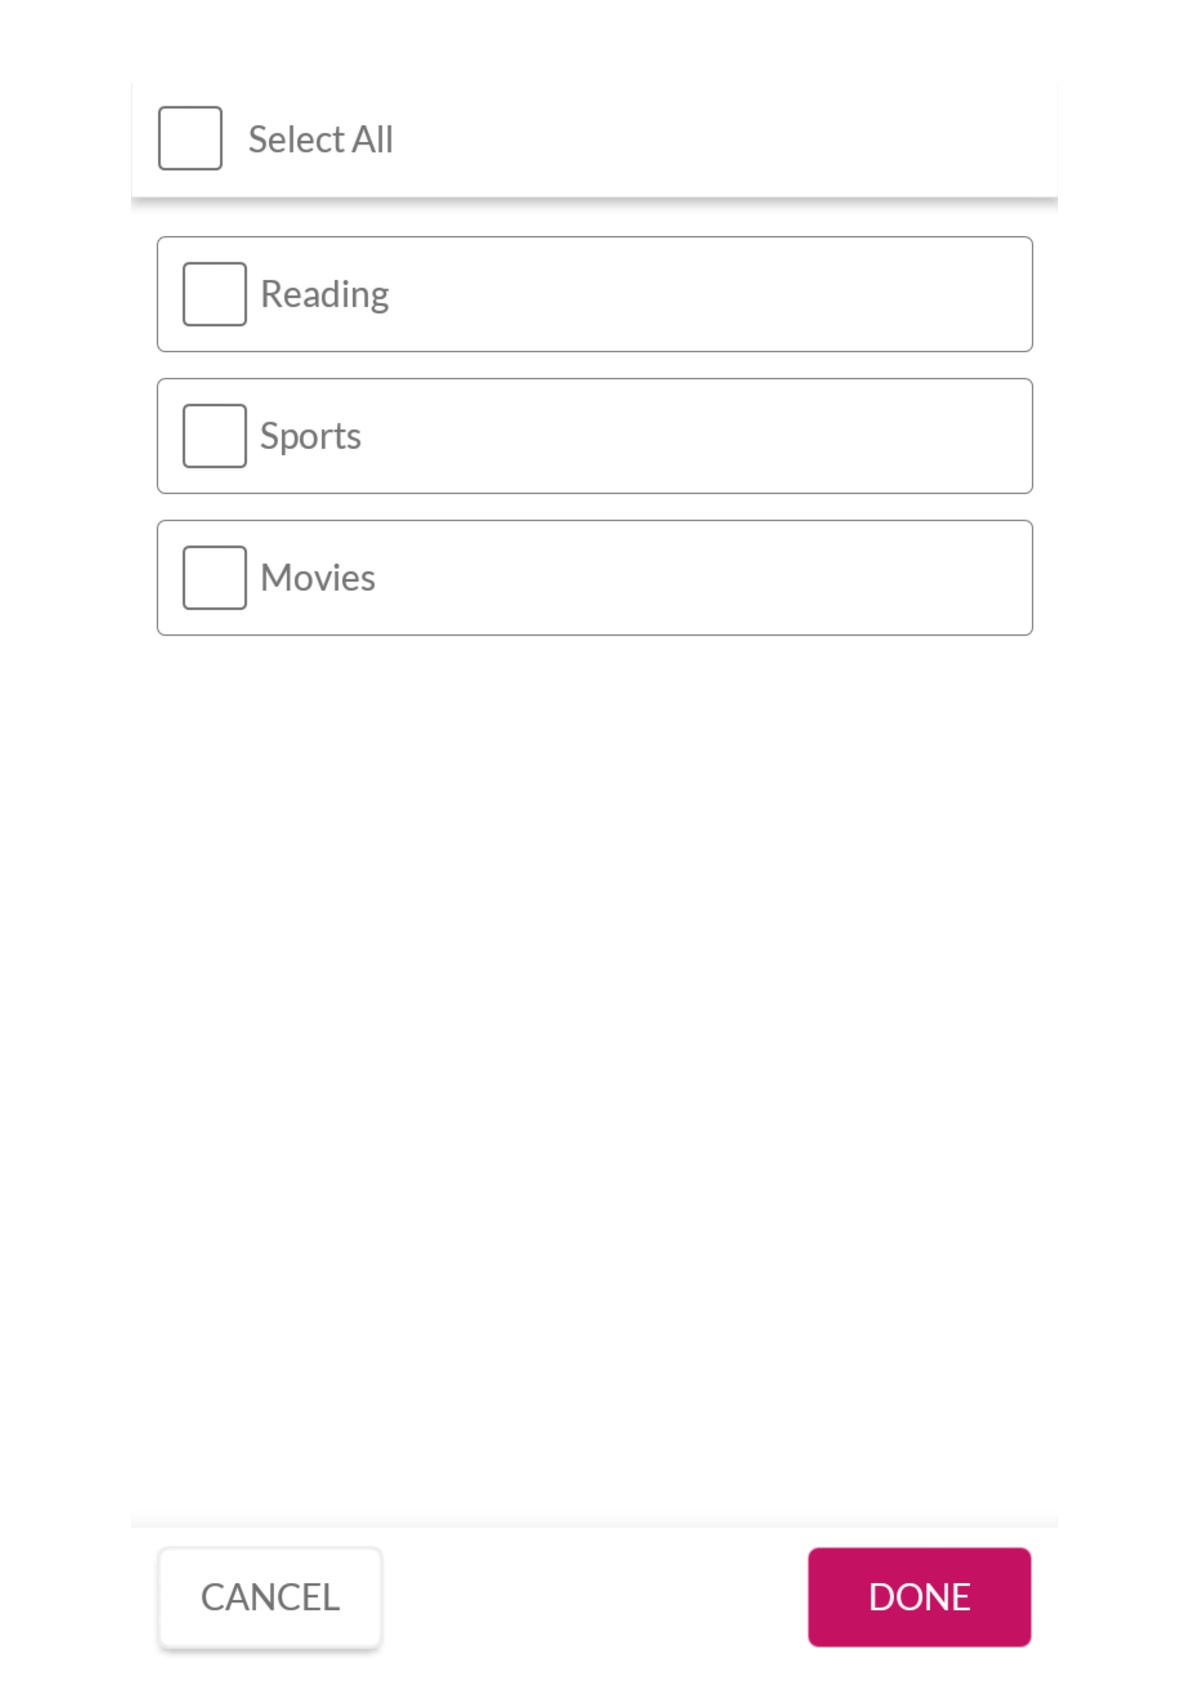
Multiple choice Questions that allow app users to select more than one option.
Click on ‘Multiple Select’ (left panel in Questions tab)
In the pop - up window, enter the question and upload an image (if required)
Add choices (options from which the app user can choose).
You can select multiple options to be pre-selected
To make the question mandatory, you can check the box present at the bottom of the window
Click on ‘Save’
The question will be updated in the form
Multiple Select with Images
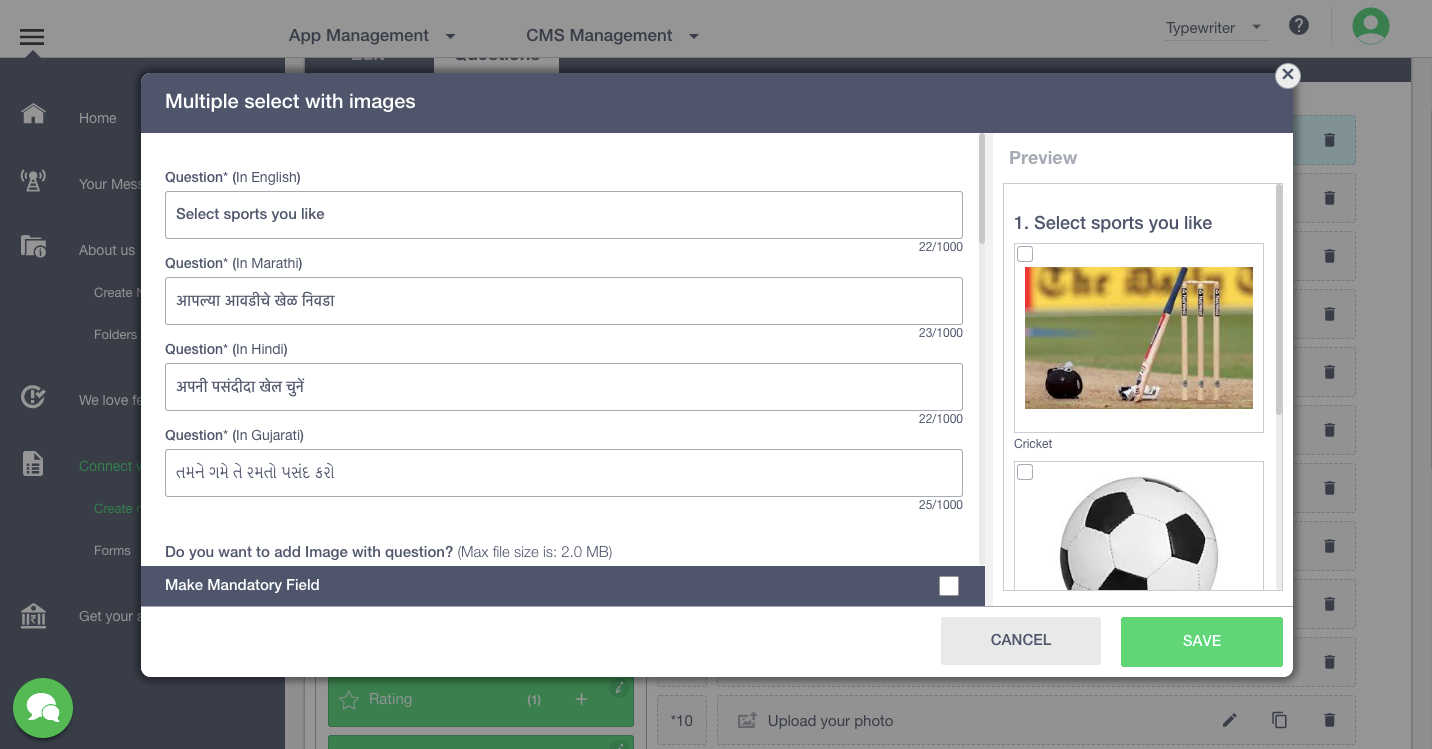

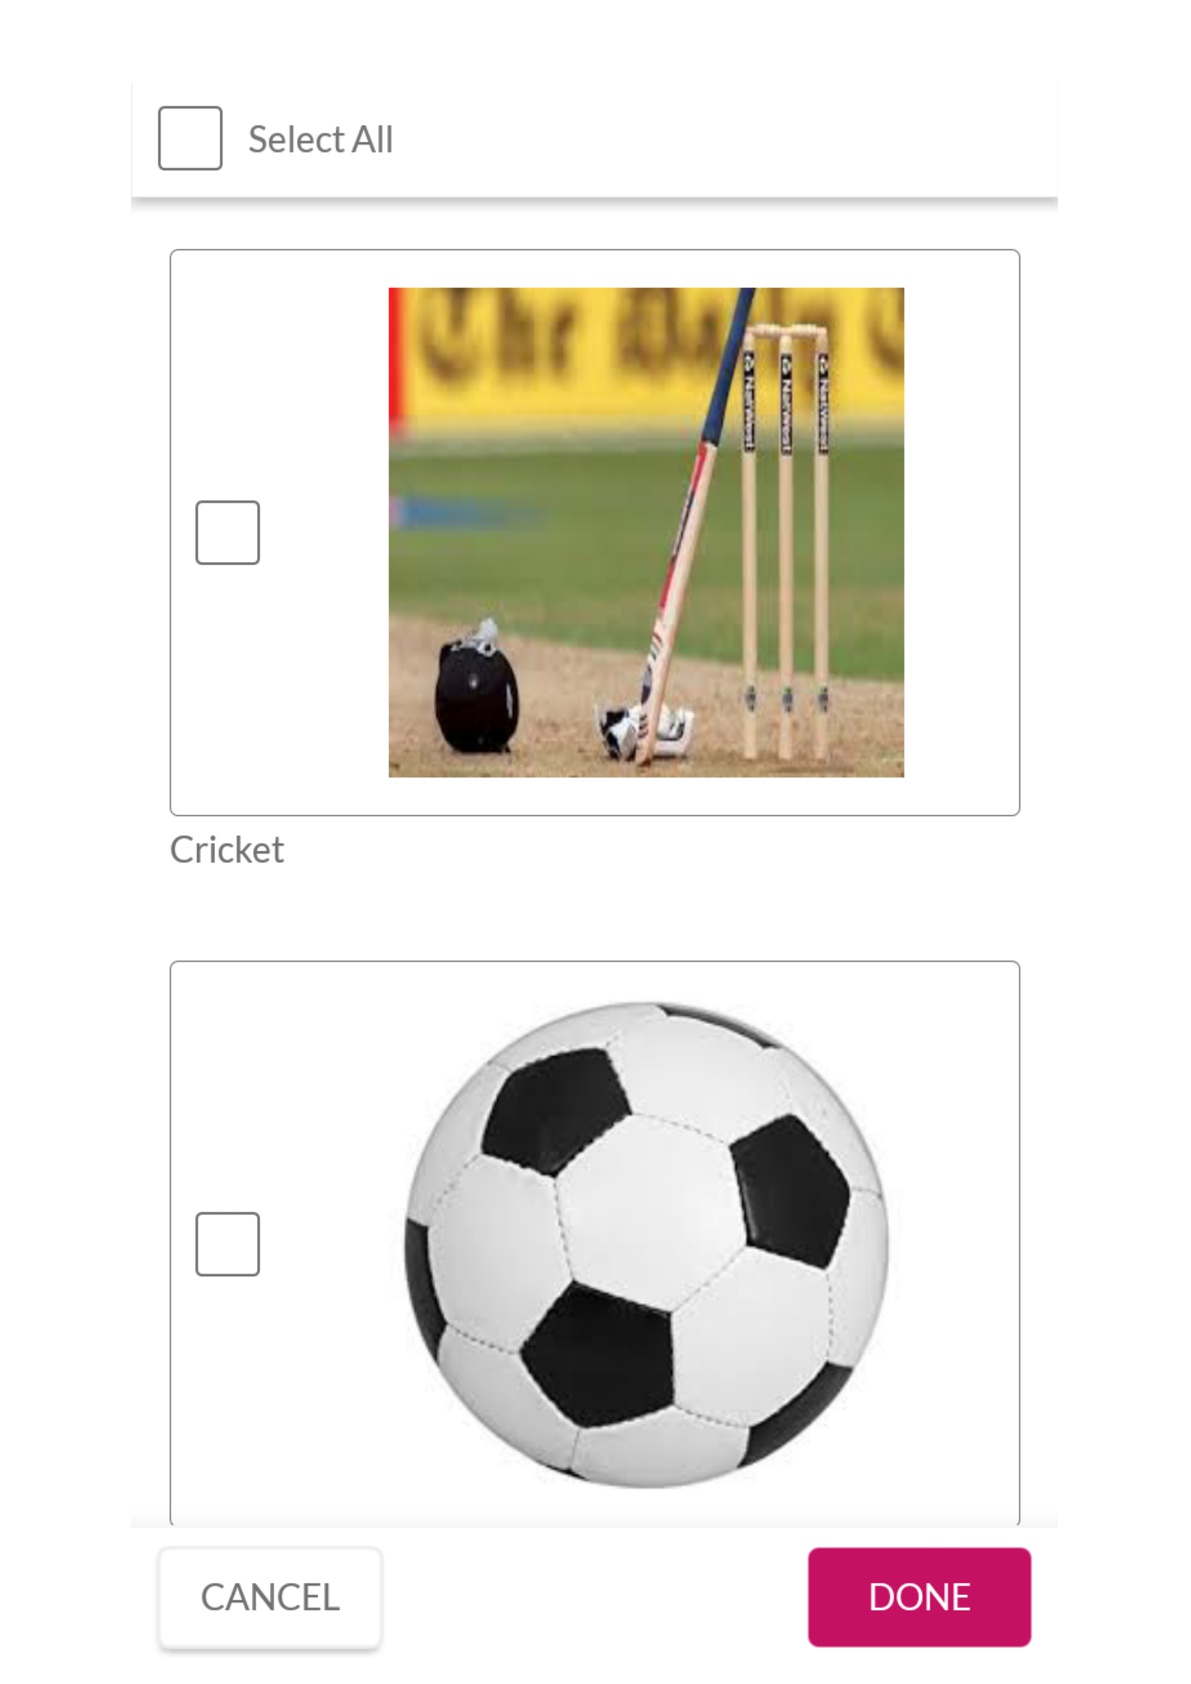
Multiple choice Questions that allow app users to select more than one option. For each option that you specify, an image has to be added.
Click on ‘Multiple Select with Images’ (left panel in Questions tab)
In the pop - up window, enter the question and upload an image (if required)
Add choices (options from which the app user can choose). In this case, you have to add images as options to be chosen. You can also add captions to images added as options
You can select multiple options to be pre-selected
To make the question mandatory, you can check the box present at the bottom of the window
Click on ‘Save’
The question will be updated in the form
Rating
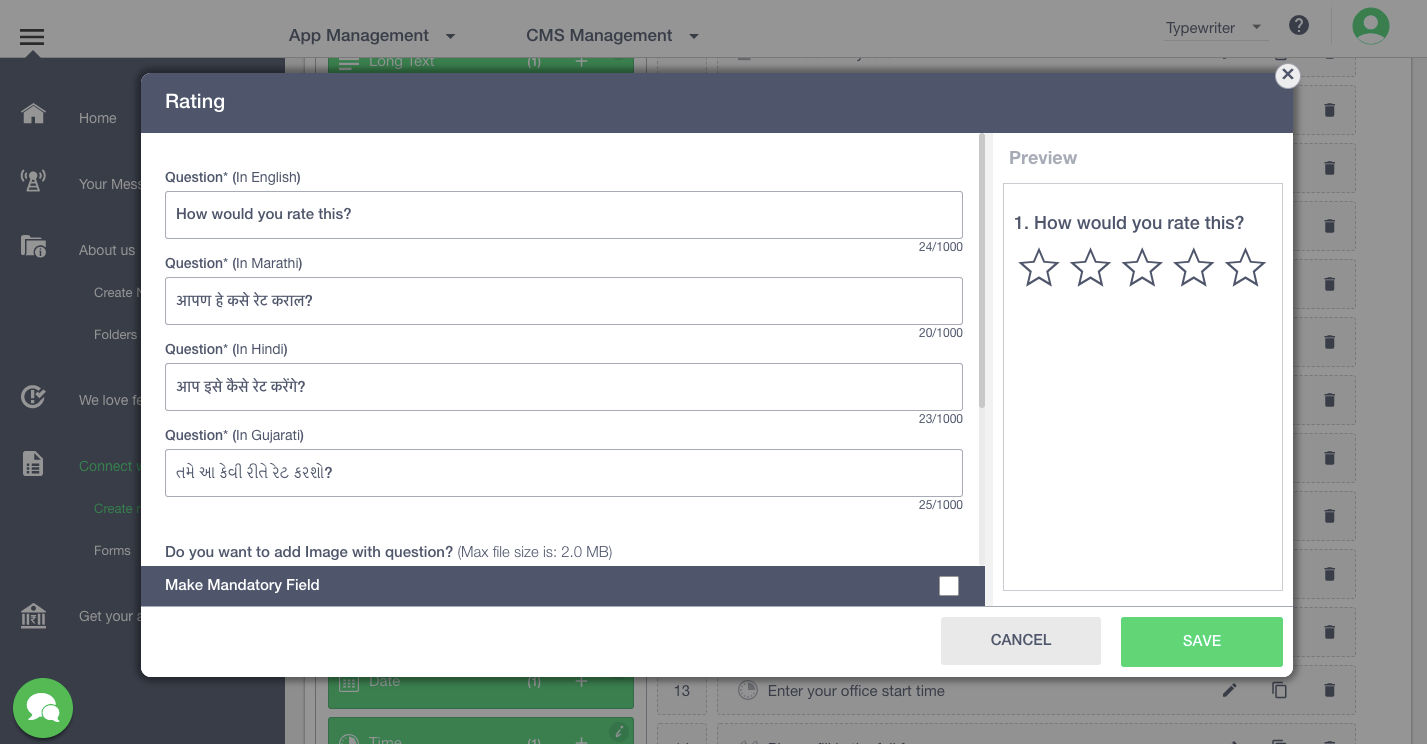
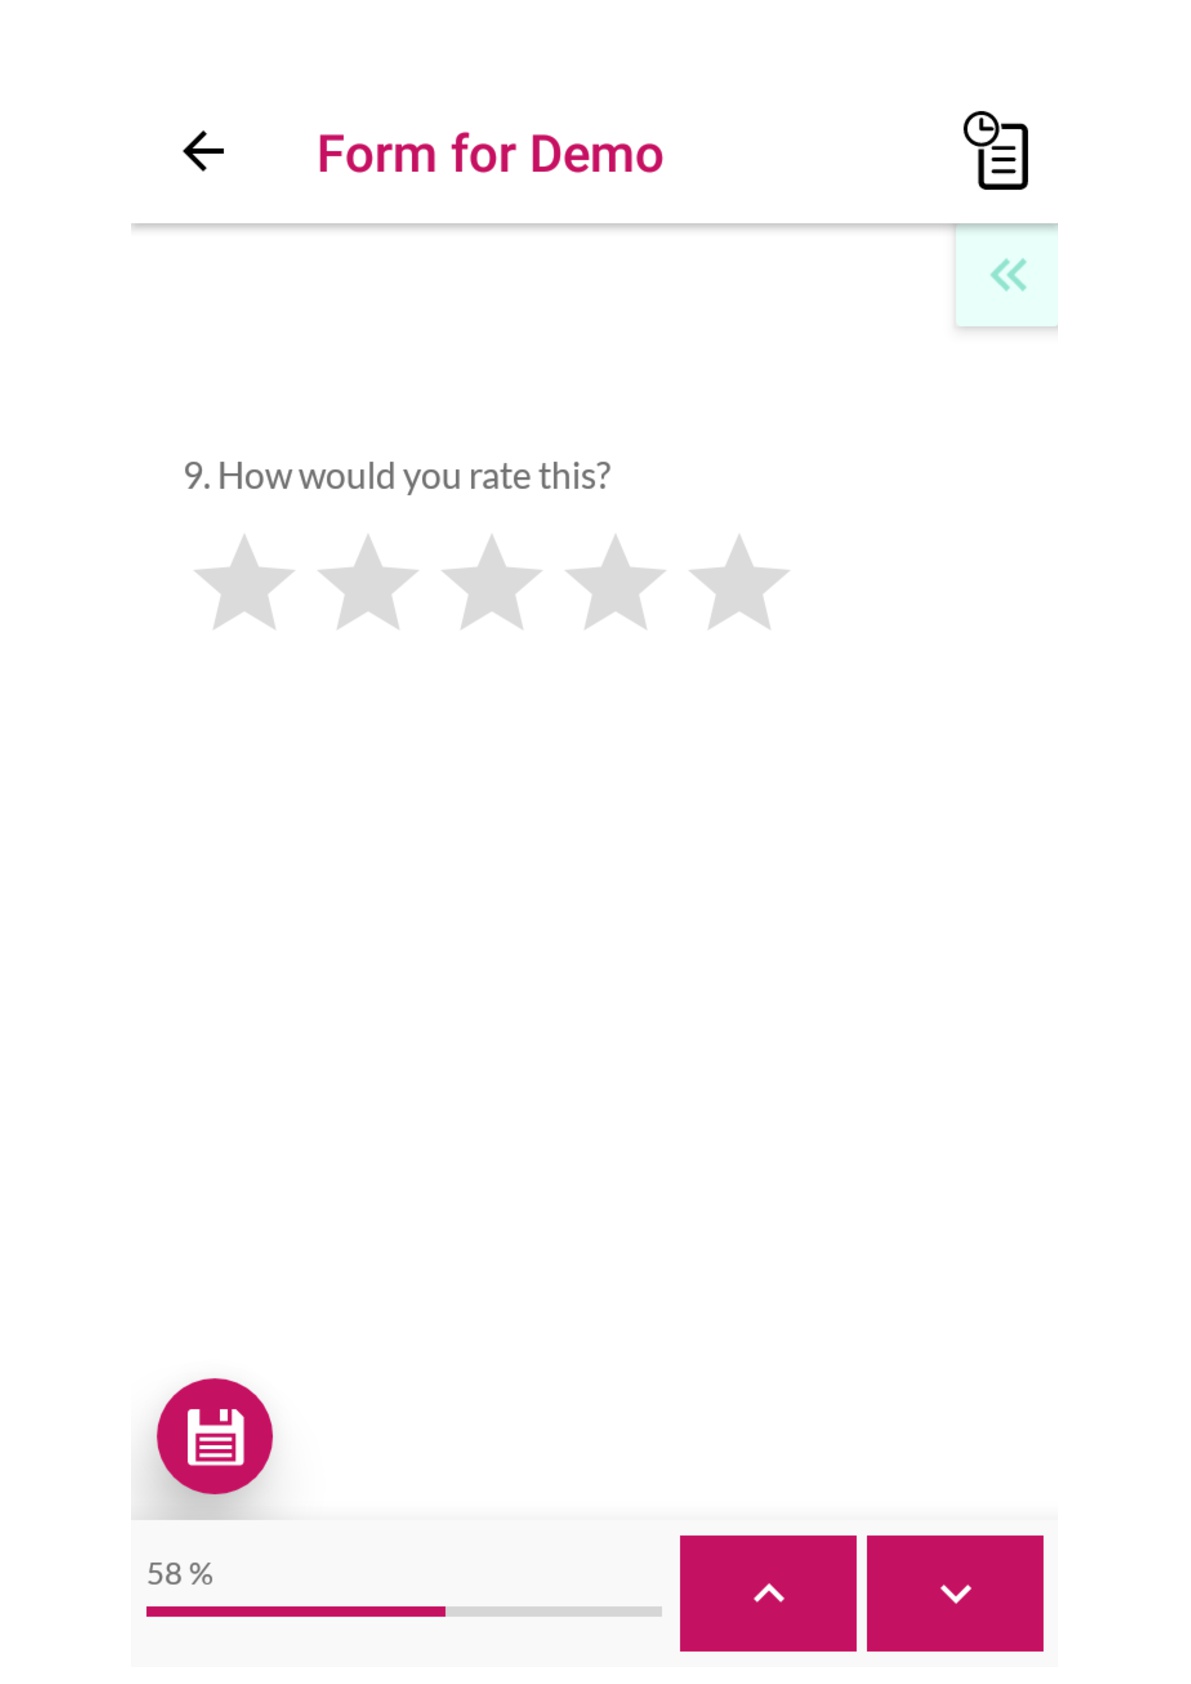
This question would enable the app users to rate on a scale of 1 to a maximum of 5
Click on 'Rating’ (left panel in Questions tab)
In the pop - up window, enter the question and upload an image (if required)
Decide the maximum rating possible by selecting the number of stars
To make the question mandatory, you can check the box present at the bottom of the window
Click on ‘Save’
The question will be updated in the form
Image Upload
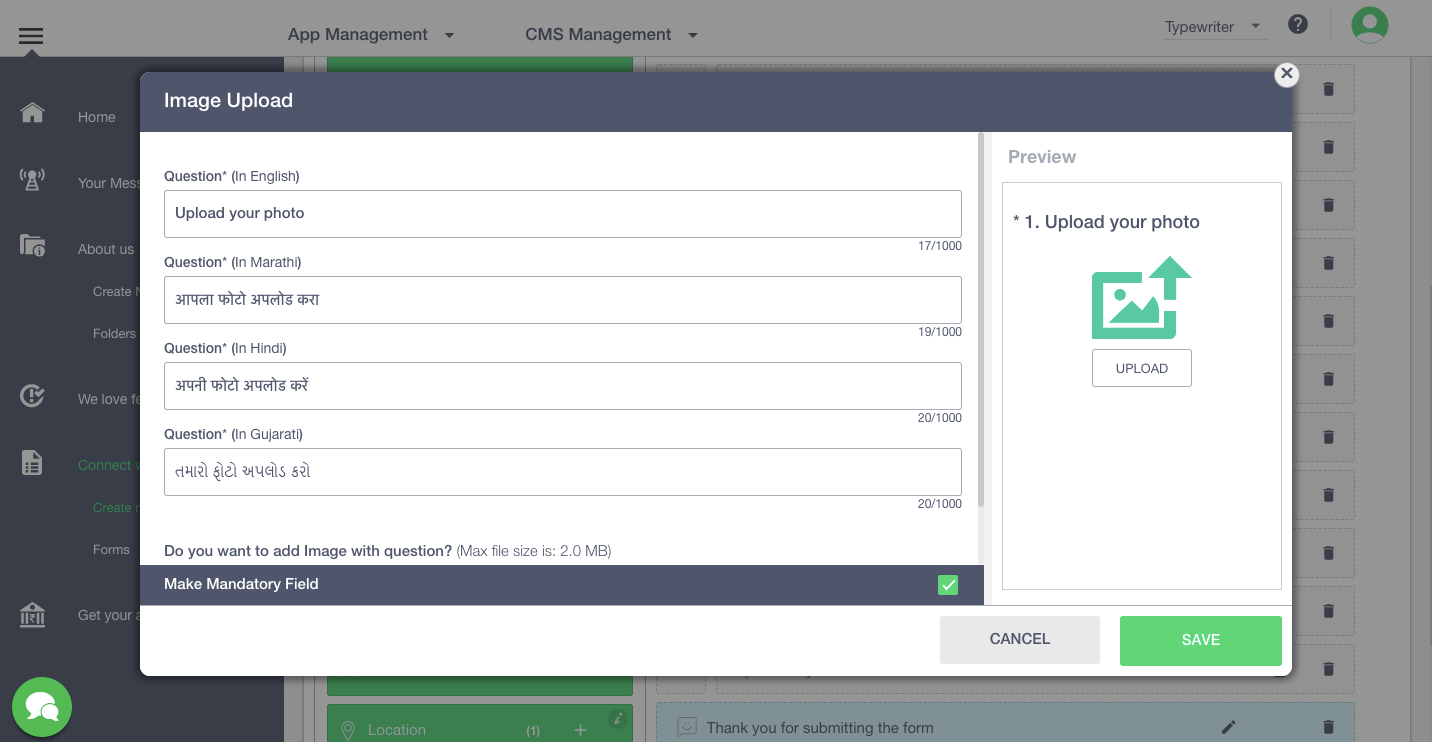
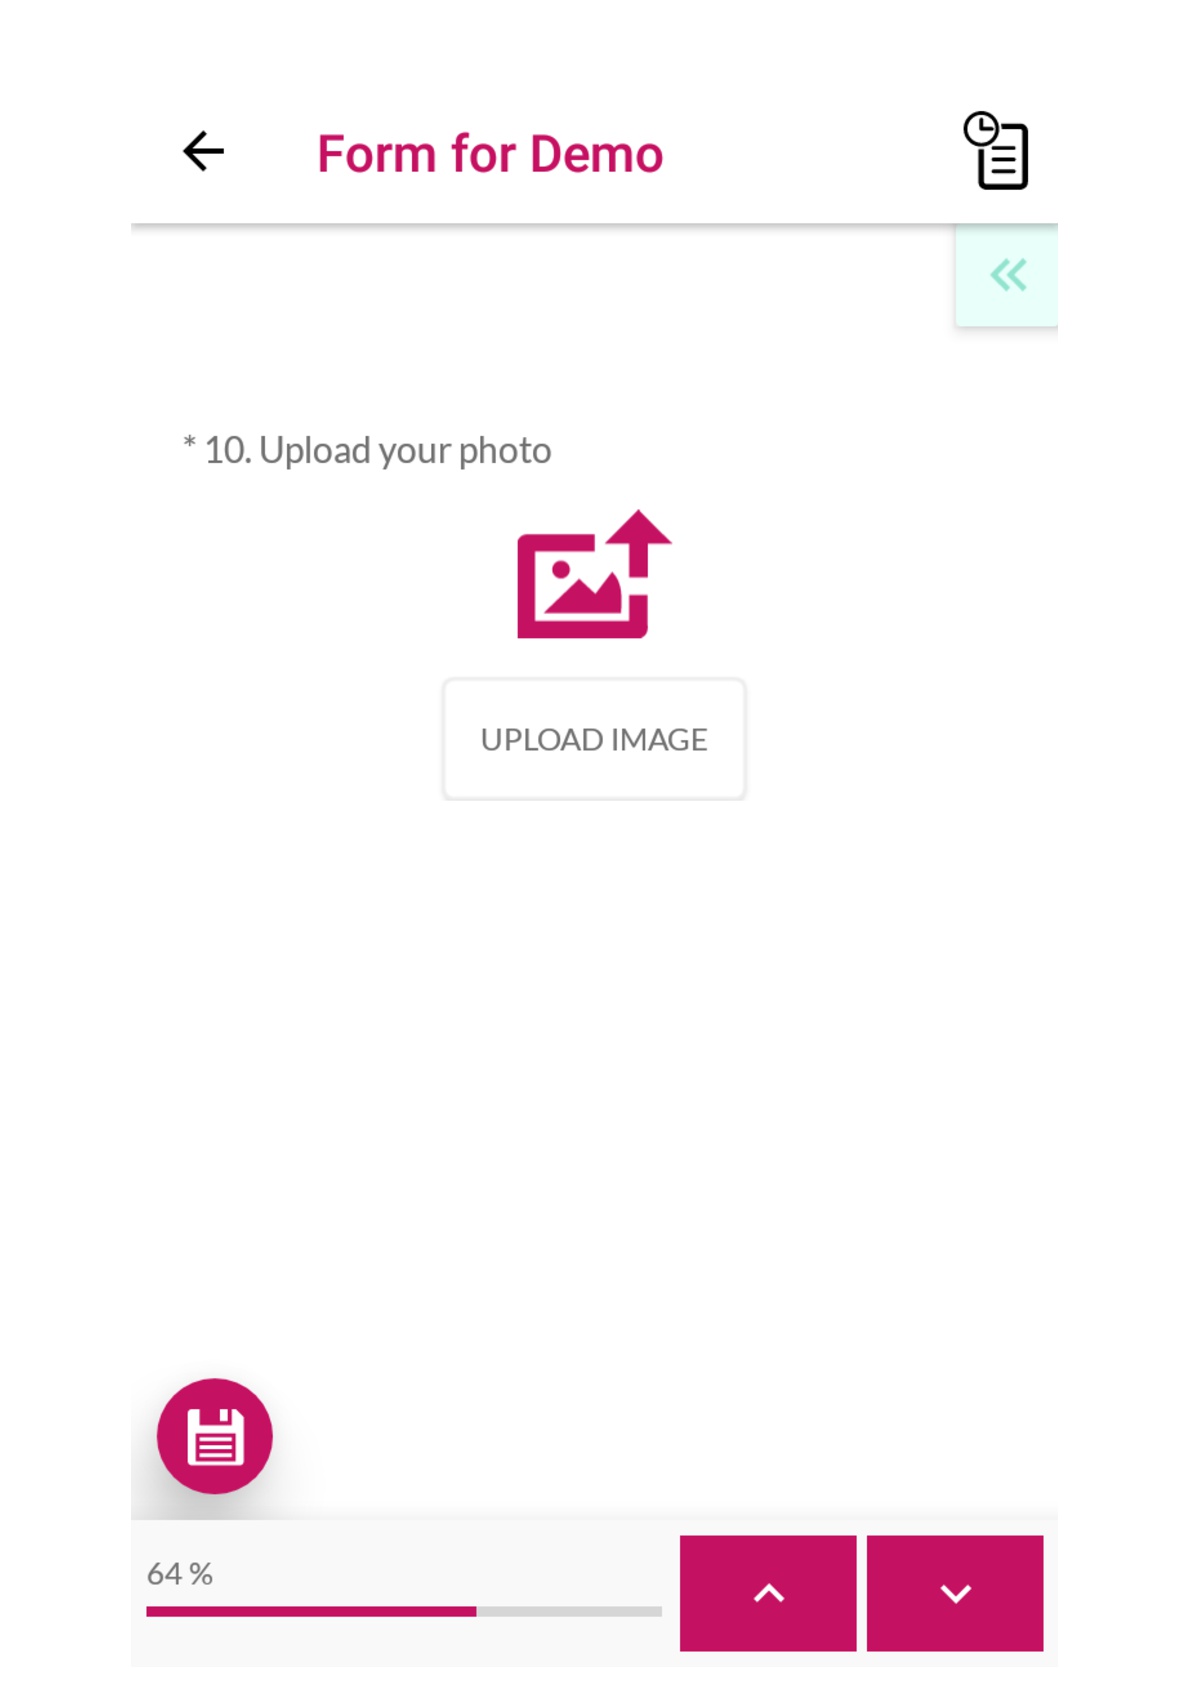
This question would enable the app users to upload an image.
Click on 'Image Upload’ (left panel in Questions tab)
In the pop - up window, enter the question and upload an image (if required)
To make the question mandatory, you can check the box present at the bottom of the window
Click on ‘Save’
The question will be updated in the form
File Upload

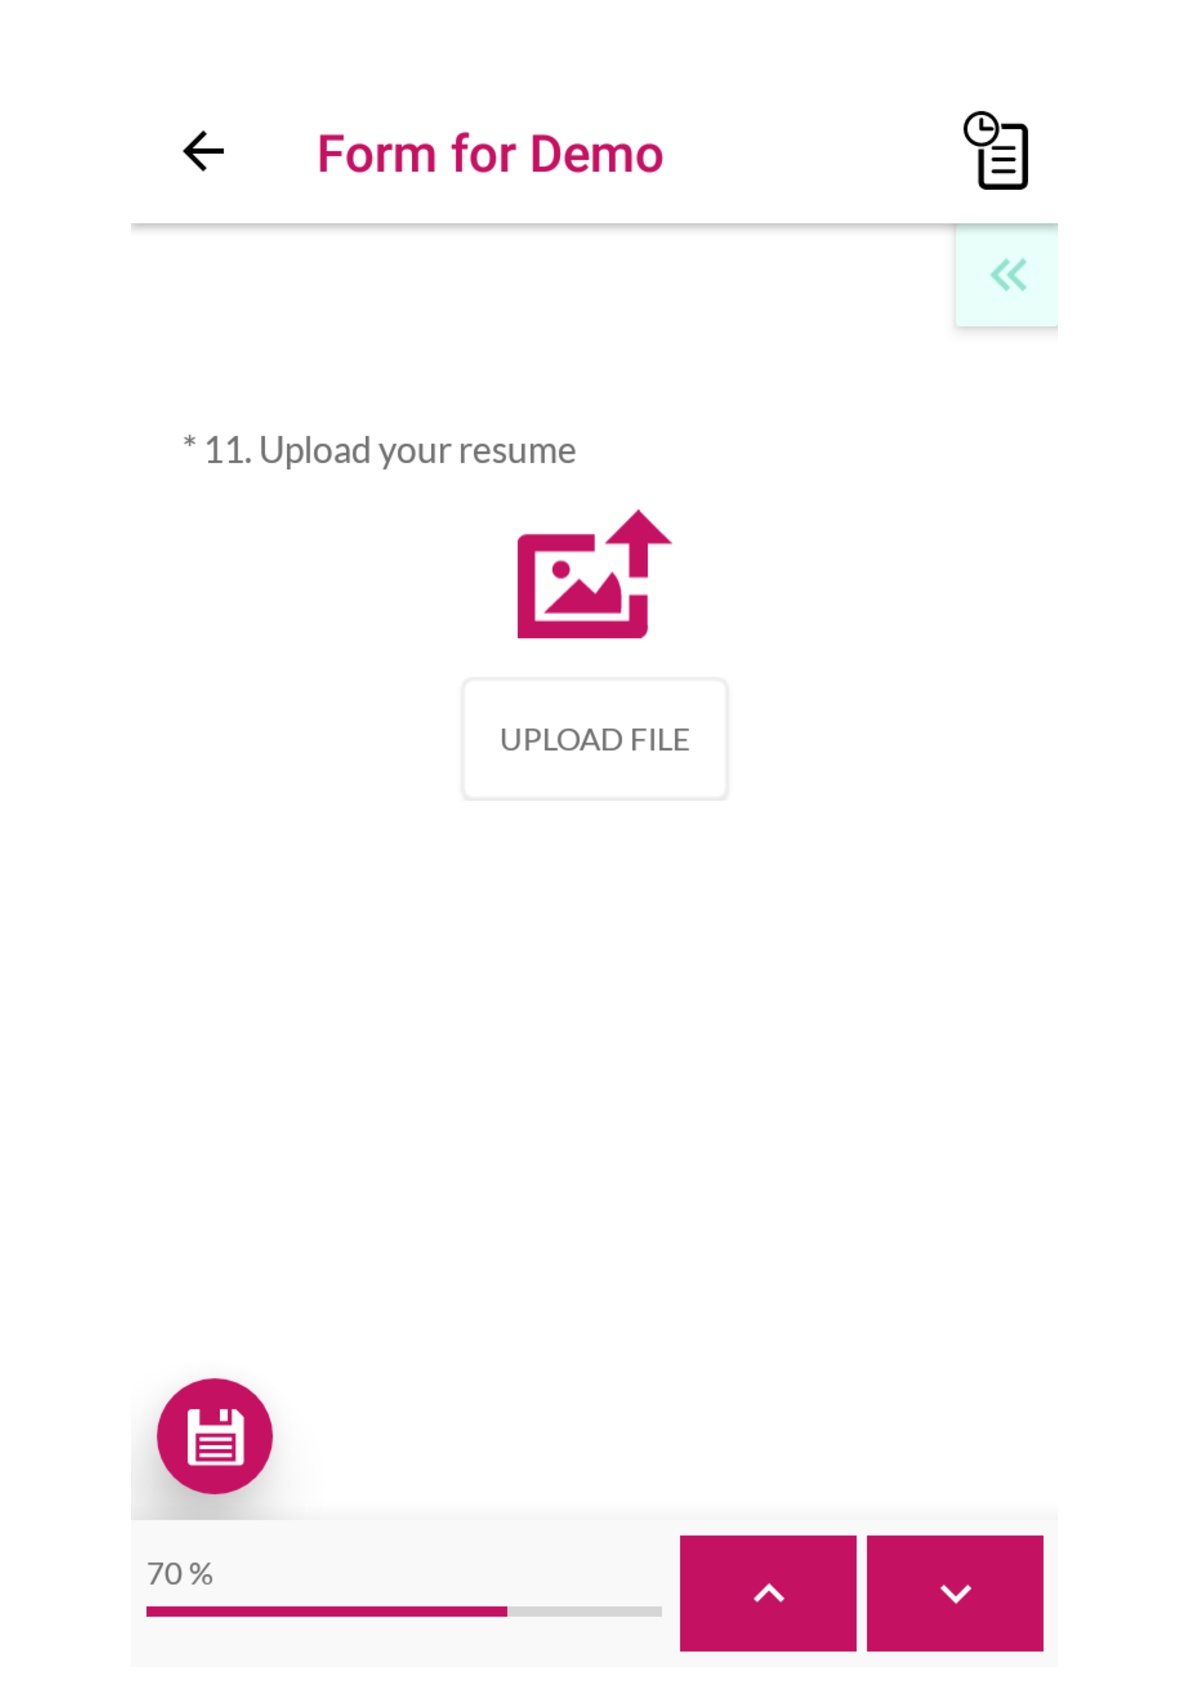
This question would enable the app users to upload a file.
Click on 'File Upload’ (left panel in Questions tab)
In the pop - up window, enter the question and upload an image (if required)
To make the question mandatory, you can check the box present at the bottom of the window
Click on ‘Save’
The question will be updated in the form
Date
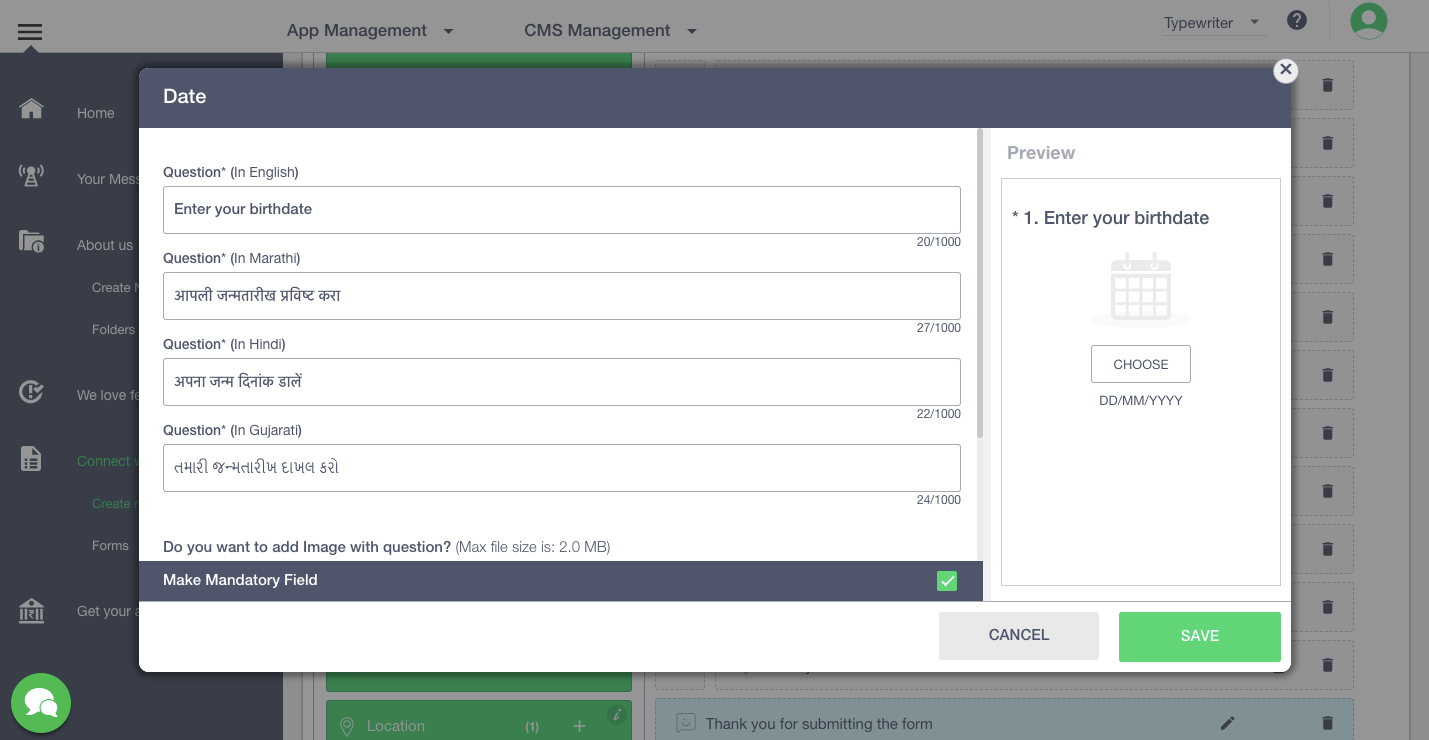

This question can be used to get date as an input from the app users.
Click on ‘Date’ (left panel in Questions tab)
In the pop - up window, enter the question and upload an image (if required)
Switch on the pre-fill toggle, if you want a default date to appear in the input box
To make the question mandatory, you can check the box present at the bottom of the window
Click on ‘Save’
The question will be updated in the form
Time
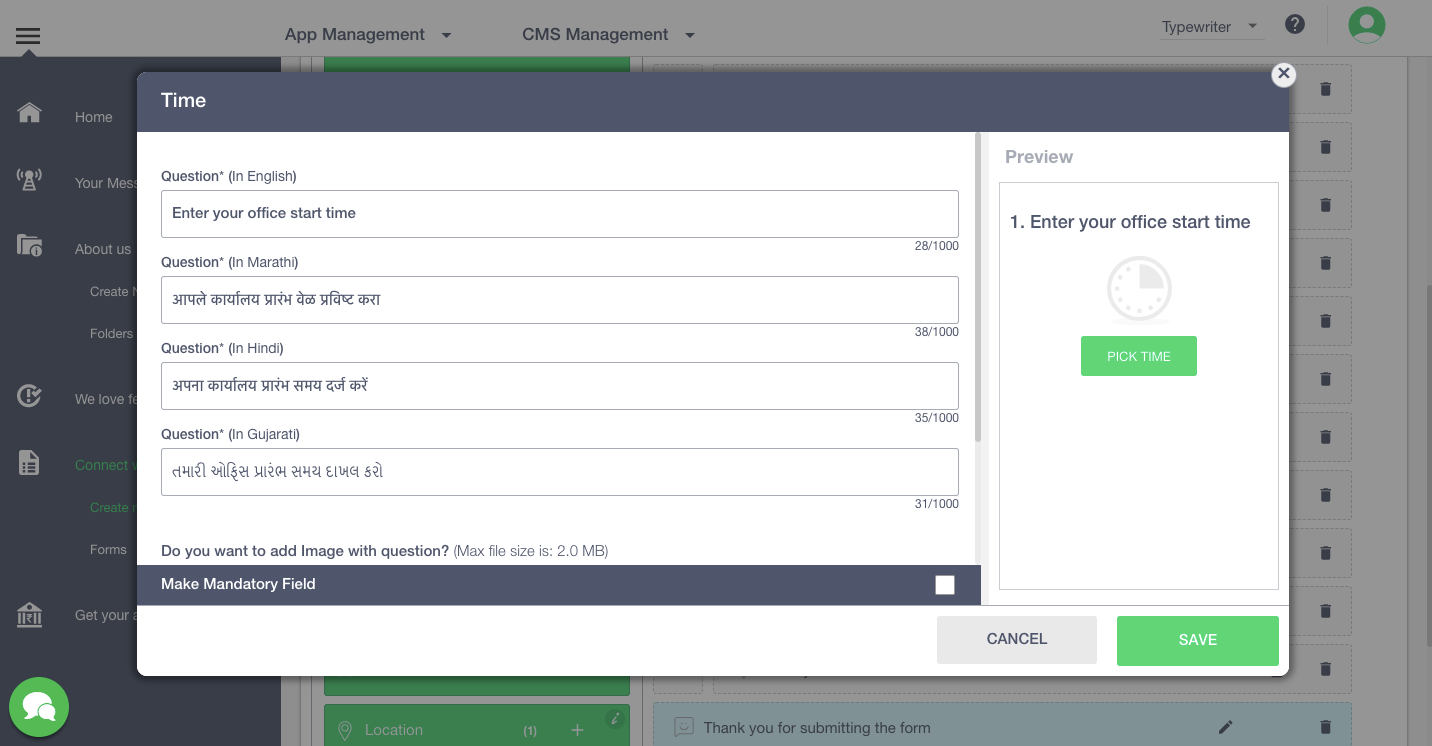
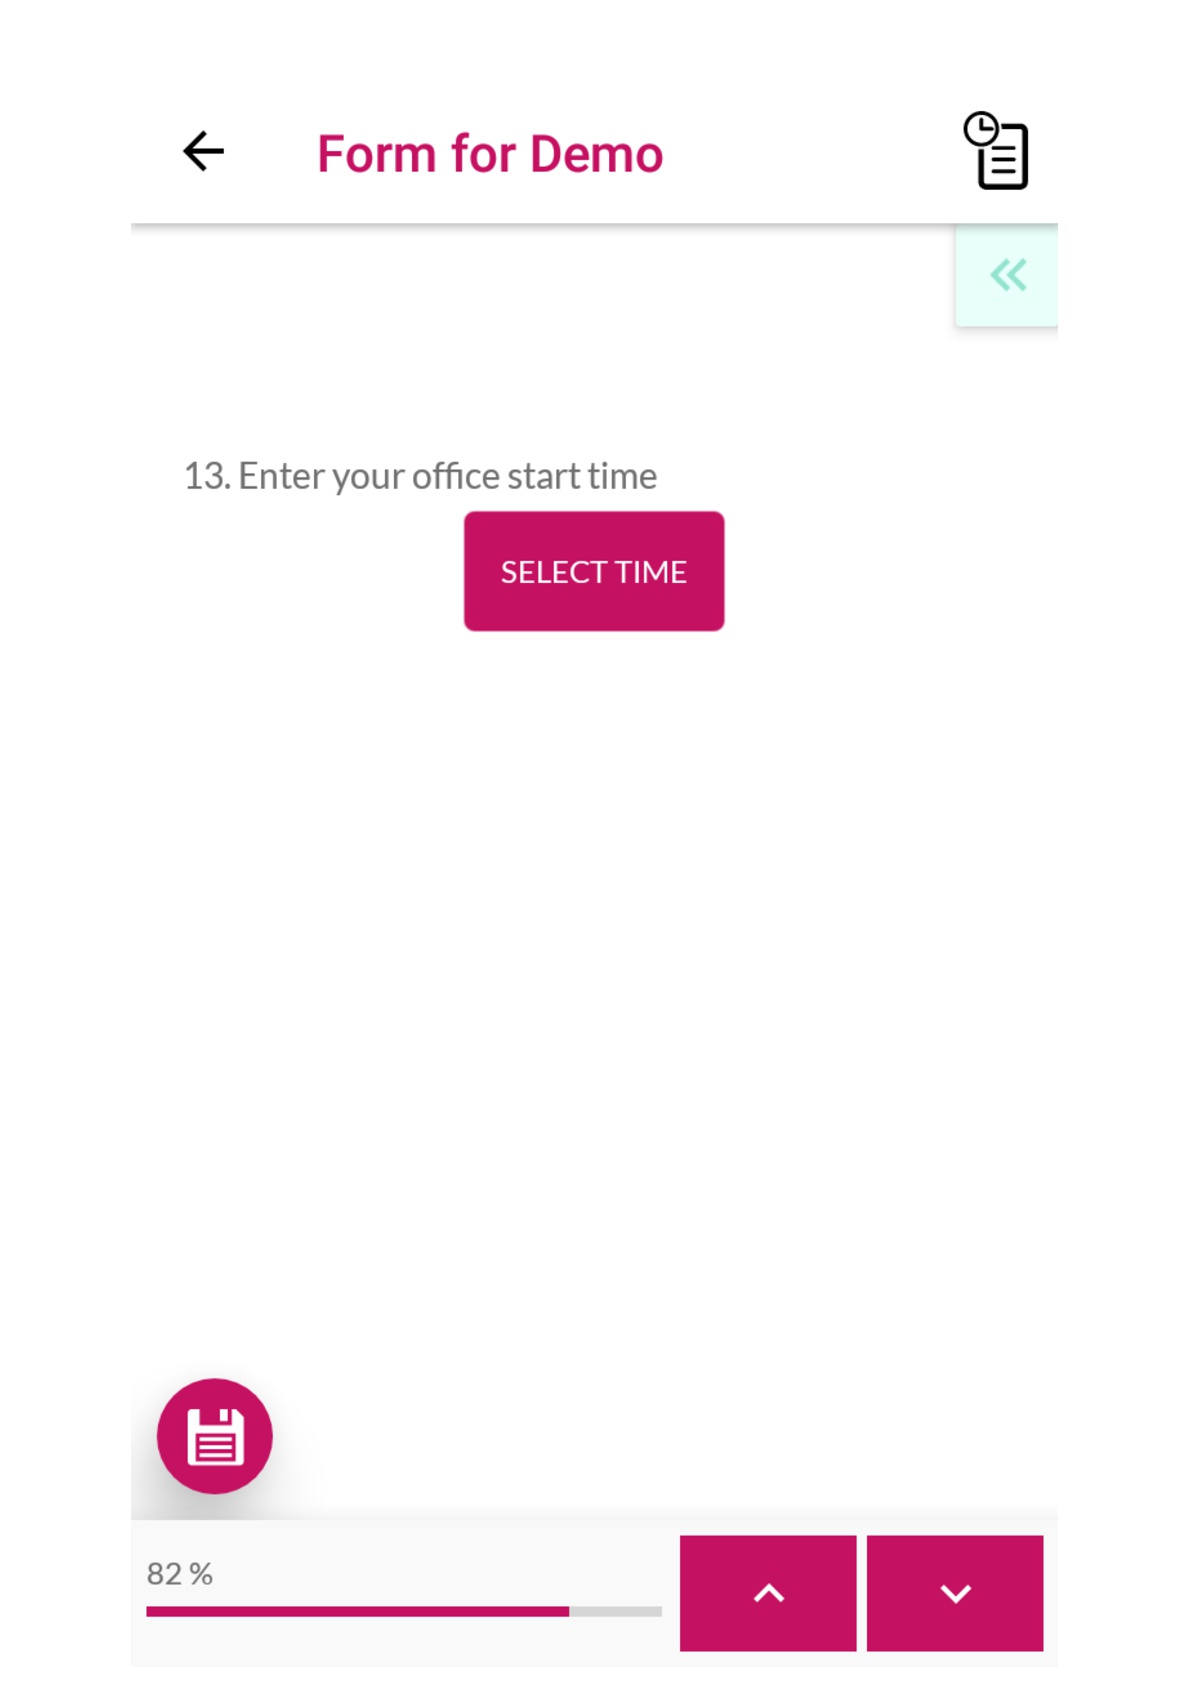
This question can be used to get time as an input from the app users.
Click on ‘Time’ (left panel in Questions tab)
In the pop - up window, enter the question and upload an image (if required)
Switch on the pre-fill toggle, if you want a default time to appear in the input box
To make the question mandatory, you can check the box present at the bottom of the window
Click on ‘Save’
The question will be updated in the form
Statement
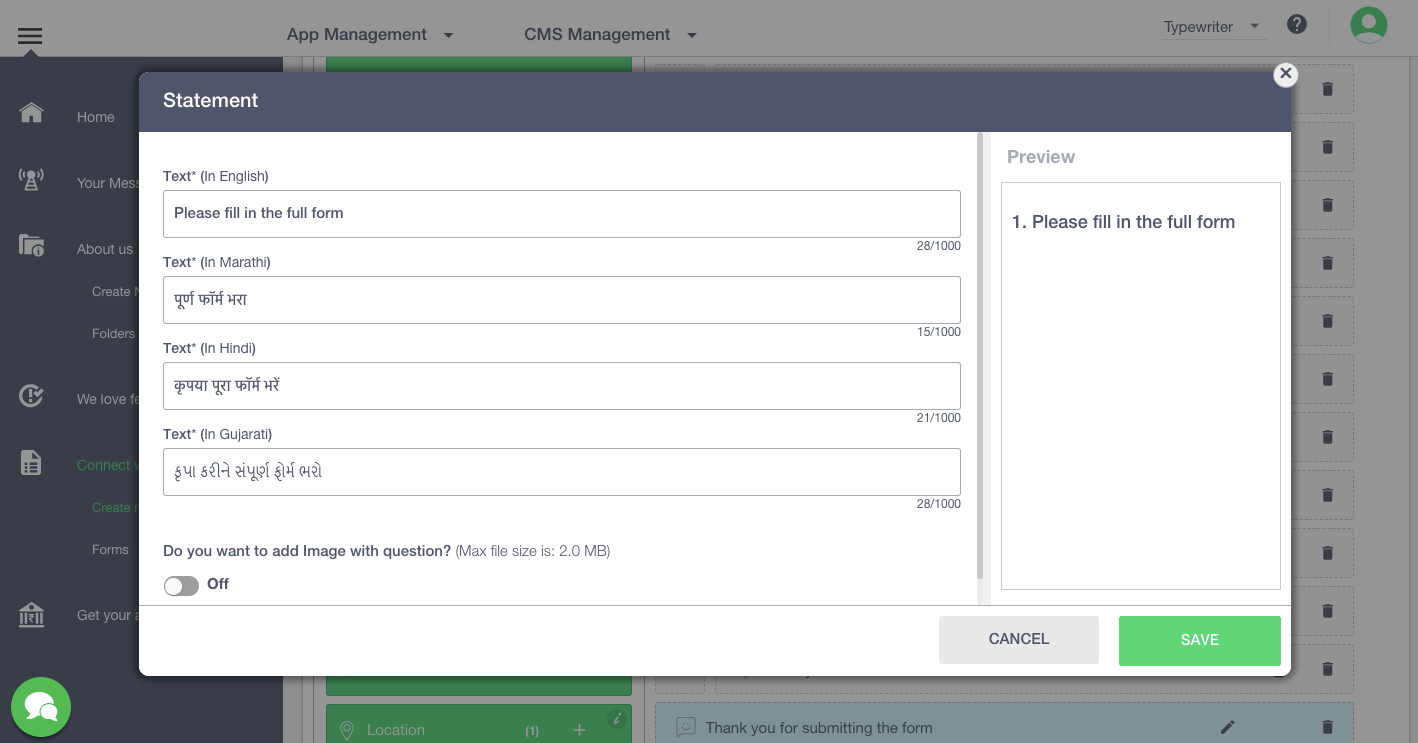
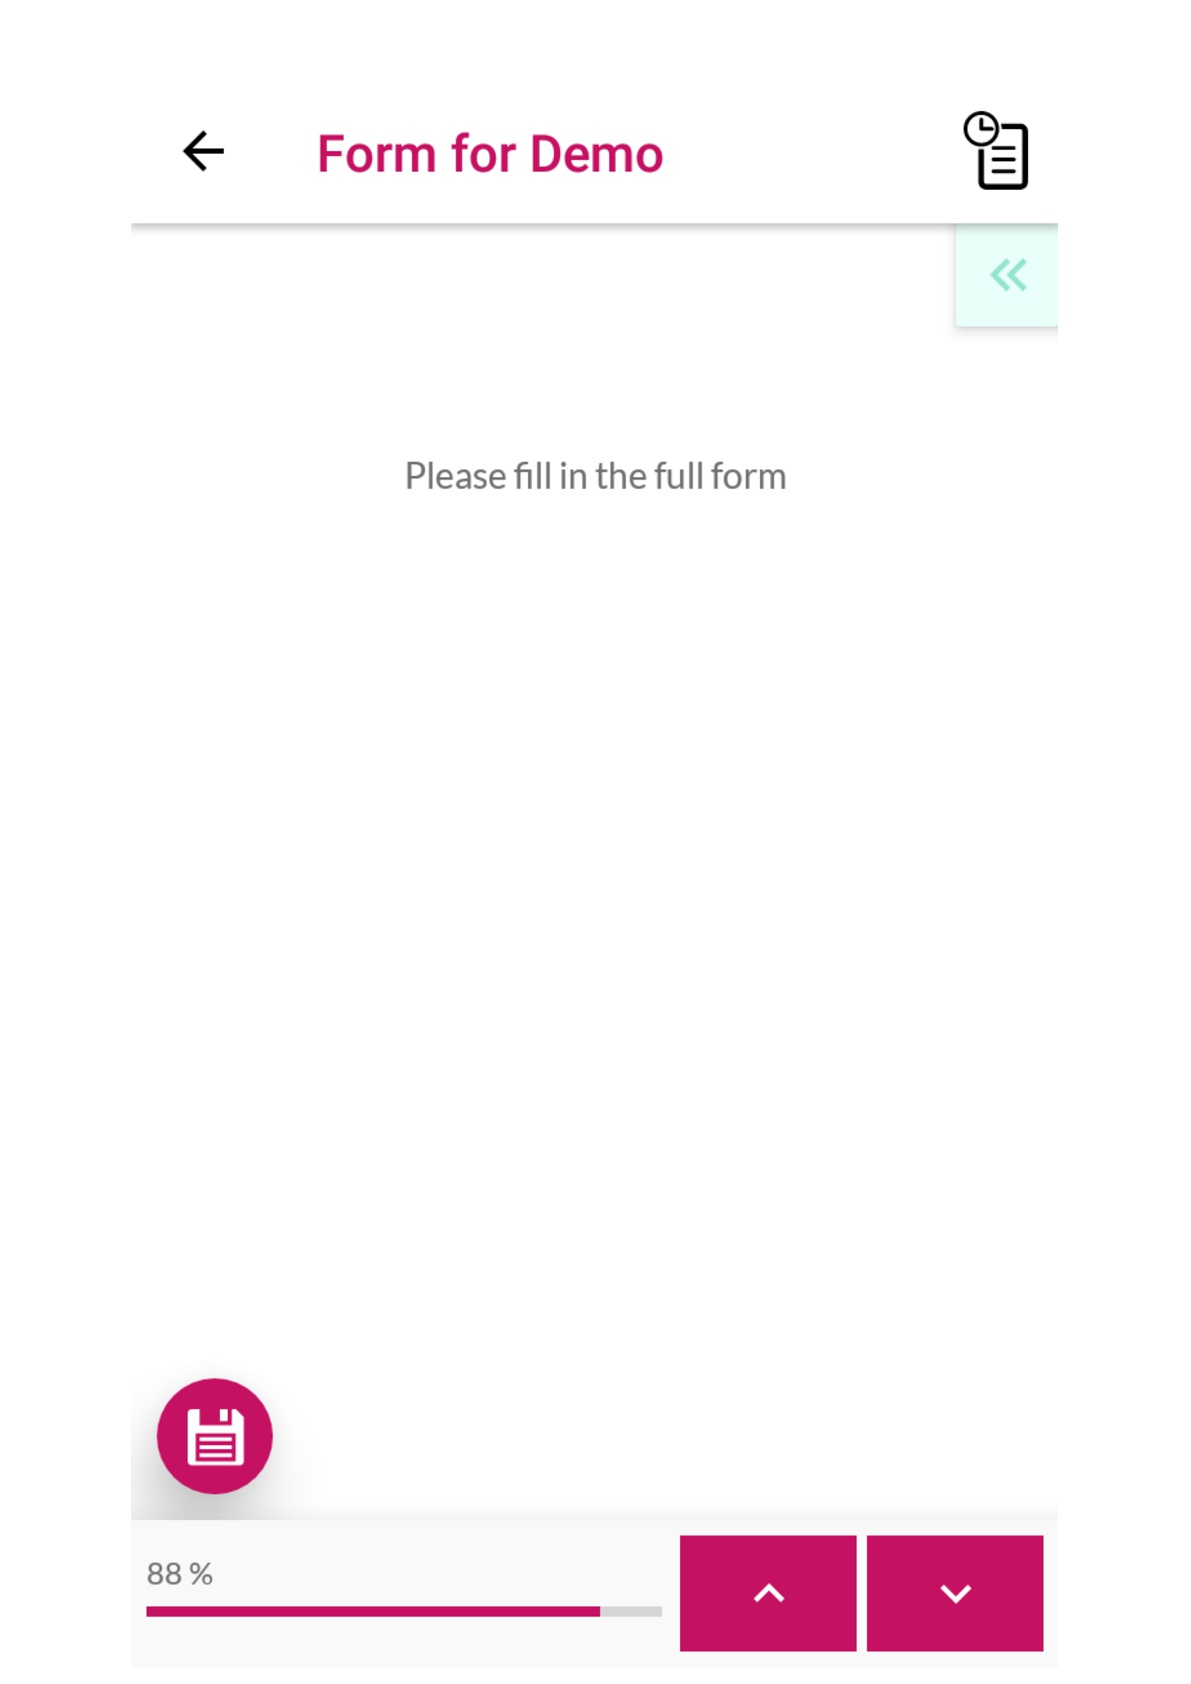
A general statement that can be added anywhere in the form.
Click on ‘Statement’ (left panel in Questions tab)
In the pop - up window, enter the text and upload an image (if required)
Click on ‘Save’
The statement will be updated in the form
Location
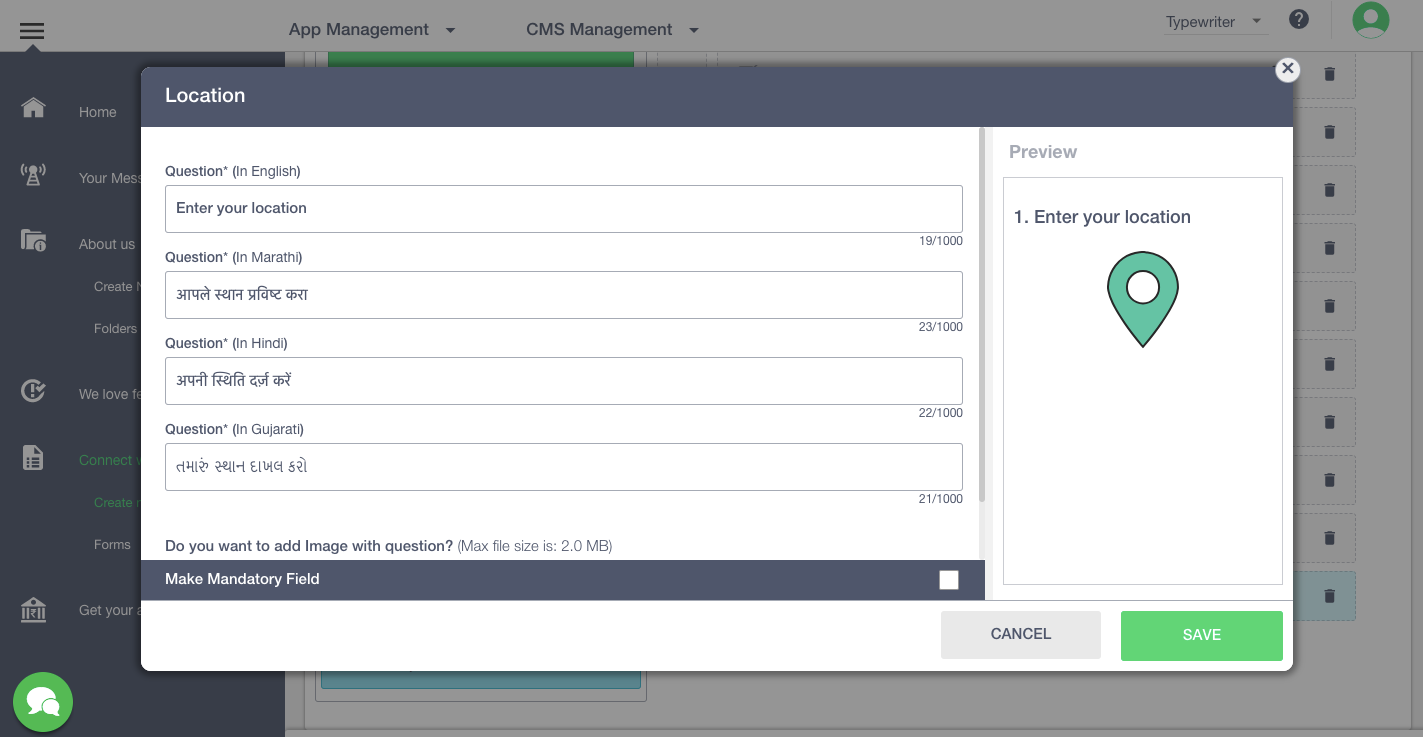
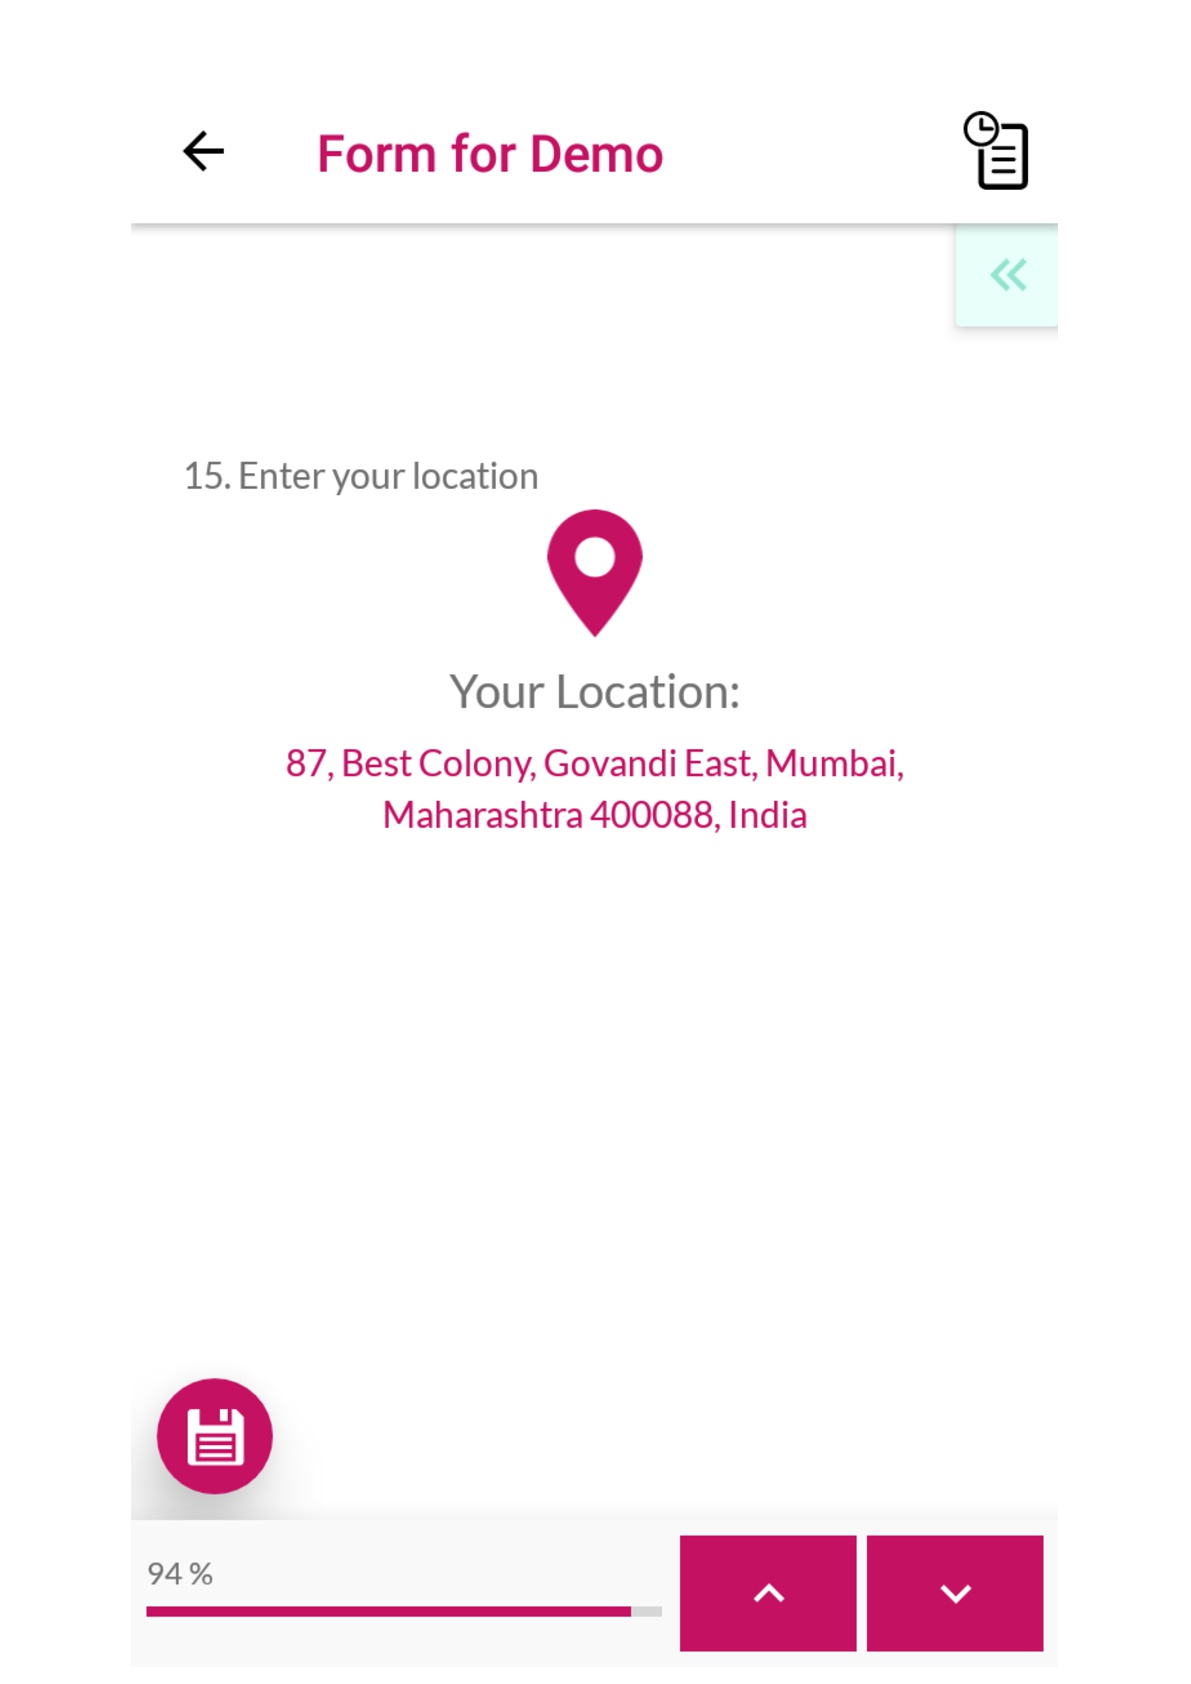
This question can be used to track the location of the user at the time of filling the form.
Click on ‘Location’ (left panel in Questions tab)
In the pop - up window, enter the question and upload an image (if required)
To make the question mandatory, you can check the box present at the bottom of the window
Click on ‘Save’
The app user will have to turn on GPS location and allow access
The question will be updated in the form.
Thank You Screen
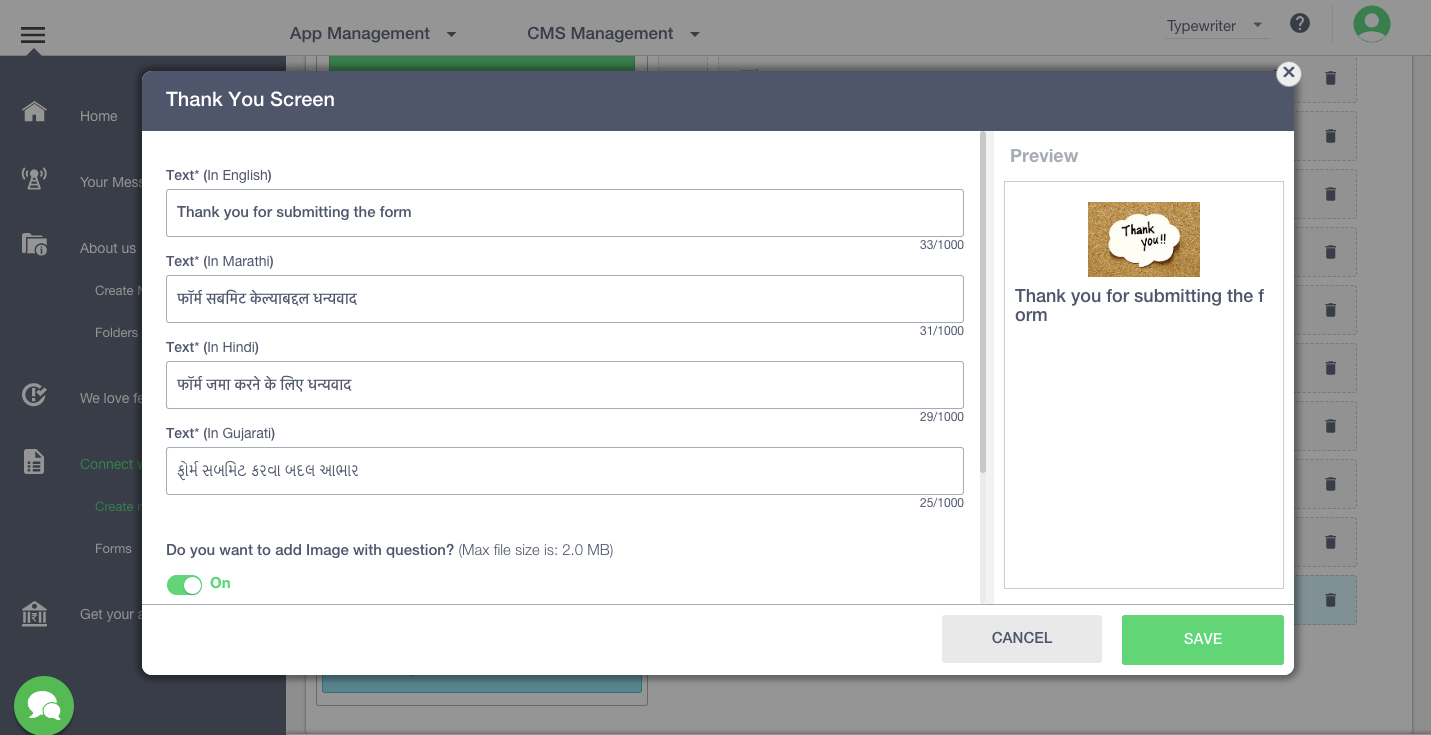
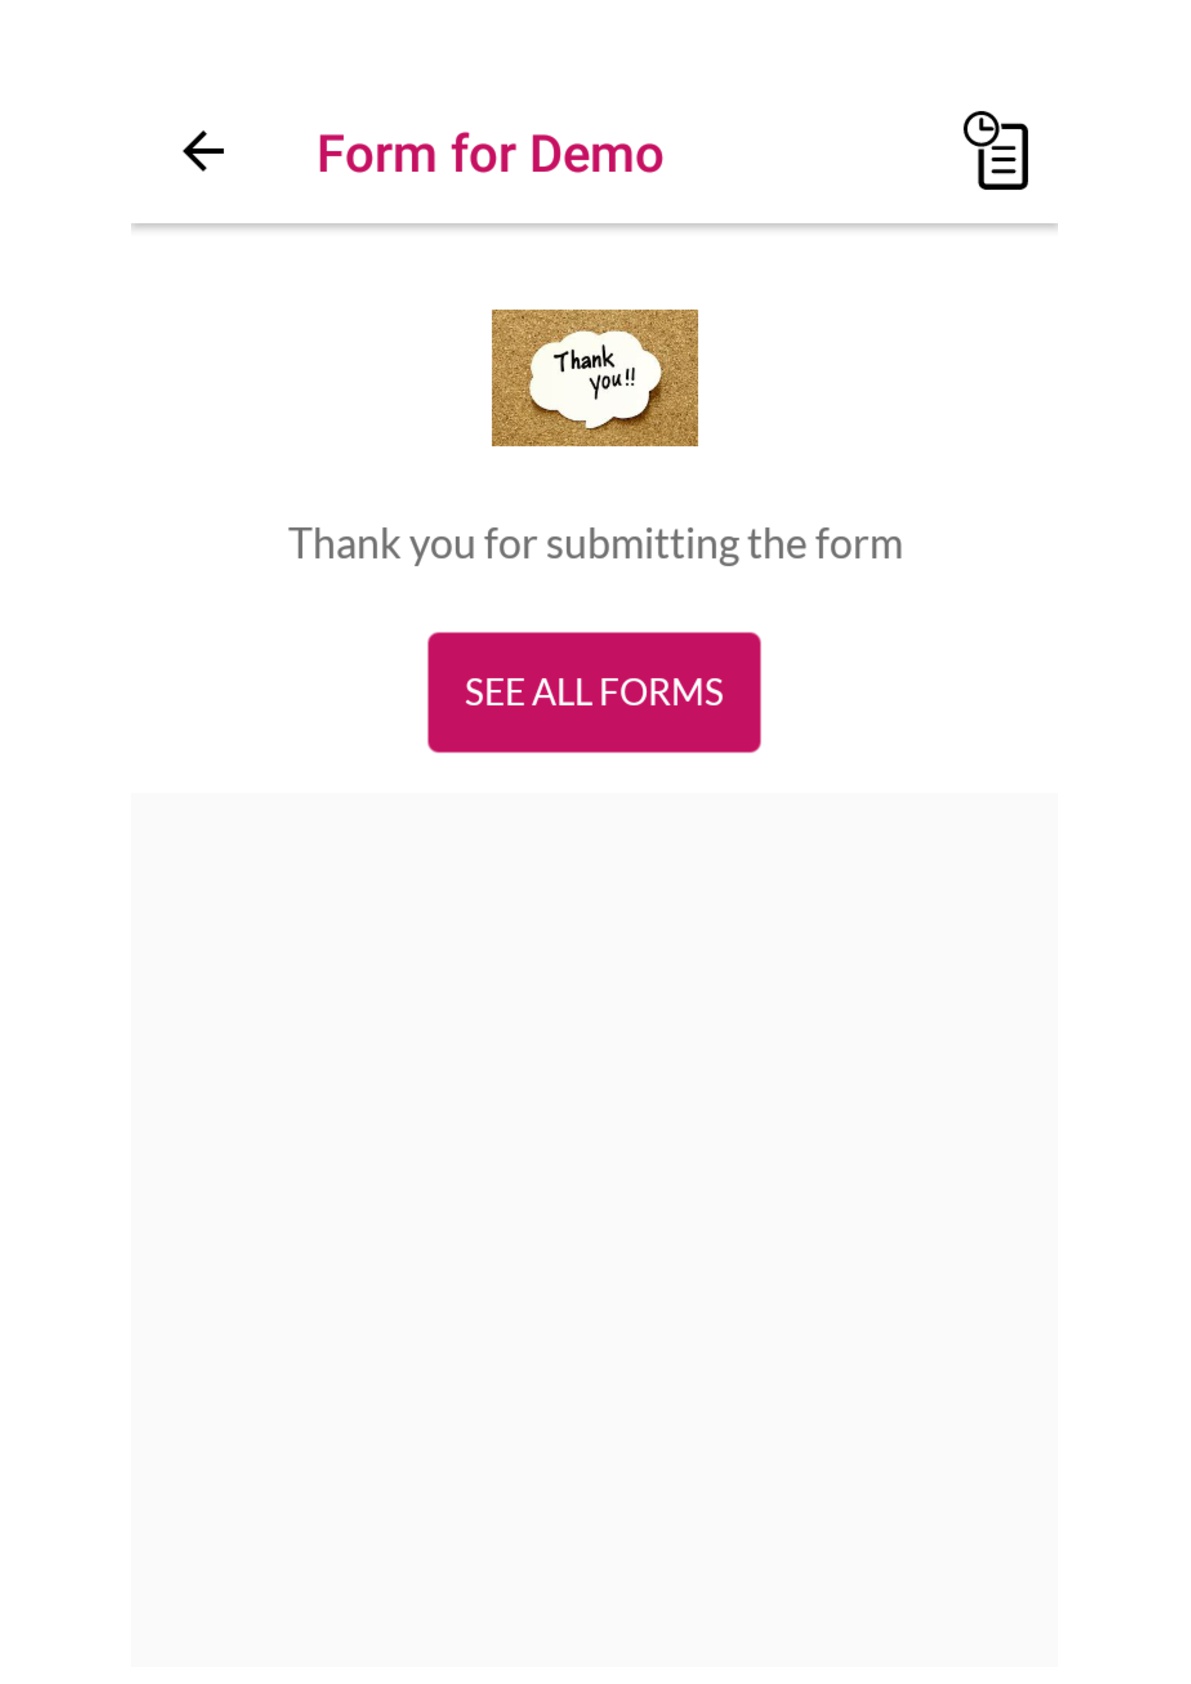
A Thank you message to be shown at the end of the form. You can customise the same
Click on ‘Thank you Screen’ (left panel in Questions tab)
In the pop - up window, enter the text and upload an image (if required)
Press ‘Save’
The thank you message will be added to the form.
Form Submissions
You navigate to see form submissions by selecting any form from the form list. You can also click 'Submitted Data' from the edit state of a form.
You can see three icons next to each submission listed:
Comment: To comment on a submission
Print: To get the submission in the print ready pdf form
Delete: To delete a submission
You can review a submission by clicking on it. All the data of that particular submission will be showed. At the bottom of the page you can also comment on the submission received. The app user who submitted the form will be alerted via a push notification
You can also download the submissions that you receive for a particular form by clicking on 'Download All' at the top right. An excel file be generated and downloaded.
You also have an option to view and download selected submissions. Simply check all the submissions that you want to see together and then click on either the 'View' or 'Download' option that appears at the top. 'Download' will again generate a file for you. The View option will take you to another screen where you can select specific questions to see their inputs. The submission details are also shown horizontally under question columns. You can also download responses to specific questions here.